Chair Modeling
椅子建模
作者:Florence Design Academy
翻译:CWWS
chair spline modeling
椅子线条建模
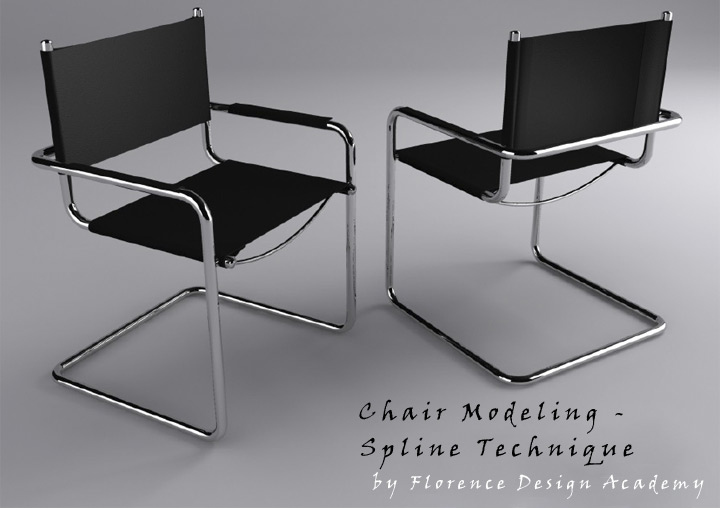
This is a basic tutorial of the Florence Design Academy to understand how to use the SPLINES effectively in the field of Interior/Furniture Design. This tutorial is based only on splines. It is very important that your chair has the correct dimensions, otherwise the rendering with Mental Ray will not be optimal. Let’s begin our tutorial.
这是为佛罗伦萨设计学院写的一篇基本教学,来阐述如何使用线条有效率地进行室内/家具设计。这个教学基于见大的曲线,因此你的椅子拥有正确的规格是非常重要的,不然MentalRay的渲染无法优化,让我们开始教学。
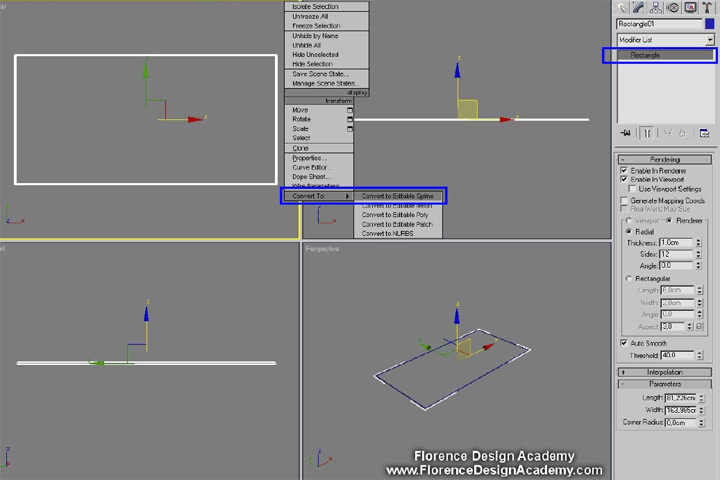
Create a rectangle in the TOP view. Make a right mouse button click (RMC) on it and choose convert to editable spline.
在顶视图创建一个长方体,选择它点击鼠标右键,但后选择convert to editable spline.(转换为可编辑曲线。)
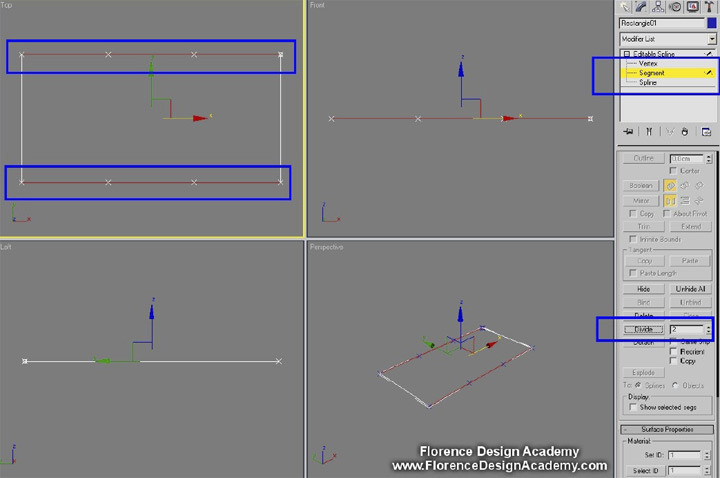
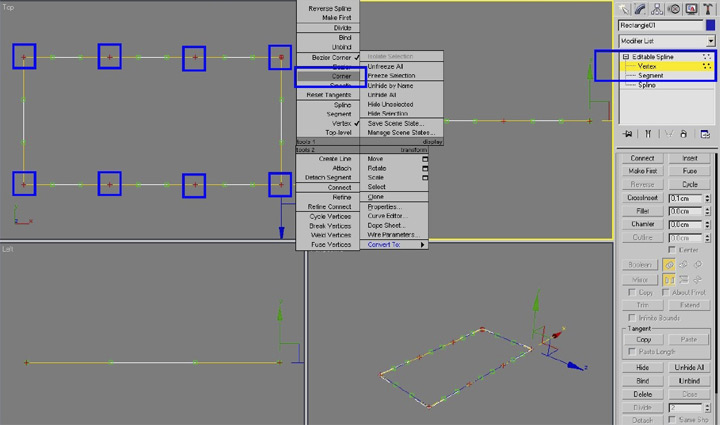
Select the segments like shown in the image below and press the button DIVIDE. Put the number 2 in the textbox and click on the button DIVIDE. This will create 2 additional vertexes on each selected segment.
如下图一样选择线段,点击DIVIDE(分离)按钮,在文字框设置数字2并且点击DIVIDE(分离)按钮,这将会在选择的线段创建2个附加的点。
Select all vertexes and click with right mouse button. Now choose CORNER (there are 4 different types of vertexes: Corner, Smooth, Bezier and Bezier Corner). This step will make the next steps easier.
选择所有的点燃后点击鼠标右键,现在选择CORNER(直角顶点方式)(一共有4种定点方式,Corner直角,Smooth平滑,Bezier贝尔兹曲线,以及Bezier Corner贝尔兹直角曲线),这个步骤会使得后面的操作更容易。
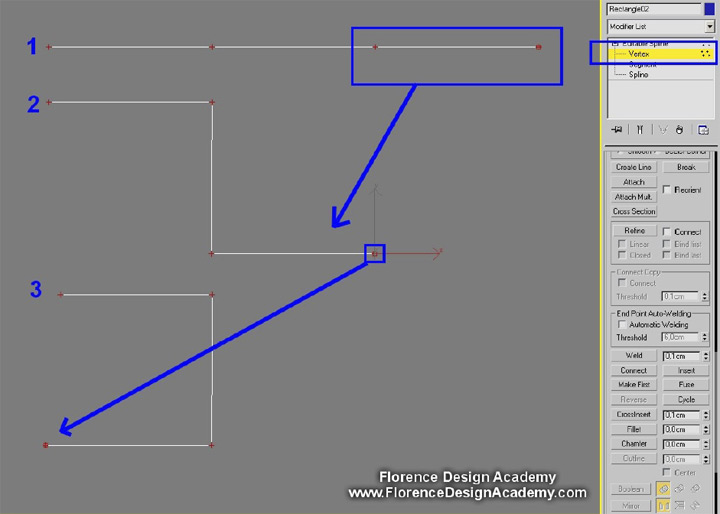
Now select the vertexes like shown in below step 1 and move them down and left to get the shape of step 2. After this step select the vertexes of step 2 and move them right to get the shape of step 3. The end result seems to be a flipped letter C.
现在选择下图第一步的顶点,然后把它们朝左下移动,然后得到第二步的形状,然后按照第二步的图示选择相应的点朝右边移动,获得第三步的形状,最终结果有点像反过来的字母C。
Important: remember that in the front view you see only one side of the chair. Make always a REGION selection to be sure that you are selecting the vertexes on both sides of the chair.
重要提示:记住在前视图,你看到的只是椅子的一个侧面,永远使用区域选择的方式来确保你将了椅子侧面两侧的点都选择了。
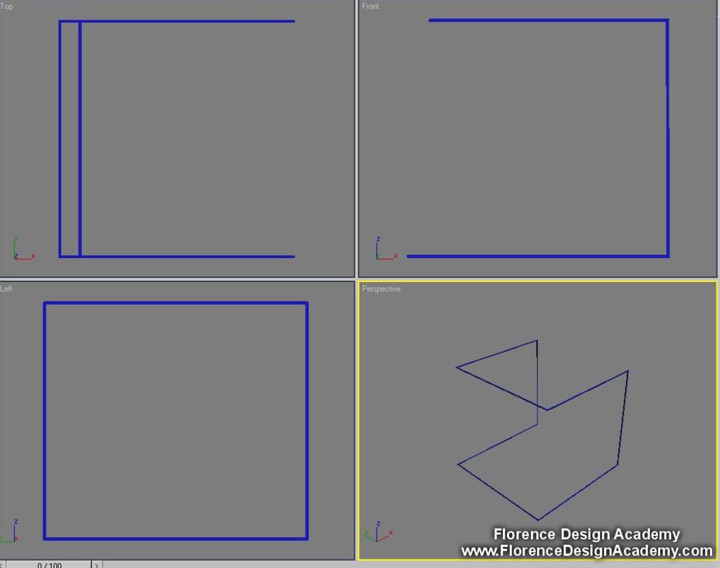
This is now what you can see in the perspective view.
现在在透视视图,你能看到这样的结果。
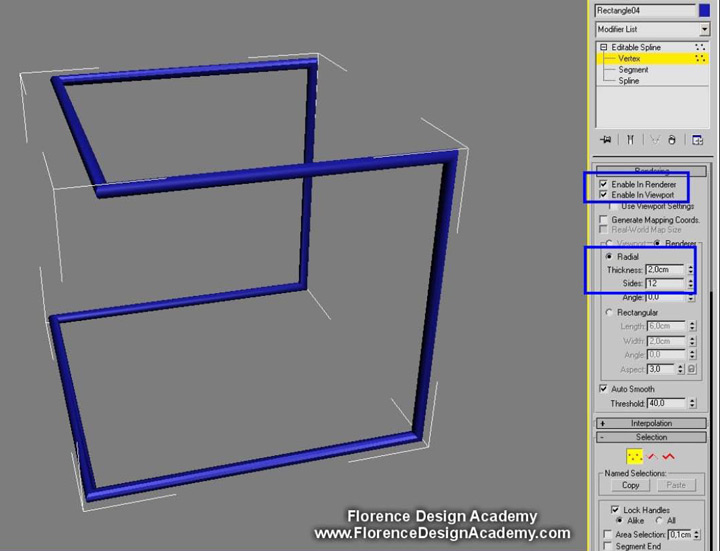
To create a 3D Object you must go to the modify panel and enable 2 slots which are: Enable in Renderer and Enable in Viewport. This will transform your spline in a object in which you can choose to change a few parameters. For our chair we need a radial section. Choose Radial and write in the thickness slot the diameter size.
要创建三位物体,你必须到编辑面板并启动两个选项:启动Enable in Renderer 和 Enable in Viewport选项,这会把你的曲线转换为一个物体,你可以选择改变一些参数,对于我们的椅子来说,我们需要圆形的管状,并且填入管子的粗细值。
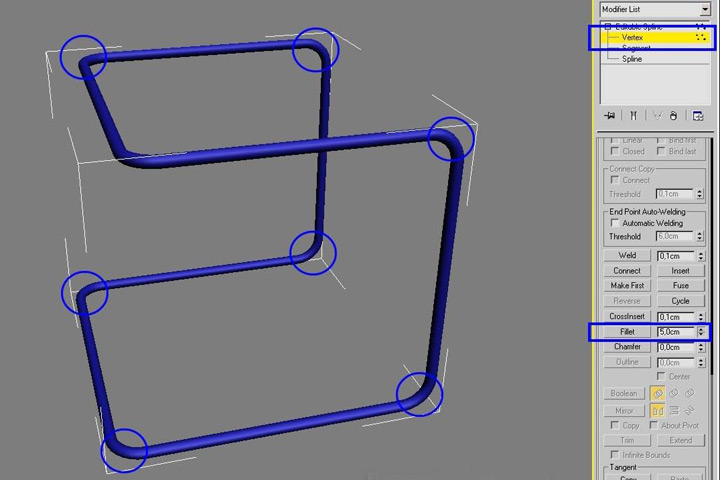
Select all vertexes and go to the command FILLET. This will round your sharp corners.
选择所有的点并来到导角命令面板,这将会将尖锐的交角变成圆弧的形状。
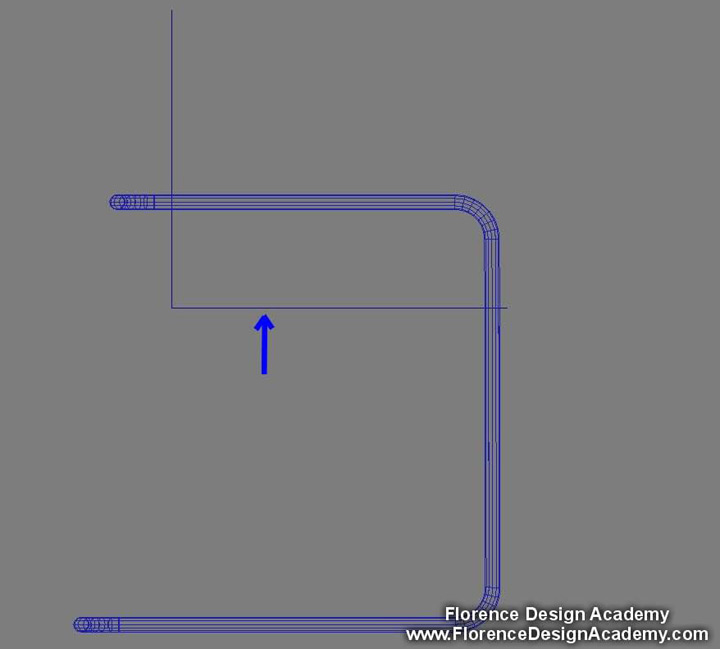
Create a new spline with the shape of the letter L.
创建一个类似于字母L的线条形状
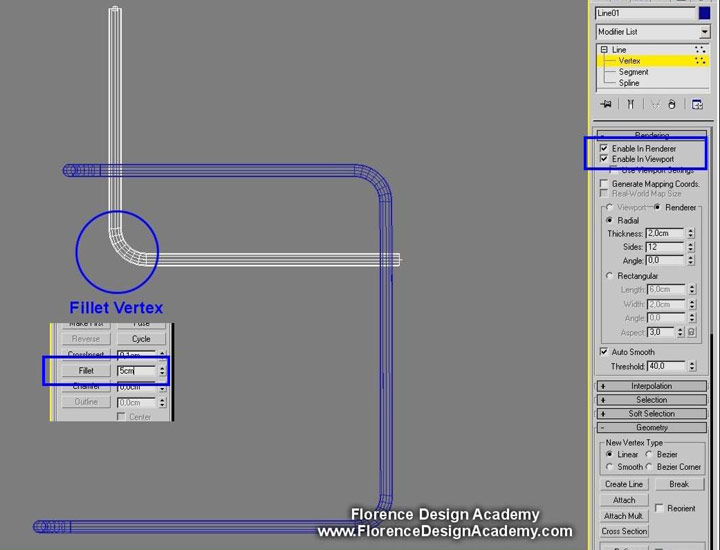
Check again the slots enable in renderer and enable in viewport. Now select the vertex like in the picture and fillet it.
再一次激活Enable in Renderer 和 Enable in Viewport选项,现在选择蓝圈的点并给他们加上导角。
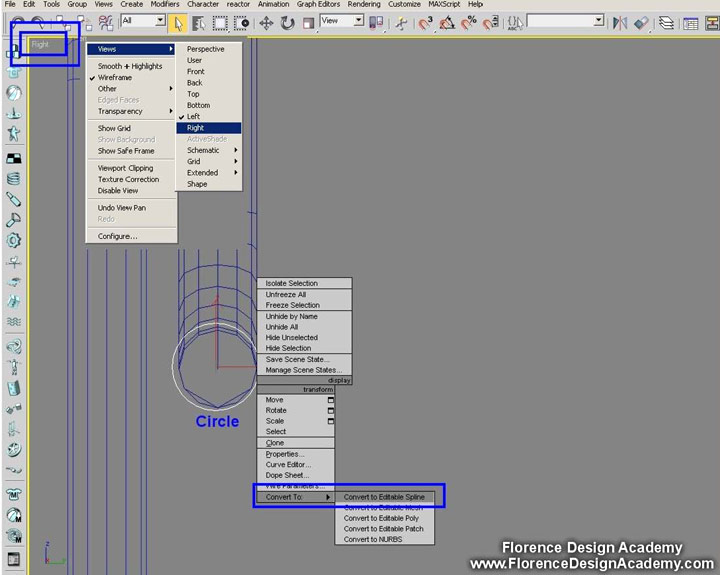
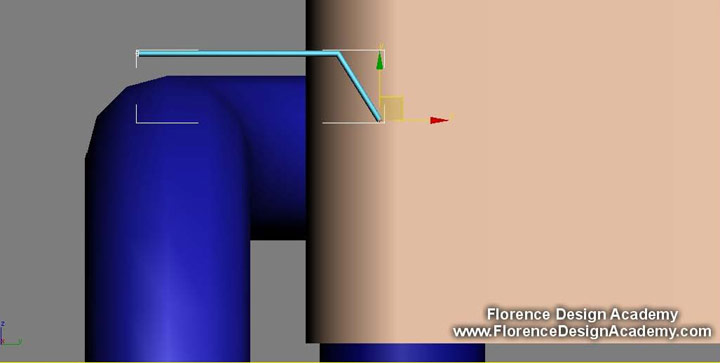
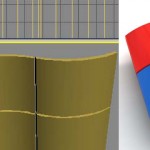
Change the left view to a right view. In this way we can see the circular shape of our spline. Now create a circle (spline) in the center of the circular section of the spline like in the image. You need to convert it into an editable spline to be able to work with the vertexes of the circle.
把左视图改变为右试图,在这个视图你可以看到我们线段的圆形截面形状,现在在线段的圆形界面中心创建一个圆形(曲线),像下面这个图片一样,你需要把它转换为一个editable spline(可编辑曲线)来使得你可以对圆形曲线的顶点进行操作。
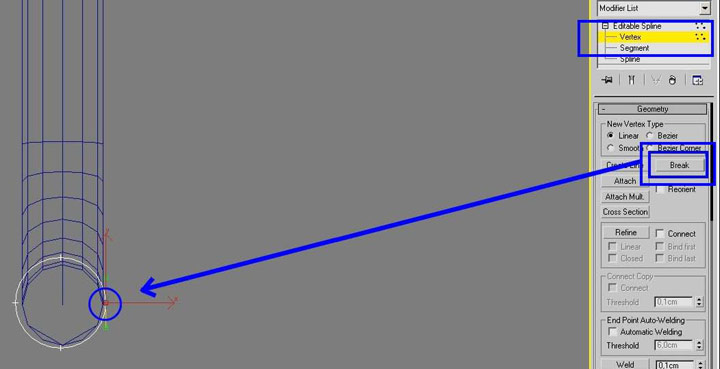
Select the vertex like in the image, and BREAK it. This will split a single vertex in 2 vetexes and break the circle.
如入所示选择这个图像,然后BREAK(分断)它,这会把一个点分断为两个点,并分开圆形曲线的闭合状态。
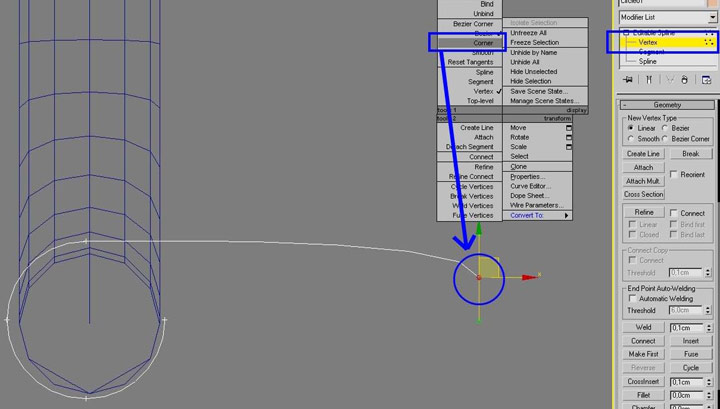
Select the upper vertex and move it to the right side. Transform the vertex with a right mouse button click into a CORNER vertex.
选择上部的点并把它移动到右侧,然后点击鼠标右键把这个顶点的状态选择为CORNER(直角)状态。
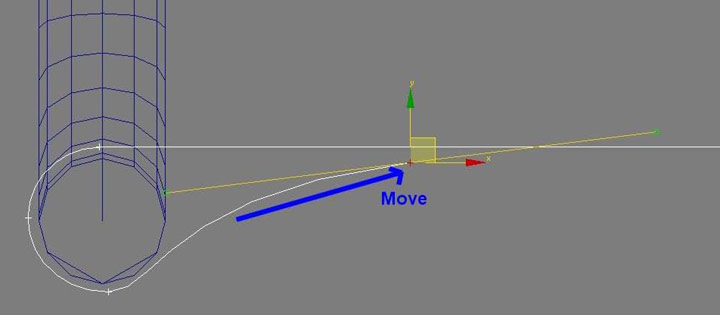
Move the lower vertex like in the image and use the Bezier (also Bezier-corner works very good in this situation).
如图所示移动下面的点,并对这个顶点使用Bezier贝塞尔曲线(Bezier-corner贝塞尔直角曲线模式在这个情况下也可以)。
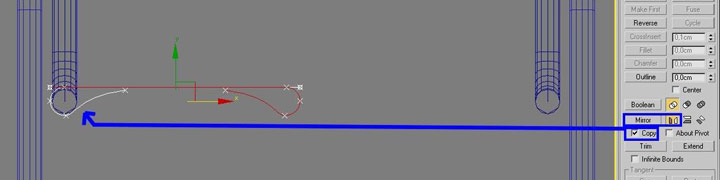
Now select SPLINE and MIRROR it with COPY. Move the copy to the opposite side of the chair. Move it only in the X axis. You can mirror the spline from the modify panel or just using the Mirror tool. If you use the Mirror tool you have to ATTACH the two splines to be able to weld the vertexes.
现在选择整个曲线,并镜像复制它。把复制的部分移动到椅子的另一边,移动的时候注意只移动X轴的位置。你可以从编辑面板使用调整器镜像该曲线或着直接使用镜像工具,如果你使用镜像工具的话,你必须ATTACH(连接)两个曲线,才能随后焊接点。
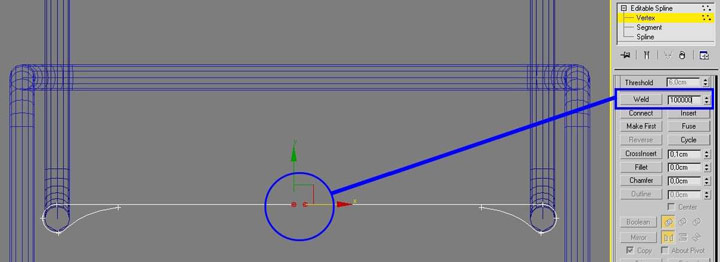
Select the 2 vertexes. Now go to the Weld button. Insert a big number in the weld slot and click weld. The number you must write in the slot must be equal or bigger than the distance between the vertexes that you are welding. The easiest way is just to write a very big number like 100000.
选择2个顶点,现在来到Weld(焊接)按钮的部分,插入一个比较大的焊接距离,点击焊接按钮,你填入的焊接距离必须等于或着大于你要焊接的两个点之间的距离。最容易的方法就是直接写一个很大的数字类似于100000。
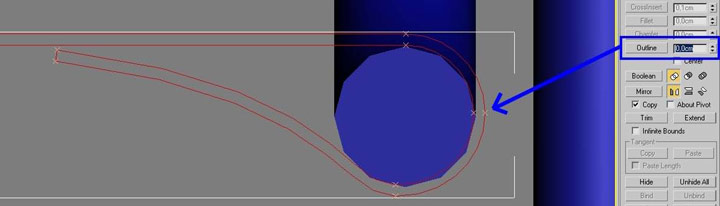
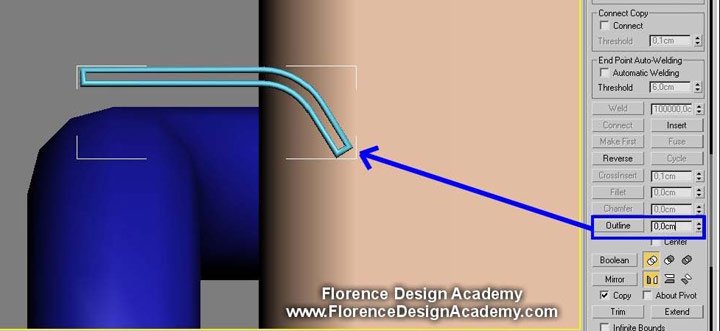
Now select SPLINE and outline the spline.
现在选择曲线并给它设置外轮廓。
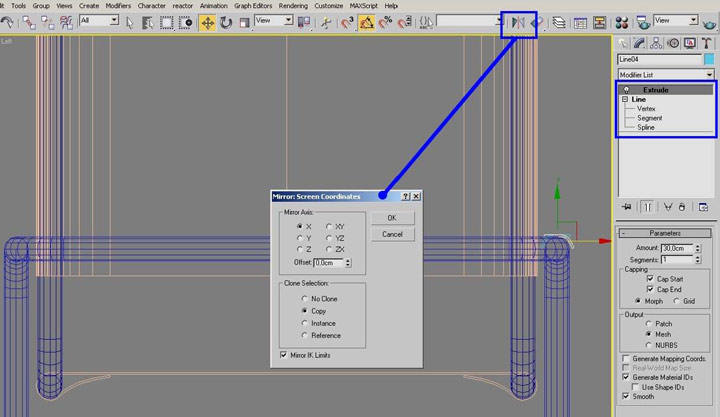
Add an EXTRUDE modifier from the modifier list on the Editable Spline and adjust the amount of the modifier.
从编辑器列表中给曲线添加一个EXTRUDE(挤出)修改器,然后调整修改的数值。

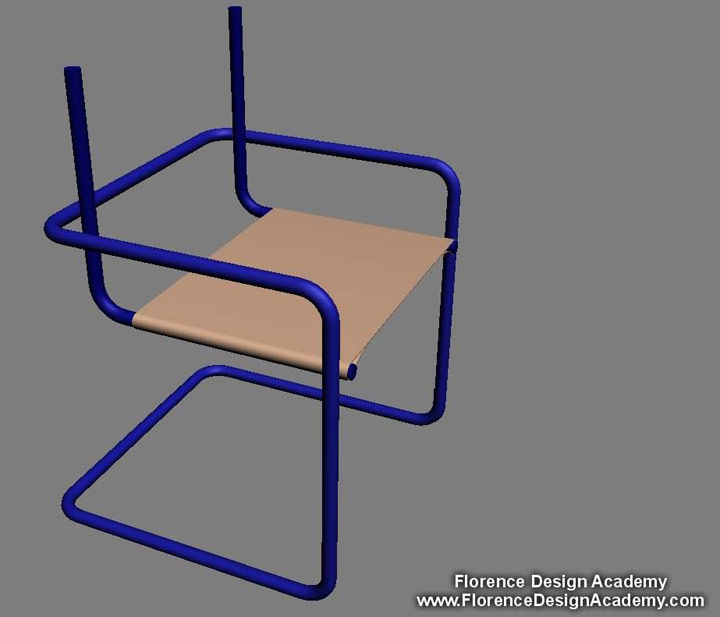
Now you should have this result.
现在你会有这样的结果
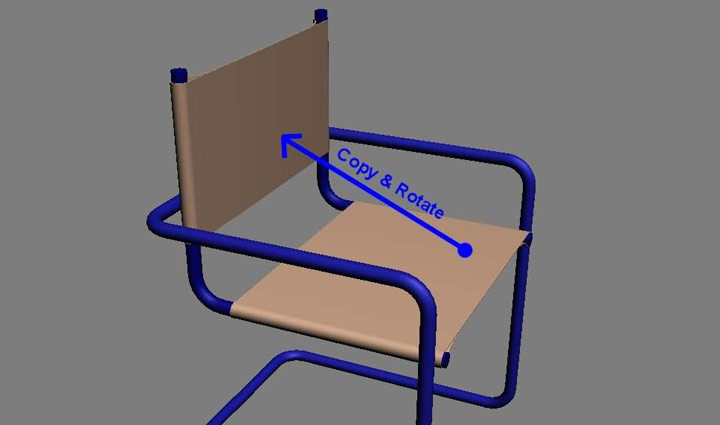
Copy and rotate the extruded object like in the picture.
复制并旋转挤出物体,如下图所示:
From the Right view create a spline like on the image below.
从右视图创建一个如下图所示的曲线。
Now outline it (SPLINE).
现在也给它创建外轮廓,
Extrude the spline and mirror it to the other side of the chair.
将这个曲线挤出成物体,并将它镜像复制到椅子的另一边。
Now you should have this result.
现在你可以看到下图的结果

Create a sphere and squeeze (scale) it in only one axis to make it flat.
创建一个球体,并挤压(在一个轴向上不规则缩放),使它变得扁平。
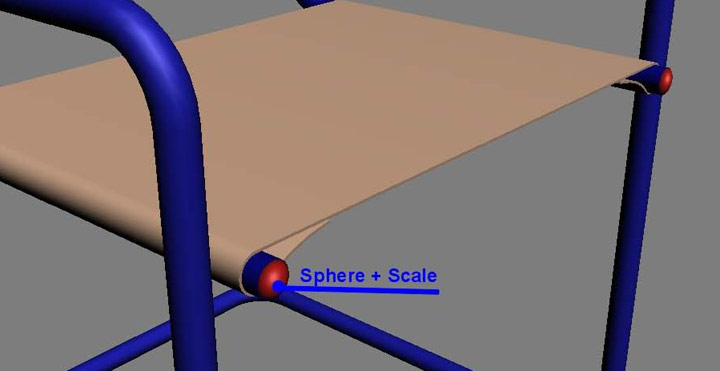
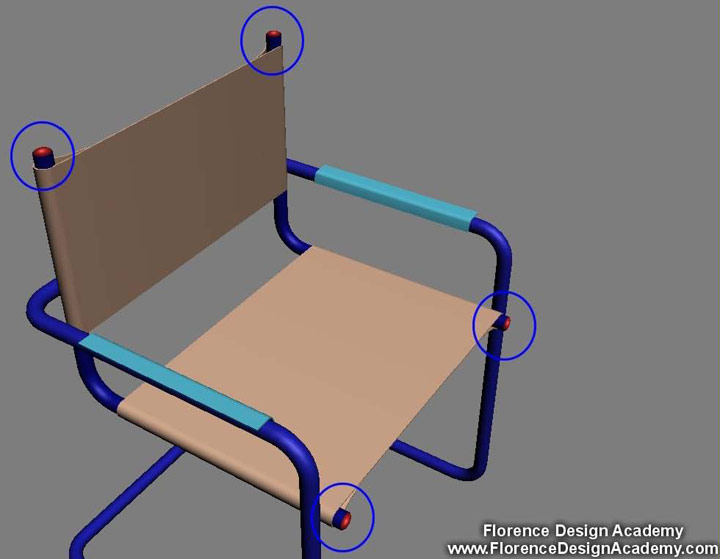
Create a flat sphere in each marked point.
在每一个图片标记的地方都创建一个扁平的球体。
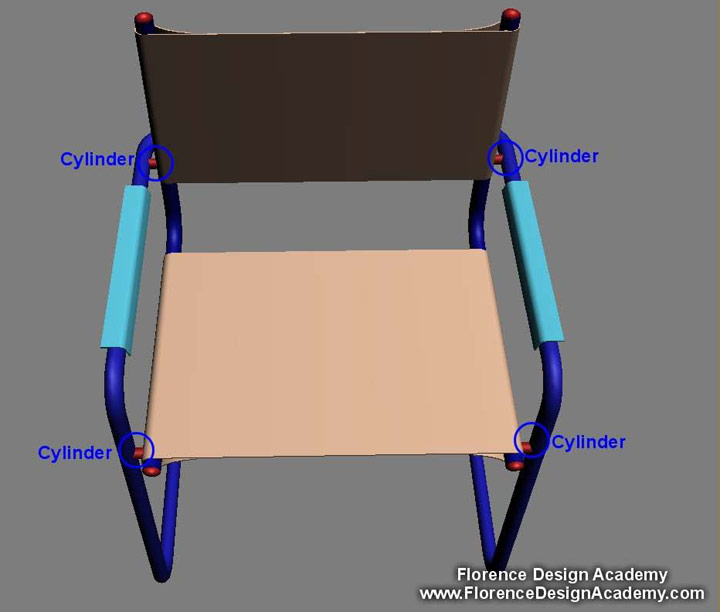
Create a cylinder in each marked point.
在每一个下图标记的地方创建一个圆柱体。
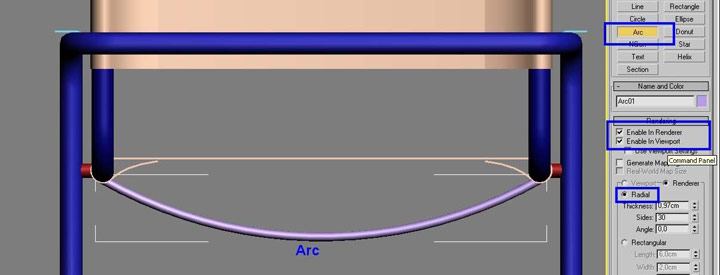
Create an arc (Spline), enable the renderer and viewport like in this image.
创建一个弧形(曲线),如下图所示,激活可渲染选项和视图里的可见选项。
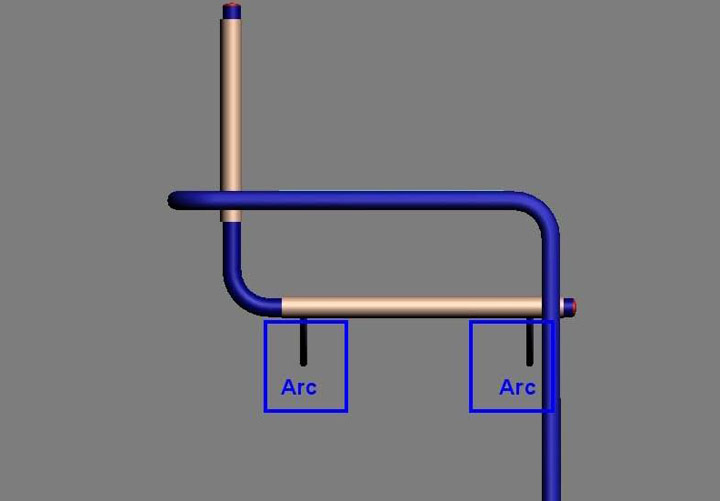
Copy the arc like in the picture
复制它们,放置到如下图所示的位置
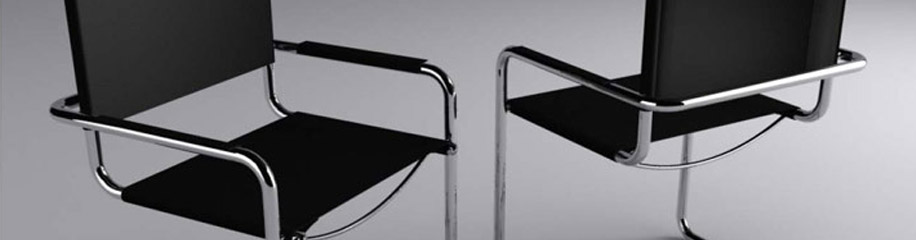
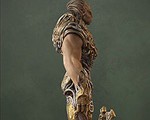
Here you can see the final result.
这里你可以看到最终模型的样子。
I hope you have enjoyed this tutorial.
我希望你喜欢这个教学。
您可以能还会喜欢这些内容:


推荐相关中文教程

3DSMAX动力学特效实战教学
本套教学将通过24章实例教学,来向你详细讲解3DSMAX的动力学特效在电视包装与广告中的应用。3DSMAX国外粒子案例效果解析
本教学通过27个实战案例,教您如何用3DSMAX结合ParticleFlow本身以及扩展的ParticleFlow Box 1、Box 2、Box 3、功能包,结合Vray渲染器,来制作流行的广告和电视包装中的粒子特效效果。无论是常见的粒子聚合,分散,动态粒子替换,粒子矩阵,粒子动力学,本套教学都有相应的案例。3DSMAX国外流体案例效果解析
本教学通过20个实战案例,教您如何用3DSMAX结合Realflow,FumeFX, ParticleFlow插件,来制作流行的广告和电视包装中的流体效果。无论是常见的液体,烟雾,流体碰撞,沙粒变化,水墨表现,本套教学都有相应的案例。2.5D商业游戏场景制作教程 进阶篇
在本教程中,Freeyy老师将从零开始,向你讲解如何根据确定的主题进行前期准备,随后建模,绘制贴图,制作材质,最后再进行细节调整,完成一个商业游戏级别的2.5D场景画面。Mentalray for max实战教程
本教程共包含超过42小时以上的视频教学内容,共18章 132课,通过大量实例,详细讲解了3ds Max平台下的Mental Ray1渲染器的使用基础和实战方法。是一部非常完整详细的3dsMax版的Mental Ray渲染器的教学.网游角色制作女精灵实战教学
本教学以一个AAA级网游女精灵角色为案例,向您展示如何完成她的模型,UV,和贴图绘制。教学使用的软件主要是3ds max和 bodypaint, 其中建模和UV使用3ds max完成,贴图绘制在bodypaint和 PS中完成。


推荐课程


推荐教程

不错
很不错