Create a Windows-Like Logo in 3D Studio Max
如何使用3D Max创建一个Windows标志
作者Raven
翻译:CWWS
This tutorial will teach you how to create a Windows like logo as shown in the image below:
这个教学将会教你如何创建一个如下图所示类似于windows的视窗标志
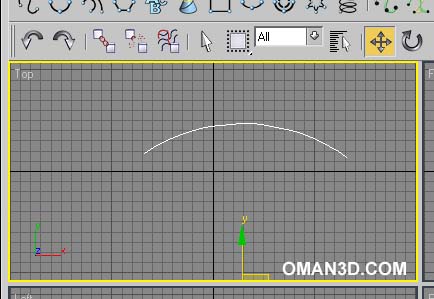
1 – Start by creating an arc. ( Create > Shapes > Arc ) You will have to drag the object and then pull it with the mouse upwards to make it curve a little bit only. Check the image below to get a better idea.
1-我们从创建弧线开始。(选择 Create > Shapes > Arc按钮),你就可以点击鼠标拉出一小段弧线,看下面的图,作为你的弧线形状的参考。
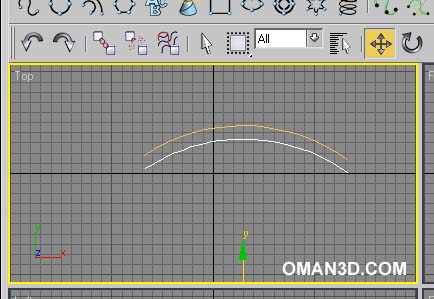
2 – Duplicate the arc by first selecting it, and then dragging it down while holding shift. A cloned version of it should appear.
2-首先选择弧线,然后按住Shift键,用鼠标将弧线往下拖来复制它,然后选择Clone物体,新的弧线出现了。
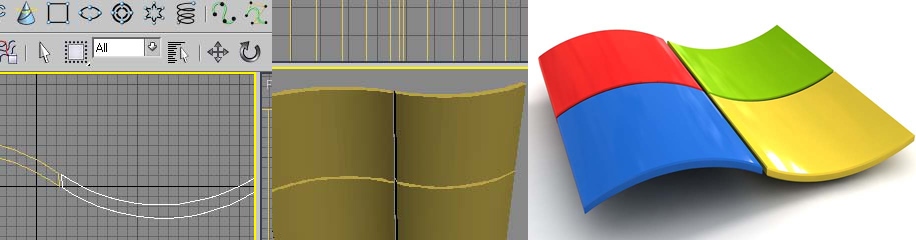
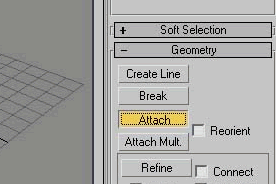
3 – Right click any arc and convert it to an editable spline, go then to the Modify tab and select Vertex then after that click the attach button then select the other arc and then click connect.
3-右键单击任何弧线,在弹出的窗口选择将弧线转换为Editable Spline(可编辑曲线),然后点击Modify(编辑)面板,然后选择Vertex(点编辑模式),再然后点击attach(附带)按钮,选择另外一个弧线,,接着选择Connection(连接)。

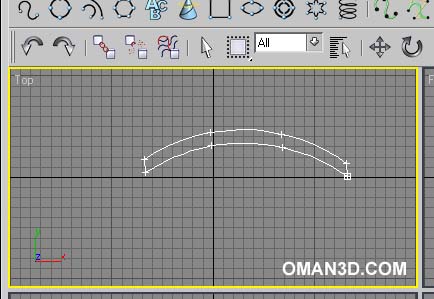
4 – Click the end of any arc and drag it to the opposite end. Do the same for the other end to make the two arcs join at their ends by the two lines.
4-点击任何一个弧线的末端,将它拖到与之对应的弧线末端,建立一条连接线,在弧线的另一头实施同样的操作,这么做就将弧线用两根竖线连起来了。
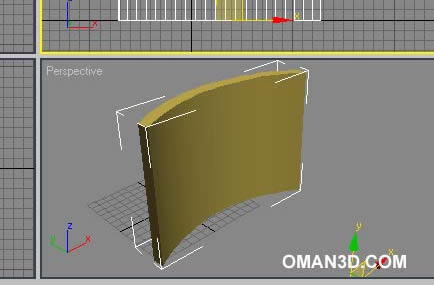
5 – Unselect vertex button and click the shape. This should now make us a whole shape and not two separate arcs. Select Extrude in the Modify tab and raise the amount of extrusion to the amount you desire. You should make the height at least equal to the width.
5-关闭点编辑模式,然后选择我们之前创建的形状,现在是一个封闭的弧形形状,而不是两条分开的线,在Modify (编辑)面板选择Extrude(挤出调整器),然后提高基础长度的数值直到你期望的形状出现,你应该让高度至少等于宽度。
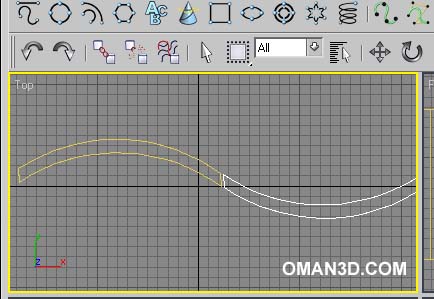
6 – Now duplicate this shape the way we did for the arc before, this time drag so that you have two identical shapes next to each other as seen in the next image.
6-现在用我们之前讲过的方法复制这个物体(按住Shift键拖动),这次鼠标拖到如下图所示:两个物体相邻为止。

7 – Rotate the 180 degrees so that it looks this way. (The rotate button looks like this )
7-将新复制的物体旋转180度,看上去如下面的图片
8 – Finally duplicate the two shapes and drag them to below the older two shapes so that you have the windows like flag shape.
最终将这两个物体再拖动复制一次,这一次往下拖动,你就会看到类似Windows标志的旗帜形状。
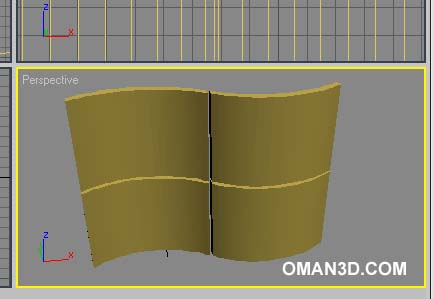
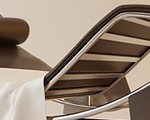
9 – The ending look is created by applying a material for every square to match the colours of the real logo.My model looked this way by rendering it in v-ray and chamfering the edges.
9-最终效果通过给每一个物体单独赋予匹配Windows标志的颜色的材质,并通过Vray渲染器渲染而得到,另外,下面这张图,我还对物体的边缘做了一些导角处理。
Click to enlarge
感谢观看,希望您喜欢!
– End of Tutorial.


推荐相关中文教程

3DSMAX动力学特效实战教学
本套教学将通过24章实例教学,来向你详细讲解3DSMAX的动力学特效在电视包装与广告中的应用。3DSMAX国外粒子案例效果解析
本教学通过27个实战案例,教您如何用3DSMAX结合ParticleFlow本身以及扩展的ParticleFlow Box 1、Box 2、Box 3、功能包,结合Vray渲染器,来制作流行的广告和电视包装中的粒子特效效果。无论是常见的粒子聚合,分散,动态粒子替换,粒子矩阵,粒子动力学,本套教学都有相应的案例。3DSMAX国外流体案例效果解析
本教学通过20个实战案例,教您如何用3DSMAX结合Realflow,FumeFX, ParticleFlow插件,来制作流行的广告和电视包装中的流体效果。无论是常见的液体,烟雾,流体碰撞,沙粒变化,水墨表现,本套教学都有相应的案例。2.5D商业游戏场景制作教程 进阶篇
在本教程中,Freeyy老师将从零开始,向你讲解如何根据确定的主题进行前期准备,随后建模,绘制贴图,制作材质,最后再进行细节调整,完成一个商业游戏级别的2.5D场景画面。Mentalray for max实战教程
本教程共包含超过42小时以上的视频教学内容,共18章 132课,通过大量实例,详细讲解了3ds Max平台下的Mental Ray1渲染器的使用基础和实战方法。是一部非常完整详细的3dsMax版的Mental Ray渲染器的教学.网游角色制作女精灵实战教学
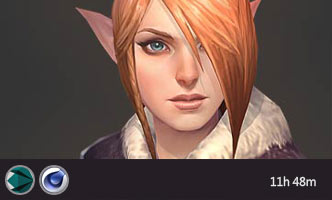
本教学以一个AAA级网游女精灵角色为案例,向您展示如何完成她的模型,UV,和贴图绘制。教学使用的软件主要是3ds max和 bodypaint, 其中建模和UV使用3ds max完成,贴图绘制在bodypaint和 PS中完成。


推荐课程


推荐教程

0回复如何使用3D Max创建一个Windows标志"