
Project Overview: Hunter 角色制作流程
翻译:层层(本站翻译小组成员)
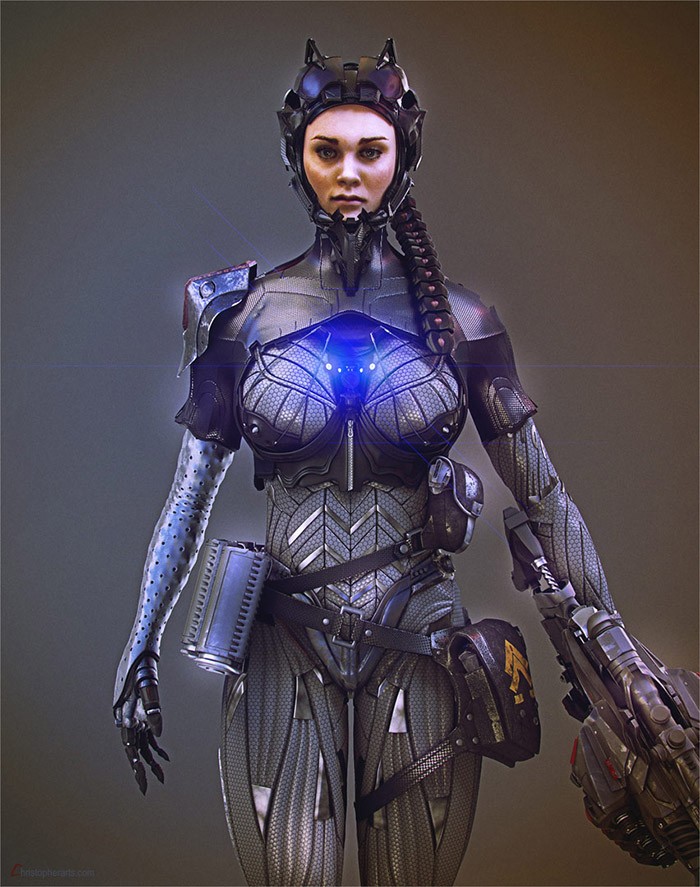
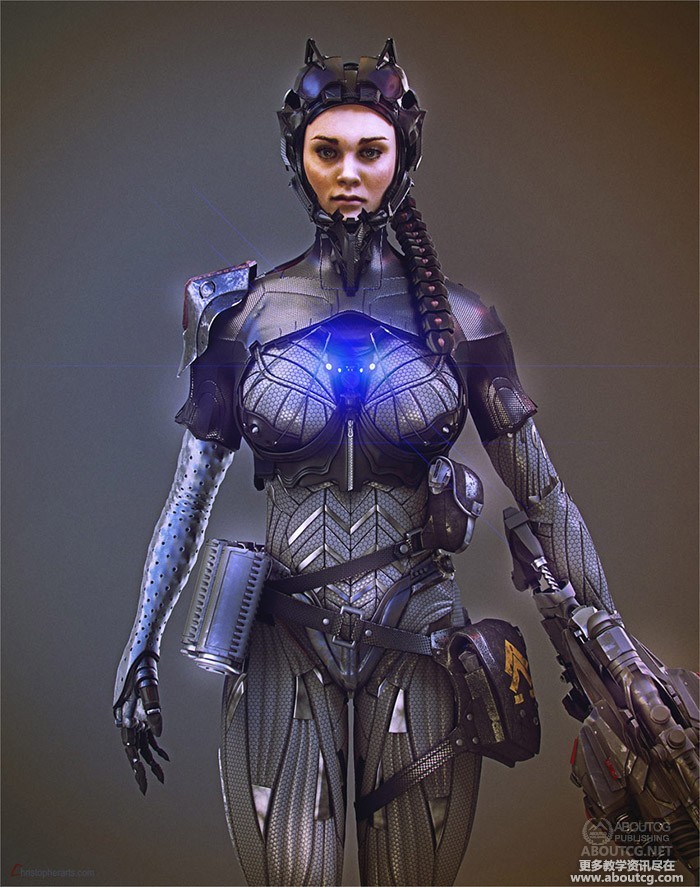
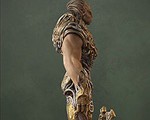
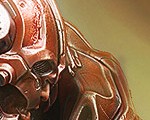
Originally created for a Mass Effect-style challenge, Christopher Parnian went off brief to create this sexy, armored woman instead!
一开始是为《质量效应》创作,最终Christopher Parnian 却制作出这一穿铠甲的性感女性。
Introduction
简介
In this project overview I’m going to show you an overview of the workflow that I used for my Hunter model. I’ll try to share the interesting parts about this project and I hope that you find what I say useful. Here are the sections I’ll be covering:
在这个项目概览中我将为大家展示我制作Hunter模型的整个工作流程,分享其中有趣的部分,希望这对您有用。以下是整篇文章涵盖的内容。
1. Inspiration and Reference
灵感和参考
2. Modeling
模型
3. Textures and Materials
材质和贴图
4. Lighting
灯光
5. Rendering
渲染
Compositing in Photoshop
Ps合成
7. Animation
动画
8. Conclusion
总结
Inspiration
灵感
I created this character for a challenge and the rule was to create a character that would fit into the Mass Effectuniverse, but I didn’t follow that rule exactly! My character is very similar to Crysis’s character, but a female version.
我这个角色是为《质量效应》创作的,但是我没有完全遵循设定。我的角色非常接近Crysis创造的角色,但却是女性版本。
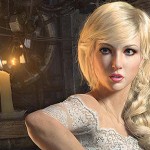
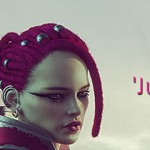
I knew from the beginning that I wanted to create a “sexy character in a nano suit and armor”. I started by gathering references from various websites to complete my ideas. I watched some movies too, to help me find some inspiration. I think it’s a good idea to collect references before going onto the modeling stage so you won’t be confused later.
一开始我就知道我想要的是“穿纳米铠甲的性感角色”。我到各种网站搜集参考来完善我的想法。同样我也看一些电影,来帮助我找灵感。在建模之前收集参考非常重要,可以避免之后的工作无从下手。

These are my inspiration and reference images
这些是激发我灵感的参考图片
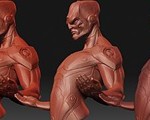
Modeling
建模
I intended to do the whole modeling process in 3ds Max and not to use any secondary or plug-in software. When modeling, I usually work on a base geometry in ZBrush, but this time I decided to use a different technique to help increase my ability.
我打算只在3ds Max里完成整个基础建模,而不使用其他软件或者插件。以前我经常用ZBrush来完成这一步,但这次我决定用一种不同的技术来提高能力。

Base mesh created in 3ds Max
3ds Max里的基础建模
After I had created the base mesh, I did just a little bit of deforming in ZBrush.
完成基础模型之后,我只在ZBrush里做了一些修正。


Deforming in ZBrush
在ZBrush中塑形
When I was content with the shape, I went back into Max and did some modeling by using the Graphite modeling tools and the retopologizing technique. I have experience with Maya, XSI, ZBrush and Topogun too, and in my opinion it’s better to use ZBrush or Topogun for retopologizing because the polygons will snap on the surface very well.
对造型满意之后,我返回到Max中用Graphite工具和拓扑技术完善模型。这些我同样用Maya, XSI, ZBrush 和 Topogun做过,在我印象中,ZBuash或者Topogun在这方面做得更好,因为多边形会在表面贴合的很好。

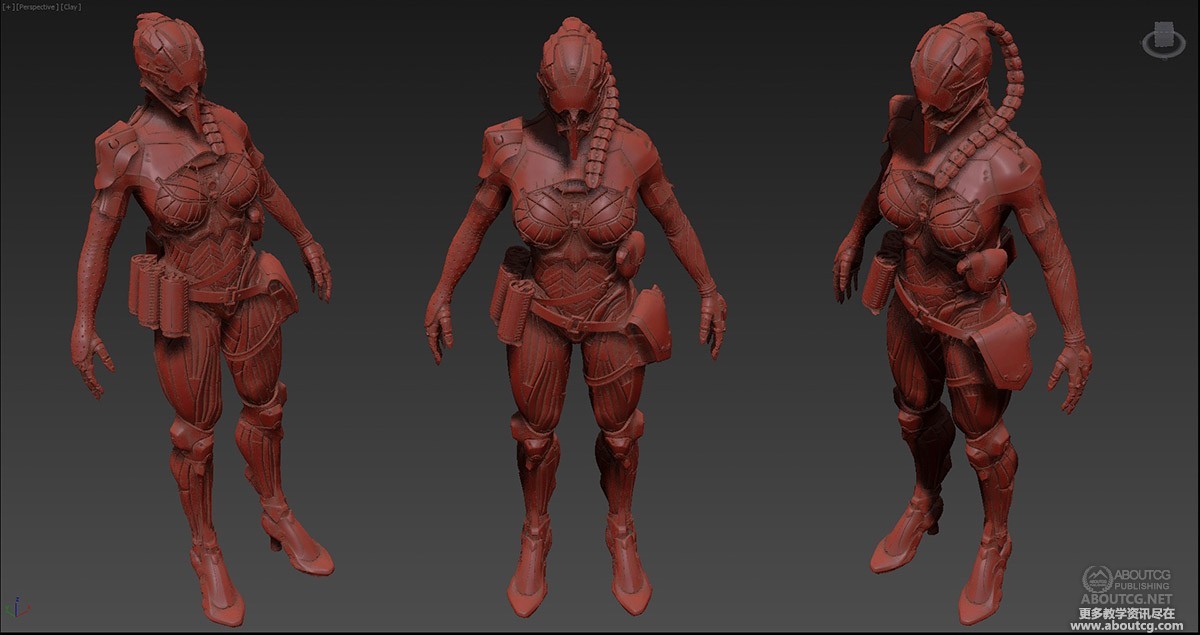
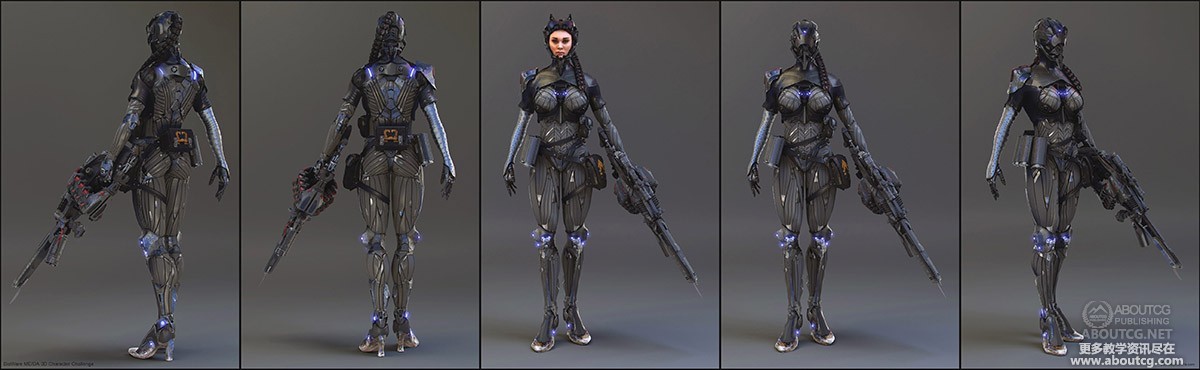
Final model, render to be rendered
最终模型
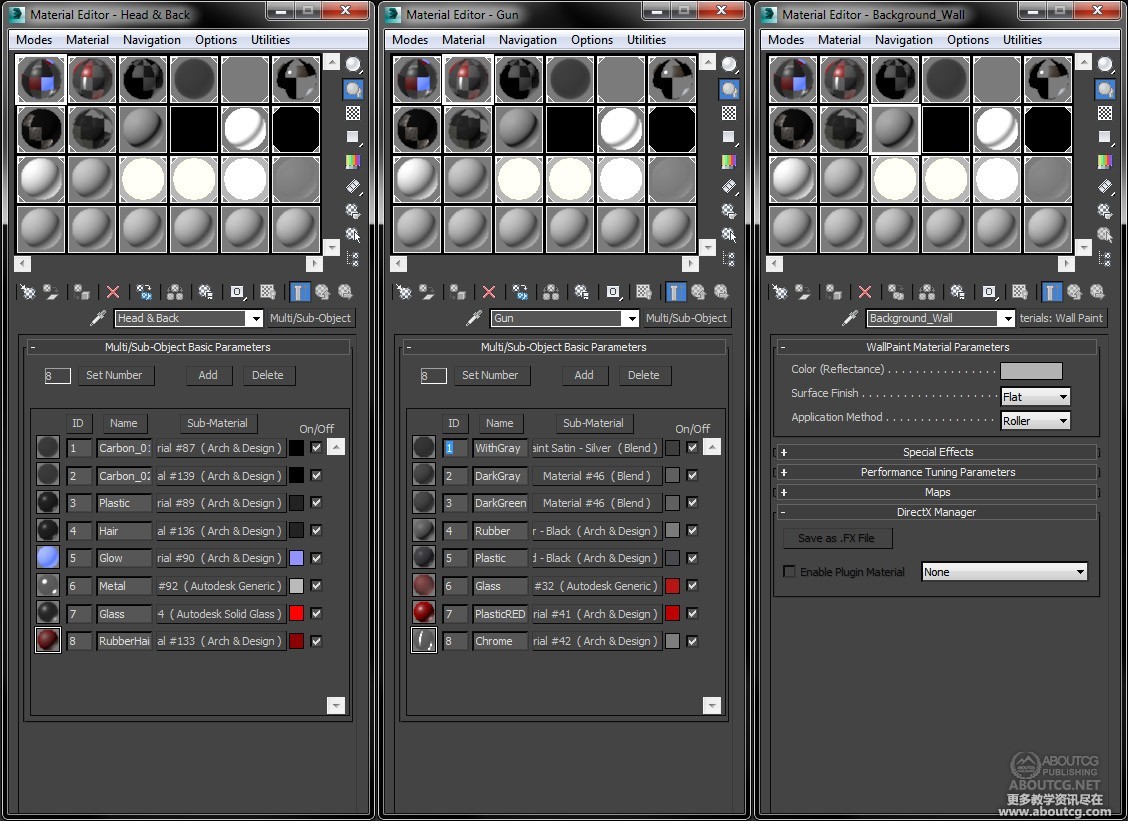
Textures and Materials
材质和贴图
I used the mental ray Arch and Design material and SSS system for this project, as they are very good at portraying metal materials. The Arch and Design materials have some good preset settings with which you can create all sorts of realistic materials. These are a good starting point from which to create your custom setups.
我用mental ray渲染器的Arch and Design材质和sss材质为模型附材质,因为它们很容易反应金属质感。通过Arch and Design的材质预设你可以创造出各种真实的材质。这是自定义设置的一个好的起点。
I also used an HDR image in the reflection map slot, which helped greatly in achieving realistic metals instead of relying only on the environment reflections.
我也经常为反射加HDR贴图, 这样比单独依靠环境反射更能得到真实的金属质感。
The Arch and Design materials dramatically increased the render times, but I think the end result was worth the wait.
Arch and Design材质会大幅度增加渲染时间,但是我想最终效果会值得这样的等待。
For scratched and weathered parts of the armor, I painted alphas with some other dirty textures in Photoshop.
铠甲磨损和皮质的部分,我是用一些污点素材在ps里绘制。
For UV unwrapping I used the UV Editor in 3ds Max and most of the textures such as the face and patterns were created in Photoshop.
我在3ds Max里展UV,而大多数贴图像脸部和花纹图案都是在ps里制作的。
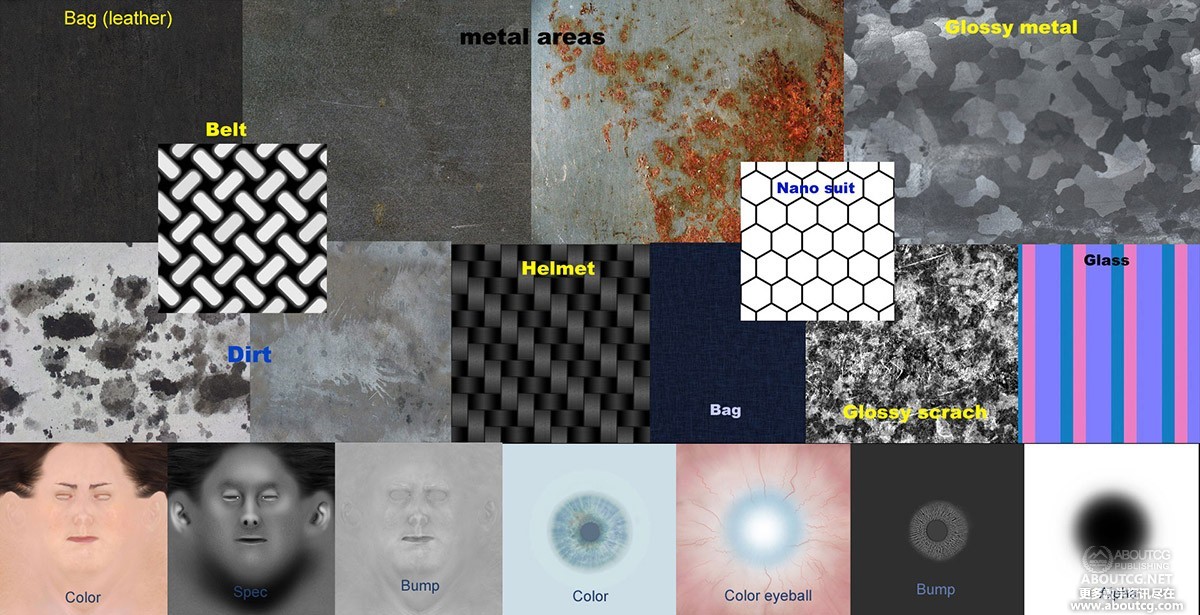
Some of the materials and textures used
用到的一些材质和贴图
Lighting
灯光
I only used three groups of lights, and each group had two lights for the whole scene. Also, I used mr sky portal lights to give me the smooth shadows I wanted.
我只用三组灯光,每一组为场景打两盏灯。我还会使用mental ray的sky portal lights制作我想要的平滑的阴影效果。
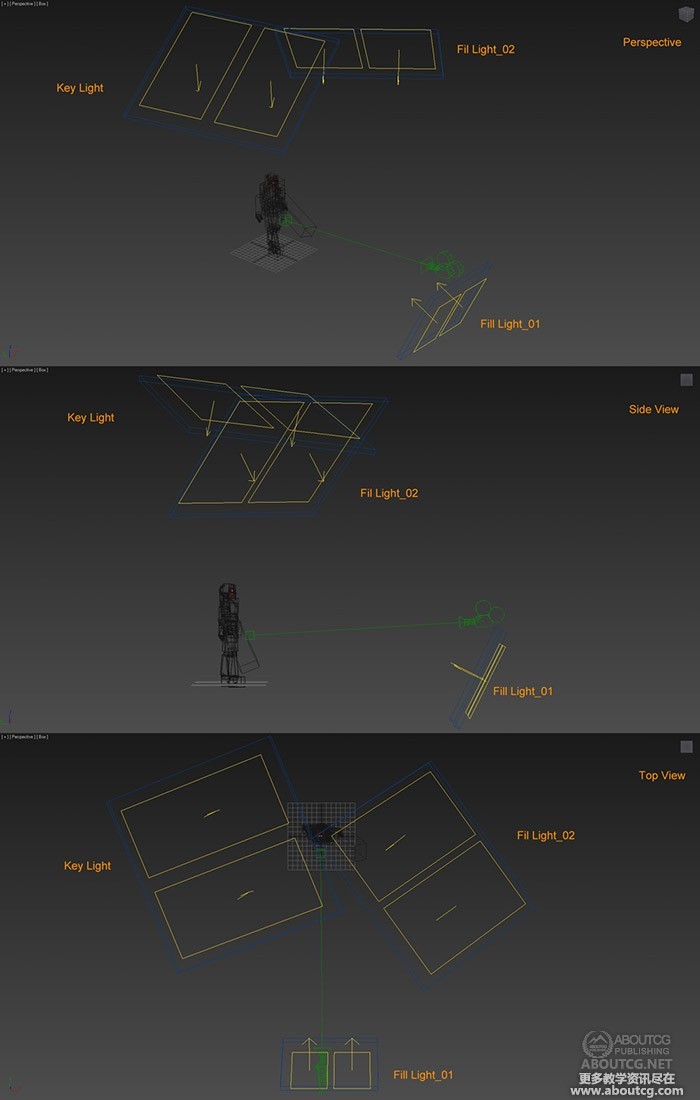
The entire lighting rig, consisting of six lights in three groups
所有六盏灯,两两一组分为三组

The settings I used for the lights
灯光设置

A clay render, just showing the lighting
展示灯光的白模渲染
Rendering
渲染
Because some of the materials were quite heavy and took a long time to render, I set my render test settings to a very low quality. This is always good practice and will speed up your workflow; the last thing you want to be doing is waiting around for test renders. I used the default draft settings for the tests and kept the render size small.
因为一些材质非常繁杂,要耗时很长来渲染,所以我将渲染测试的设置调得非常低。这是一个很好的习惯,可以提高制作速度;剩下的就是要等待渲染了。我用默认的草稿设置来进行渲染测试,并且渲染小尺寸的图像。
Once I was happy with my render and the lighting looked reasonable, I moved on to a larger render. This render had slightly increased settings such as bounce and final gather rays cast.
当我对渲染和灯光满意之后,我将渲染更大的图像。这次渲染将稍微提高渲染设置,例如bounce和final gather rays cast。


Render configuration
渲染设置
Compositing in Photoshop
Ps中合成
For the compositing, I worked with the final render with some passes (AO, Alpha).
用最终渲染出来的层来合成(AO,Alpha等)。
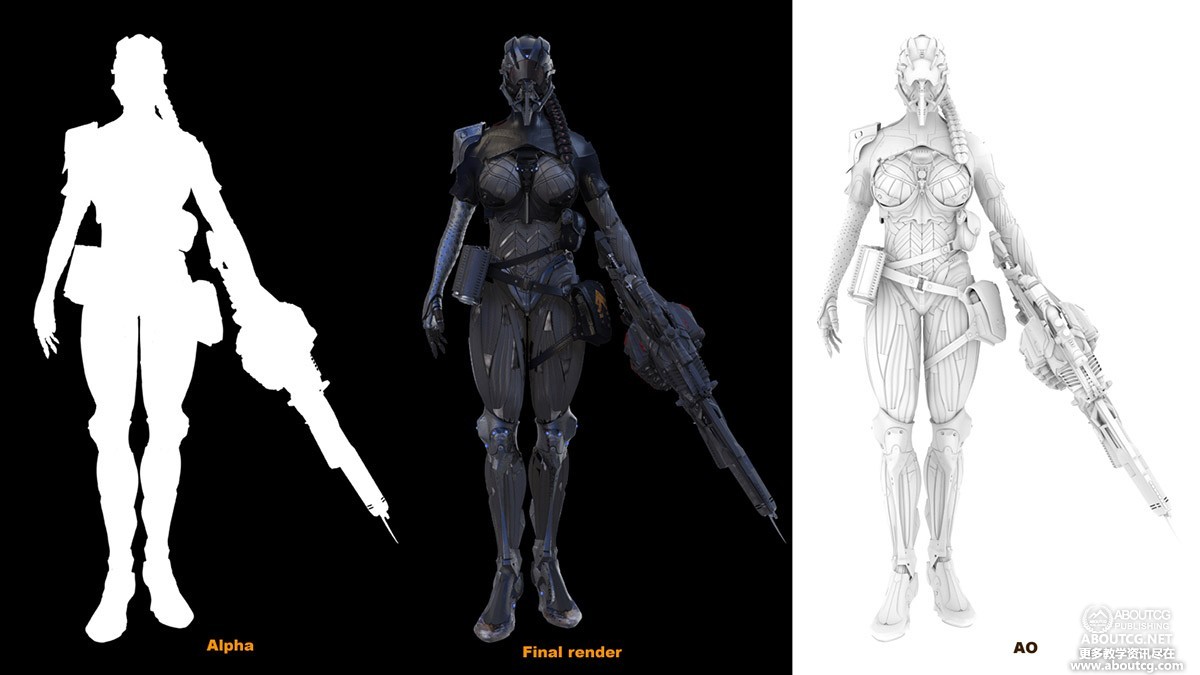
hese are the final shots and some additional images
这是最终镜头和一些附加图片
Animation
动画
I also made an animation for the helmet, just to show how it would open and close: https://vimeo.com/59767917
我为头盔做了动画,展示它开合的过程:https://vimeo.com/59767917
Conclusion
总结
I would like to thank you for reading this project overview. This has been an opportunity for me to show a little of my workflow. If anyone has any questions about this overview or any of my other artworks then feel free to contact me at www.facebook.com/christopherarts
感谢您阅读这篇文章。展示我工作流程的一部分对我来说是一个机会。如果大家对文章或者我的其他作品有任何问题,欢迎访问www.facebook.com/christopherarts
Good luck!
祝君好运!


推荐相关中文教程

3DSMAX动力学特效实战教学
本套教学将通过24章实例教学,来向你详细讲解3DSMAX的动力学特效在电视包装与广告中的应用。3DSMAX国外粒子案例效果解析
本教学通过27个实战案例,教您如何用3DSMAX结合ParticleFlow本身以及扩展的ParticleFlow Box 1、Box 2、Box 3、功能包,结合Vray渲染器,来制作流行的广告和电视包装中的粒子特效效果。无论是常见的粒子聚合,分散,动态粒子替换,粒子矩阵,粒子动力学,本套教学都有相应的案例。AboutCG Zbrush4R7高级机械建模实战教程
本套教学由我们两位强大的老师,《造型巨匠Zbrush》的作者田涛老师,和《Zbrush完全教学》的作者Purplesun老师一起打造,两位老师分别使用Zbrush4R7制作多个机械模型案例,难度由浅入深,对制作当中用到的功能命令一一讲解。并时时分享提高建模效率的宝贵经验。3DSMAX国外流体案例效果解析
本教学通过20个实战案例,教您如何用3DSMAX结合Realflow,FumeFX, ParticleFlow插件,来制作流行的广告和电视包装中的流体效果。无论是常见的液体,烟雾,流体碰撞,沙粒变化,水墨表现,本套教学都有相应的案例。Zbrush 4R7新功能中文视频教学
zbrush4 r7将会是zbrush4版本的最后一次升级,下一个版本将会是zbrush5。本次更新进一步完善了zbrush的功能,首次提供了几乎全套的多边形建模命令,大部分硬表面对象的建模将不需要借助第三方软件。ZBRUSH全案例实战中文视频教学
本套视频教学以案例为主,通过11个完整的zbrush雕刻案例,由浅入深的带领大家掌握zbrush常用的雕刻流程和雕刻技巧,全套教学在25小时以上。2.5D商业游戏场景制作教程 进阶篇
在本教程中,Freeyy老师将从零开始,向你讲解如何根据确定的主题进行前期准备,随后建模,绘制贴图,制作材质,最后再进行细节调整,完成一个商业游戏级别的2.5D场景画面。Mentalray for max实战教程
本教程共包含超过42小时以上的视频教学内容,共18章 132课,通过大量实例,详细讲解了3ds Max平台下的Mental Ray1渲染器的使用基础和实战方法。是一部非常完整详细的3dsMax版的Mental Ray渲染器的教学.


推荐课程


推荐教程

0回复Project Overview: Hunter 角色制作流程"