
本教学为翻译教学,转载请注明来自aboutcg.net,以及注明翻译者
原始链接如下:
http://www.webdesignerwall.com/tutor…shop-tutorial/
注:这个工具和效果在制作3d贴图的时候也常常用到。
翻译:NONAL
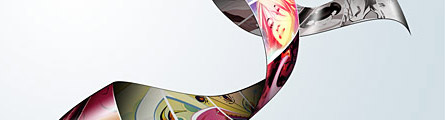
这个ps教学致力于创建漂亮的照片电影条,就像Apple’s iLife 包设计和DigitalMash网站设计中的样子。这个弯曲工具将会用来创建扭曲的效果,(当你需要ps CS2或者这只上的版本来完成这个教学)。这个教学的成品,你可以用自己的照片或者作品来创建照片条。不要错过这个奇妙的效果。
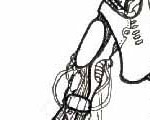
First, create a strip with the Pen tool (either in Photoshop or Illustrator). We will use these shapes as a guideline and for masking purposes.
1. 创建一个新的条(矢量)
首先,用钢笔工具创建一个条(ps或者ai都可以)。我们将用这些形状为mask做一个引导。

2. Photo Stack
Choose 3 photos of your choice and stack them together.
2. 照片条
选择你自己的3张图片,把他们放在一起。

3. Warping (Photoshop Warp Tool)
Adjust the layer opacity to 40 or 50% so you can see the guideline underneath. Go to Edit > Transform > Warp. Now you should see a grid and 4 anchor points in the corner. To bending the image, simply drag the anchor points, direction points, or grid lines.
3. 弯曲(ps的弯曲工具)
调整图层的透明度为40%-50%这样你可以看清在下面的引导。去编辑面板,变形,弯曲。现在你会看到在转角共有4个锚点的格子。弯曲图片,简单的拽锚点,方向点或者格子线。
Repeat this step for the rest of the strip. Since this step is relatively simple and repeatitive, I’m not going to get into the details. Here are the screenshots of the steps:
为剩下的条重复操作上一步骤。当这个简单的步骤被重复完成后,我才会进行下一步的细节。下面是步骤的截图。


4. Masking
Organize the layers into groups (ie. strip 1, 2, 3, 4).
4.遮罩
把这些图层放在一个组中。(条1234)
Load selection from the shapes you created in step 1 and add a layer mask for each group (so you get a perfect smooth curve).
载入这些你在第一步创建的图形然后给每个组添加图片覆盖。(这样你会得到一个完美的圆滑曲线)

5. Shadows
In masked group 1, create a new layer above the strip. Use the Gradient tool and drag from the top to bottom to create a black gradient.
5. 阴影
在第一组的遮罩中,我创建了一个在所有图层之上的新层。用渐变工具从上到下创建一个黑色的渐变。

为每个条重复添加。

To make highlighted and glossy areas: create a round glowing circle, compress it, and rotate it in the angle according to your strip’s direction.
1. 高光
做高光和平滑渐变的区域:创建一个圆的发光圆环,压缩它,然后旋转到一定角度,适合你做的条的方向。

To make line strokes: load a selection of the mask, create a new layer, fill it with black, shift the selection to the left by 1 or 2 pixels, delete the selected area by pressing the Delete key.
7边缘线

To make the image look more interesting, desaturated the two strips in the back.
8. 最后的质感

其他应用
The Photoshop warp tool is very useful when creating any sort of twisting and bending graphic effects. The following examples illustrate some of the things that you can do with the warp tool. Have fun!
当你需要创建任何扭曲或者弯曲图片效果的时候,弯曲工具应用很广泛。下面这个插画例子你可以用弯曲工具实现。尝试一下把。


推荐相关中文教程

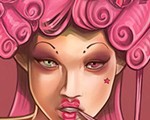
电影MATTER PAINTING基础实战案例教学
马良老师将通过一个精美的实例,来教你如何使用Photoshop结合After Effects软件完成动态Matter Painting场景的制作,从而带你踏入专业MP行业的大门。构图绘画完全教学
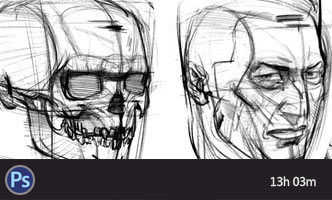
本套课程的内容重点是学习绘画艺术的构图规律和方法。在绘画学习过程中,构图是一个重要的组成部分,学习它对于提高绘画练习和创作水平有显著的促进作用。特指纯艺和插画,海报。艺用人体解剖实用教学 下集 四肢篇
本套“四肢篇”教学是王九斤老师的《艺用人体解剖使用教学》系列教程中的下集部分,主要讲解了四肢的结构绘画要点,以及部分人体动态的基础讲解。艺用人体解剖实用教学 上集 躯干篇
本套“躯干篇”教学是王九斤老师的《艺用人体解剖使用教学》系列教程中的上集部分,主要讲解了躯干的结构绘画要点,以及部分人体动态的基础讲解。


推荐课程


推荐教程

0回复Photo Strip图片条"