

奉上短教程一份,希望对大家有帮助。
使用软件:Photoshop
原文链接:http://www.3dtotal.com/pages/tutoria…ial/levels.php
作者信息:
Joseph Mirabello
Email: blankslatejoe@hotmail.com
Web: ramsites.net/~mirabellojr/
翻译:StoneBird(aboutcg.net)转载请注明出处。
关于译者:

利用色阶清理扫描件
Scanning a drawing, sketch, portfolio piece, even a photo is one of the black arts of photoshop. There are people out there who know so much about the adjustment tools that they can make any scribble look amazing. I’m not one of those people. However, this is the process I go through when I’m scanning one of my drawings. Hopefully you’ll pick up a thing or two also.
PS的魔术之一,就是能扫描一张绘画、草稿、作品,甚至是照片。有些人精通修图的工具,能化腐朽为神奇。我可没那技术,但是下面这招我用起来挺好,没准对你也有点用。
Before doing the tutorial: Scan your image.
首先扫描一张图进计算机。
Some hints on scanning:
At a minimum, scan at at least 150 dpi. I usually use 300 dpi myself, but for small scans that I’ve needed to blow up to a larger size I’ve had to scan as a high resolution as 600 or 1200 dpi. Be careful scanning little bitty things at high resolutions though, most scanners CAN’T scan at the top resolution their box says they can. They scan as high as they can and then interpolate (guestimate) the extra pixels. I usually do not scan in black and white, even if the picture is in black and white, since I like the ability to adjust the temperature of the pic myself. (but that’s for another tutorial)
一些小提示:
至少用 150dpi 的分辨率做扫描。我一般用的是 300dpi,但是如果是扫小图然后放大,我就得用 600 到 1200dpi 的设置。用高分辨率扫描小东西的时候要小心,大多数扫描仪都是说的好听,实际到不了包装上声称的那么高的分辨率。它们只是能扫多高扫多高,然后靠猜的方法把剩下的像素补齐。我一般不喜欢用黑白模式,就算原件是黑白的,因为我喜欢自己调整色温。(另一篇教程会讲)(译注:我没找到他说的“另一篇教程”)
Right away crop and orient your image. It’s good to crop before you mess around with remastering the image so that the only factors involved in the adjustments are from what the final image will be. You won’t have a glowing white border from the scanner lid screwing up your levels this way.
裁剪扫描结果,确定位置和朝向。事先裁剪好可以防止你手忙脚乱地重新再扫一遍,并可以让你径直得到你想要的结果。这样扫描仪灯光产生的白边也不会干扰你调整色阶。
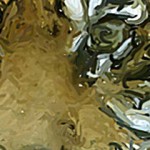
Ok, this Robot gal I drew (it’s only an hour of work, so be kind) lends itself well to this tutorial, with a variety of headaches to deal with. Right away you can how washed out the scan looks. There’s also those little gesture sketch lines behind her to deal with and a couple of other blemishes.
这个机器女(我只画了半个小时,别挑剔,对她好一点,谢谢)是一个很好的例子,图上有很多的污点让你折腾,比如上面像是水渍的东西,还有草稿线和其它各种小痕迹。
YOU COULD DO IT THIS WAY….
The sketch lines and the washed out look can be dealt with at the same time with the power of levels. Instinct might make you tempted to use auto levels simply because it’s quick and painless, and as you can see below, autolevels (found under image>adjust) will make the image pop out, but it doesn’t get rid of those gray sketch lines.
你或许会这样做:
为了用色阶工具将草稿线和“水渍”一并除掉,你或许会下意识选择自动色阶工具,因为自动色阶很强很方便。但从下图可以看出,自动色阶(图像 – 调整 – 自动色阶)只会加深你想要的,而不能除掉你不想要的。

BUT THIS WAY IMPRESSES MORE GIRLS:
Here’s one of the ultimate Levels tricks. Open up adjust levels. See the fancy black bars and buttons? Ignore them. They basically tell you how much of the picture is white and how much is black, and you can alter that if you want to by sliding the triangles, but the easiest way to do what we want here is to just pay attention on the little 3 eyedroppers that appear below the “ok, cancel, auto, buttons”. Choose the one that is filled with black, the first one. By clicking on the darkest part of whatever image, you reset the black point to make that spot pure black, even if it’s not.
但这样做更性感:
下面这个是终极色阶小把戏之一。打开色阶面板,看到那些时髦的按钮和工具条了吧?别理它们。它们只是告诉你图上有多少白有多少黑,你可以通过滑动小三角进行调整。但是现在请注意右下角的三个小滴管,选择最左边那个装着黑墨的。点击图片最暗的地方,就算本来不是纯黑,点完之后那点就被调为纯黑了。
Sidenote: You don’t have to permanently apply levels or any adjustment to an image. Starting with Photoshop 6 there has been a little thing called adjustment layers. They’re update-able adjustment effects that you can apply or remove just like any other layer. (click the little half circle on the bottom of the layers palette to apply one)![]()
小提示:你不用没完没了地对图像应用色阶或者其他的什么调整。PS 6 开始就有了一个增加“调整层”的功能,把各种调整放到一个层里面,方便修改。就是这个图标:
If you guessed that the far right dropper, the white one, is used to set the whitest point your right, but that’s not what we want to do. If we set the whitest part of the document as white, then we’d end up doing the same thing that “autolevels does”. Instead I use the white dropper to click on the gray I want to get rid of. It’ll turn everything that tone or lighter to a pure white, eliminating all our sketchiness problems! ![]()
你或许猜到了,最右边那个小滴管是调整白点的,但是我们不这么用。因为如果用了,效果和自动色阶一样。我用它去调那些我想除掉的灰色痕迹,这样可以把浅色都抹掉!
The result of setting White/Black points
设置好之后:

It’s not flawless, a few spots that are only visible up close still present problems, but most of the work is done.
但图上面还有一些瑕疵,放大一点还是能看到污迹,但大部分还是消掉了。
To get rid of these without messing up the rest of the picture, select them loosely.Feather the selection, (select>feather) the number of pixels depends on the resolution, but between 5 or 10 is good.
为了完善一下,大致选中那些瑕疵,之后羽化,羽化半径 5~10 像素就可以。
This blends any work we do to this area into the rest of the picture, eliminating the hard line of the selection once any correction has been applied.
这样就可以淡化一些,选区的边缘也可以有平滑过渡。
I used levels again here. You could use the exact same procedure as before just at a closer detail, but for the sake of being different, try something else. By dragging the white triangle on the slider toward the black triangle, the smudges and grays will fade away. Don’t drag too much, or the selection will end up too different from the rest of the image.
这里我又一次利用色阶工具。你可以用同样的手法进行操作,但这里我用另一种方法,将白三角左移,灰色的痕迹就淡去了。别移动太多,否则选区和整图相比就太浅了。
You could have done the first adjustment this way too, but tweaking the sliders correctly at that point would have been more time consuming. You can also use the sliders at the very bottom to limit the range of colors.
第一次调整其实你也可以这么干,但是比较耗时。下面那个滑动条也可以用来限制色域。
Here’s the finished scanned and fixed up image. Since (if you scanned the image like a good little graphics junkie), it’s at a higher resolution, you can output it to your printer, to the web, or for use in other projects. I also used the eraser and clone tool to clean up the image a little bit, but that’s for another tutorial.
下面是结果。如果你像一个图片狂一样地扫描,成图的分辨率会较高,这样你就可以将之输出到打印机、网络或是其它项目。我还用了橡皮和修补工具,这会在另一个教程里讲。(译注:又是“另一个”= =)
有问题可以参与答疑


推荐相关中文教程

电影MATTER PAINTING基础实战案例教学
马良老师将通过一个精美的实例,来教你如何使用Photoshop结合After Effects软件完成动态Matter Painting场景的制作,从而带你踏入专业MP行业的大门。构图绘画完全教学
本套课程的内容重点是学习绘画艺术的构图规律和方法。在绘画学习过程中,构图是一个重要的组成部分,学习它对于提高绘画练习和创作水平有显著的促进作用。特指纯艺和插画,海报。艺用人体解剖实用教学 下集 四肢篇
本套“四肢篇”教学是王九斤老师的《艺用人体解剖使用教学》系列教程中的下集部分,主要讲解了四肢的结构绘画要点,以及部分人体动态的基础讲解。艺用人体解剖实用教学 上集 躯干篇
本套“躯干篇”教学是王九斤老师的《艺用人体解剖使用教学》系列教程中的上集部分,主要讲解了躯干的结构绘画要点,以及部分人体动态的基础讲解。


推荐课程


推荐教程

0回复利用色阶清理扫描件"