
本教学为翻译教学,转载请注明来自aboutcg.net,以及注明翻译者
原教学出自zbrushcentral网站,原始链接如下:
http://www.zbrushcentral.com/zbc/sho…d.php?t=070974
作者: Nick Zuccarello
翻译:KanyaYan ( 翻译中有错误之处请谅解,并请帮忙指出!谢谢!)
关于译者:

转载请写明出处和翻译者,谢谢。
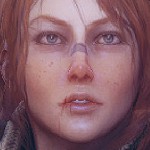
3RD Eye Blind (ZTool Download)
失明的第三眼
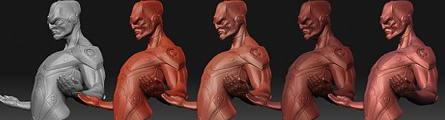
just finished a new little mini project for myself and I thought I would share my work with everyone.
我只是为我自己完成一个新的密你项目,我想我会共享给每个朋友我的文件。
First I was snooping around on the Freedom Of Teach website and I saw there was a “CG Practice Model Download”. I thought it might have been the hi res model that they used to generate their 3D print, but it was just an base mesh with no detail. I’m not sure why but I just stared sculpting on it. ( really didn’t need to start anything new at this point.)
首先,我是找了下周围的免费教学网站,我看到有一个“CG练习模型下载”。我想可能有高质量的模型供他们制作3D打印所用,但是它只是一个没有细节的基础模型。我不确定为什么但我会认真地雕刻它。(在这一点上真的不需要更新任何东西了。)
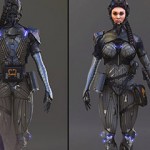
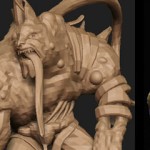
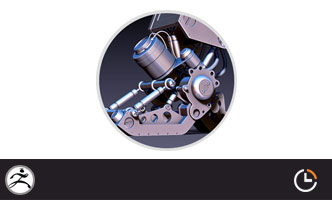
At first I was going to do just another organic model but I was rather impressed and inspired by the hard surface modeling that FoOD and Sebcesoir have been generating inside of Zbrush lately. So I gave it a try and here are the results.
首先我想这样做另一个机械模型但是我被FoOD和Sebcesoir最近在Zbrush里做的硬面模型打动了。所以我试了下,这里是结果。


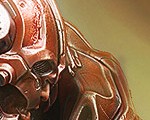
I used masks quite a bit. The clay tubes brush worked rather nicely for building up flat surfaces along with the flatten brush and of course the smooth brush to clean up some of my mistakes. I also used the lazy mouse with the standard brush and a custom alpha for generating strait lines.
我用了相当多的遮罩。Clay tubes刷子配合flatten刷子做平面效果很好用,当然smooth刷子可以清理我的一些错误。我总是用带lazy mouse的standard刷子加上自定义的alpha制作狭窄的线条。
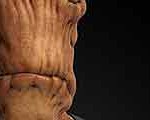
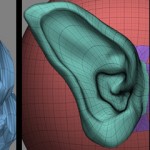
I found that using some of these custom alphas that I made with the standard brush, with lazy mouse turned on and a lazy step of .01 gave me rather nice results for long smooth thin lines.
我发现用一些我使用打开lazy mouse的standard刷子的自定义alphas,配合0.01的lazyset让我很好的长条光滑的细线。

I also created a few custom Material Capture shaders for sculpting.
我还为雕刻建立了一些自定义Material Capture shaders。

I built a Photoshop file that makes it kinda easy to generate new MatCap shaders. I things on layers to control the over all shading of the material, you can get custom control of a shader if you want to build a MatCapwith this file.
我建立了一个Photoshop文件,这很方便地生成新的MatCap shaders。我用层控制所有的材质shading。如果你想建立一个MatCap的文件,你可以得到一个自定义控制的shader 。

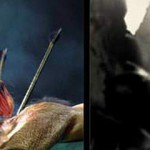
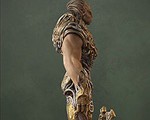
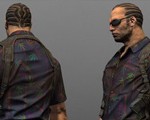
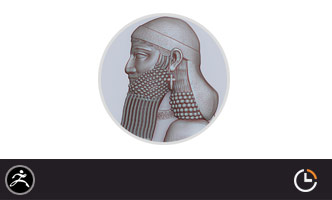
After the model was complete I used Zapplink and Photoshop to build a base color texture. I also wanted to learn more about lighting and baking that to a texture in Maya. So for the color and lit version of the texture I created several passes that separated out the lights, the shadows, Ambient Occlusion (created in XNormal) and then cavity mapping created with ZMapper.
在模型完成后我用Zapplink和Photoshop去制作一个基础颜色贴图。我还想学习更多的关于在maya里的灯光和烘焙贴图。所以在颜色和发光的贴图上我用了几个要点,分离出lights, shadows, Ambient Occlusion(在XNormal里创建),而cavity贴图用ZMapper制作。

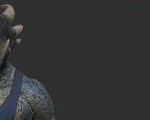
When you load the .ZTL file it will be filled with the color white and have the MatCap Grey material already applied to it. If you would like to apply a different material to the object turn on MRGB, choose the Flat Color shader and go Color>Fill Color. You can now pick any shader you wish to view the model with.
当你打开.ZTL文件时,模型会带有白色和MatCap Grey material。如果你想应用不同的材质给模型打开MRGB,选择Flat Color shader再使用Color>Fill Color。你现在可以挑选任何你希望的shader去查看模型了。

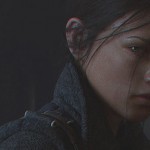
If you load the color texture I provided I suggest using the MatCap Pearl Cavity shader to look at the model.
如果你导入颜色贴图,我建议用MatCap Pearl Cavity shader来查看模型。
If you use the color and lit texture that I provided then you will need to apply the Flat Color material with the texture applied to view the model correctly.
如果你用颜色和灯光贴图,我建议你可以用Flat Color material来正确地参看模型。
You will also need to flip the texture vertically.
你还需要垂直对称下。
I hope you enjoy!
我希望你会喜欢!


推荐相关中文教程

AboutCG Zbrush4R7高级机械建模实战教程
本套教学由我们两位强大的老师,《造型巨匠Zbrush》的作者田涛老师,和《Zbrush完全教学》的作者Purplesun老师一起打造,两位老师分别使用Zbrush4R7制作多个机械模型案例,难度由浅入深,对制作当中用到的功能命令一一讲解。并时时分享提高建模效率的宝贵经验。Zbrush 4R7新功能中文视频教学
zbrush4 r7将会是zbrush4版本的最后一次升级,下一个版本将会是zbrush5。本次更新进一步完善了zbrush的功能,首次提供了几乎全套的多边形建模命令,大部分硬表面对象的建模将不需要借助第三方软件。ZBRUSH全案例实战中文视频教学
本套视频教学以案例为主,通过11个完整的zbrush雕刻案例,由浅入深的带领大家掌握zbrush常用的雕刻流程和雕刻技巧,全套教学在25小时以上。ZBRUSH完全中文视频教学
ABOUTCG现在荣幸的向您推荐这款Zbrush4的完全商业教学:本套教学包含150个片段,共计30小时的内容,全面细致的介绍Zbrush的所有功能,无论你是初学者,进阶者。还是行业人士,本套教学都能为您提供一个思路,一个方案和一份竞争力。
推荐课程


推荐教程

1回复如何制作失明的第三眼"