

本教学为翻译教学,转载请注明来自aboutcg.net,以及注明翻译者
作者:uChengHong (台湾)
翻译:CWWS (aboutcg.net)
原始链接:http://www.cgarena.com/freestuff/tutorials/photoshop/lida/index.html
请尊重互联网道德,转载请注明转载出处和翻译者,谢谢!
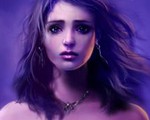
Making of Lida

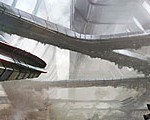
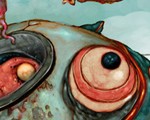
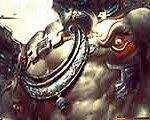
In this work, I want to interpret a new feeling of an old Chinese poem, and try to make it more fantastical, sci-fi and surreal. So I start doing research…here is some I searched on Google…
在这个作品中,我希望给重新阐述一首一首中国古诗的意境,并试着使它更加幻想化,科幻及超现实主义,因此我开始了一些调查工作……这是我在Google搜索的一些结果。
Concept / Sketch
概念/草稿
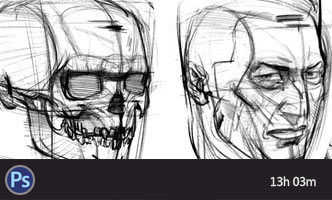
Here is some rough concept sketches, compose with the pipa (the musical instrument) photo and graphic elements to get how it’s looks like.
这里是一些粗略的草图,结合了琵琶(中国传统乐器)照片和一些图形元素,试图获得最终看起来的效果。

Black and White
黑与白
In this step, I start with black and white first, and I draw every element for each layer, that is because is more easily to change color for each elements, use the Hue/Saturation and Replace Color tool to change color.
在这个阶段,我首先从黑白稿开始,我在每一个层绘制一个元素,这是因为这样可以很容易地修改每一个元素的颜色。使用Hue/Saturation(色相/饱和度)和Replace Color(颜色替换)工具来改变颜色。
So, I fill a gradient on the background, and put the sketch as a guide line above, lower down the opacity.
因此,我在背景上填充了渐变色,然后把素描作为参考层,降低透明度。

Second, I start from skin, just paint gray tone color and working on value
然后我开始绘制皮肤,仅仅绘制灰色调,并仔细调整不同的色值。

and paint the suit and shoes..
以及画出衣服和鞋子

Painting hair and the shadow on the feet
画出头发与脚上的阴影。

Painting chair and add pipa (musical instrument)
画出椅子并加入琵琶(中国传统乐器)

I used the gradient tool a couple of times to paint the chair, to get it nice and smooth. Later added a speaker and the strings on the pipa.
我多次使用渐变工具来绘制椅子,使它看起来平滑精致,随后偶添加了扬声器和琵琶上的弦。

I used the flower brush to design the pattern on the pipa.
我使用了一些花纹的笔刷来设计琵琶上的图案。

ok, it almost done there with black and white. It’s the time to go to use Hue/Saturation and Replace color and Selective color tool to change color.
好,黑白稿基本上完成了,现在是时候使用Hue/Saturation(色相与饱和度)覆盖色彩,并使用Replace Color(颜色替换)与Selective color(选择色彩)工具来改变色彩。

Color
颜色
Here are some steps that I used Hue/Saturation and Replace color and Selective color tools to adjust color. First, I used Hue/Saturation tool to get basic color tone…
这里是我使用Hue/Saturation(色相与饱和度)覆盖色彩, Replace Color(颜色替换)以及Selective color(选择色彩)工具来调节色彩的一些步骤,首先我使用Hue/Saturation工具来获得基本色调。

Second, I used Replace color to give her skin more red and pink color…
其次,我使用Replace color来给她的皮肤更多红色与粉色。

Now, the skin shadow looks too dark, and I want it more bright. So I used Replace color tool again.
现在皮肤阴影看来太暗了,我希望它更亮一些,因此我再次使用Replace color工具来达到目的。

And I used Selective Color to give the highlight skin more yellow, more looks like Asia people skin.
并且我使用Selective Color来给皮肤的高光更多黄色,看上去更像亚洲人肤色。

I used replace color again to give more saturation on the shadow part. The light bounce from skin will get a little red and orange because subsurface scattering.
我再次使用replace color给于阴影部分更多的饱和度,皮肤上的灯光反射由于次表面散射(俗称的3S效果),将会获得一点红色与橙色的成分。

And I used Selective Color again to give the high light part a littleblue, because many tiny vein under the skin.
同时我还使用Selective Color给于高亮部分一点点蓝色,因为皮肤下有很多的毛细血管。

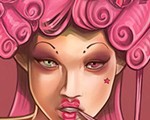
I used basic paint brush to paint the lips and eyes make up.
我用基础的笔刷来绘制嘴唇和眼睛的化妆。

and then, use Hue/Saturation tool to get the basic color of chair sofa.
然后使用Hue/Saturation工具获得沙发椅的基本颜色。

Use replace color to give the dark side more red, looks like purple.
使用replace color给暗部更多红色,看上去有点紫。

Hue/Saturation tool again to get the basic tone.
再用Hue/Saturation工具得到沙发外部的基本色调。

same as with the suit
对外套做同样的步骤

and also change the background…
还有,背景也要改变一下……

Glowing Effects
光晕效果
Here I used soft airbush paint the glow and radial blur it for couple times.
这里我使用喷笔绘制光晕,还对它使用了radial blur(放射模糊)好几次。

And I used color range tool to select the white section, and fill white color on another layer, using Gaussian blur.
并且我使用color range(色彩范围)工具来选择白色部分,在一个新层填充白色使用Gaussian blur.(高斯模糊)。


and I put some text from the poem behind the background, like graphic design.
我从诗里选择一些文字放在背景后面,就像是平面设计。

I typed the text and transform the type to surround her.
我输入文字,并扭曲它们来围绕主角。

And I duplicate the text couple times, and using motion blur for vertical and horizontal direction. And, finally it is DONE!! So, here just show you some method that I used on the piece, and hope that will be help for you. If there have any question or suggestion, please feel free to let me know. Thanks!
同时复制了几次文字层,在横向及纵向使用motion blur(运动模糊)效果,最后,作品完成了!!因此,这里只是向您展示了我完成这幅作品的一些技巧,希望能对您有帮助,如果您有任何的问题与建议,请告诉我,谢谢!


推荐相关中文教程

电影MATTER PAINTING基础实战案例教学
马良老师将通过一个精美的实例,来教你如何使用Photoshop结合After Effects软件完成动态Matter Painting场景的制作,从而带你踏入专业MP行业的大门。构图绘画完全教学
本套课程的内容重点是学习绘画艺术的构图规律和方法。在绘画学习过程中,构图是一个重要的组成部分,学习它对于提高绘画练习和创作水平有显著的促进作用。特指纯艺和插画,海报。艺用人体解剖实用教学 下集 四肢篇
本套“四肢篇”教学是王九斤老师的《艺用人体解剖使用教学》系列教程中的下集部分,主要讲解了四肢的结构绘画要点,以及部分人体动态的基础讲解。艺用人体解剖实用教学 上集 躯干篇
本套“躯干篇”教学是王九斤老师的《艺用人体解剖使用教学》系列教程中的上集部分,主要讲解了躯干的结构绘画要点,以及部分人体动态的基础讲解。


推荐课程


推荐教程

0回复Lida的绘制流程"