
这个是在2Dartist上看到的 官方网站是http://www.2dartistmag.com/
还有一个3DCreative是http://www.3dcreativemag.com/
雏田翻译
关于译者:

Making Of Scarecrow
稻草人小教程
Here are the “Making Of’s ” from last month’s top three winning entries…
这里是“Making Of’s ”从上个月的前三名获奖作品…
3rd Bstsk
Hi everyone,again! It was,as always,a pleasure to particpate in the stylised challenge.
大家好!跟以往一样,愉快地参加了别具风格的挑战。
STEP 01
第一步
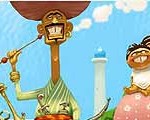
The creation process was the same for this piece as for my last:I always try to follow a sketch,adding volume and colour, all mixed up with composition and the intention of keeping it an interesting image.I started with the sketch , searching for the best character I could get. Since I didn’t have much time on the scarecrow.I had to go for the skinny version , which was one of my frist ideas- but I guess it turned out well enough .
创作进程的这一部分和我最近的一样,我总是遵循素描,填上体色,所有的都混杂在一起,打算保持一个有趣的图像.我开始素描,寻找我能得到最好的特征。由于我没有太多时间在稻草人上.我不得不想到瘦版,这是我的第一想法,但我猜它被证明是足够好的。(见图01)

STEP02
第二步
So I started colouring , trying to get a simple look and paying attention to the weight of the colour and composition in the image(flg.02)
所以我就开始着色,试图得到一个简单的形象,关注色彩的分量和在图里的构成。(是因为外国人讲话
真别扭,应该是因为我的英文太糟了,硬着头皮翻译吧o(>﹏<)o)(见图02)

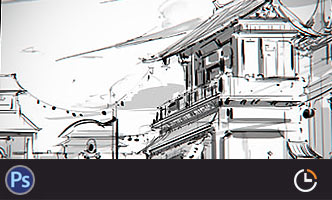
The first step I usually take when colouring is to block out the sky and groud; for the sky I tend to use a simple gradient,since it’s much better for a cartoon – fast and clean. The ground I paint with different brushes, depending on the style; this one was simple so I kept it that way.
第一步时,我通常采取染色的手法去画出天空和地面;对于天空我往往使用一个渐变,因为它更适合卡通-快速和清洁。那个地面我用不同的笔刷画,这取决于风格;这很简单,所以我一直是这样。
Since most of the scarecrow was silhouetted against the sky,I painted it with
contrasting,warm colours and planned the shadows afterwards.
由于稻草人的大部分是被天空衬托出来,我用对比画出它,暖色调,然后计划了阴影。
STEP 03
第三步
With most of the main colours defined,I started refining and polishing to incresse the
contrast an enrich the image, I positioned the sun to the left, allowing the shadows I
needed to add some dark tones in the scene . For the shadows I chose a violet tone and set it to multiply , and then continued detlailing.I also started adding some elements,like the cloud line or the barn at the background.
主色的大部分被确定,我开始精炼,雕磨,提高对比度充实图像,我把太阳放置在左边,给予阴影
,我需要补充一些暗色调的场景。为阴影我选择了紫色基调,并在混合模式中选择加深模式,然后继续详细设计.我也开始增加了一些内容,如云线或背景上的谷仓。
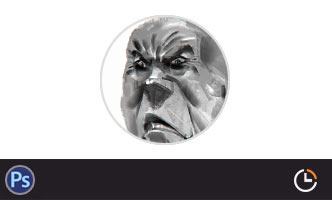
The most important part at this stage was making his smile smug enough – since the character has no movement, except for the action line of the pole,his expression had to do the trick!
最重要的部分是在这个阶段,做他自鸣得意的微笑-因为这个角色没有运动,除了杆子的线性行为,他不得不做这样的把戏!
STEP 04
第四步
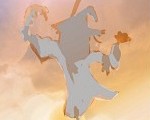
Being able to guess the final results of the character,I still wasn’t happy enough with the image as a whole… I imagined right from the beginning that the viewer would be able to guess what had happened if I simply showed some feathers(fig.03).However,I realised it was lacking something.and so I decided to add the crows themselves – placing them here and there , making the image a little more dynamic.
能够猜测角色的最后结果,整体来看我仍然不够满意这幅图…我设想右边从一开始,如果我简单的显示一些羽毛,观众将猜到发生了什么事(见fig.03 ) 。然而,我意识到这是缺乏一些东西的,所以我决定把乌鸦-放置他们在这里和那里,使图像多一点活力。

I painted in the foreground plants and changed the clouds to balance the new elements in the image… and there it was, almost ready.I ended the work on the image by refining all the characters using the smudge tool,and I used a little blur on the crows to simulate movement.The final step was to balance the colour , I made the shadows a little more subtle and made the tone of the trousers a little less saturated – and with that, it was done.And onto the next challenge!
我在前景上画了一些植物并改变了云彩去在图片中平衡新元素…而且这是,几乎准备(这里看不懂,大家自己看看吧).我通过涂抹工具精炼所有角色,并且我对乌鸦用了一点模糊去模拟运动来完成工作.最后一步是要平衡色彩,我使影子更加微妙一点,并使裤子的色调减少了一点饱和——用这些,他被完成了。 ,进入下一个挑战!


推荐相关中文教程

场景美术绘画进阶教程 光影渲染篇
本教程作为场景概念设计绘画方面的进阶教程,着重讲解了如何应用自定义的Photoshop笔刷和素材,讲解照明与场景绘画的关系,光线的反射定律,场景构图的固定模式,如何使用进行概念设计的创意思路方法,以及使用案例来讲解如何按照游戏项目的需求完成一个场景的绘画过程。电影MATTER PAINTING基础实战案例教学
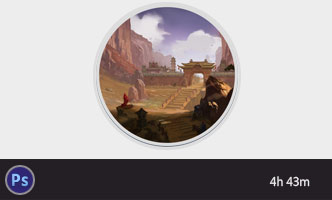
马良老师将通过一个精美的实例,来教你如何使用Photoshop结合After Effects软件完成动态Matter Painting场景的制作,从而带你踏入专业MP行业的大门。场景概念设计实战教学之玉门关场景绘制
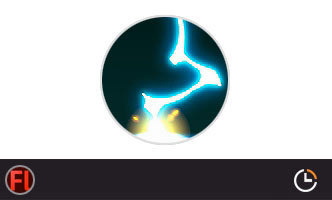
本教学将通过一个从零开始的玉门关场景绘制案例,带你了解如何进行场景概念设计。手绘游戏特效制作实用案例教程 闪电篇
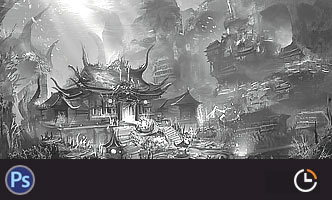
本套教学使用具体的案例,演示了多个闪电类手绘特效的绘制流程,专门针对手游,2D游戏,手绘影视动画的液体特效制作需求设计.场景美术绘画基础教程 中国建筑篇
场景绘画和设计是漫画绘画,游戏设计生产环节中不可或缺的一环,本教学将从最基础的原理开始,教授用户如何理解和学习场景绘画,如果把握场景绘制的设计技巧,讲解场景如何控制透视,从基础的几何体开始学习空间的管理和建筑的摆放。人物角色表情表现绘画教程
本套教程从人类基础的简单表情入手,讲解不同种类的笑容,焦虑,生气,愤怒,咀嚼,吃惊,惊恐,沮丧,哭泣等等不同的表情是如何表现的,帮助学习者能够通过夸张生动的表情变化理解人类丰富的表情绘画所能传达出来的含义。构图绘画完全教学
本套课程的内容重点是学习绘画艺术的构图规律和方法。在绘画学习过程中,构图是一个重要的组成部分,学习它对于提高绘画练习和创作水平有显著的促进作用。特指纯艺和插画,海报。艺用人体解剖实用教学 下集 四肢篇
本套“四肢篇”教学是王九斤老师的《艺用人体解剖使用教学》系列教程中的下集部分,主要讲解了四肢的结构绘画要点,以及部分人体动态的基础讲解。


推荐课程


推荐教程

0回复如何用ps绘制稻草人"