
本教学为翻译教学,转载请注明来自aboutcg.net,以及注明翻译者
请尊重互联网道德,转载请注明aboutcg.net完整网站链接和翻译者,谢谢!
原教学出自pixologic网站,原始链接如下:
http://www.henningludvigsen.com/inde…e_and_feathers
作者: Henning Ludvigsen
网站:http://www.henningludvigsen.com/
翻译:KanyaYan (www.aboutcg.net)
转载请写明出处和翻译者为KanyaYan,谢谢。
关于译者:

Painting plumage and feathers.
绘画羽毛
From an artist’s point of view, painting plumage and feathers is often a dreaded process, but even if it is without doubt time consuming, it doesn’t have to be complex or difficult at all.
从艺术家的角度来看,画羽毛通常是一个可怕的过程,但即使它相当费时,它也不是那么的复杂或困难。

Now, there are many types of feathers, and if you plan on painting birds, you should study theory about different kinds of feathers and their purpose.
Some feathers are for protecting against weather, some for insulating the body; some are for decoration, and flight feathers which are stiffer and obviously are for flying purposes.
现在,有许多类型的羽毛,如果你想画鸟,你就应该学习羽毛和它们目的的不同理论。
一些羽毛是为了应对天气,一些是隔离身体;有些是为装饰,还有坚硬的羽毛显然是为了飞行。
My suggested approach to feathers is quite down to basic, as I believe that completely hand painted plumage looks a lot better than a repetitive feather-shaped brush, or a perfectly repeated row of feathers in overlapping layers.
I would start off with a simple outline drawing to settle the approximate shape, and then start shaping up each feather quite roughly.
To get the sense of layers, make sure to add some soft shadow along the side of each feather where one feather gets overlapped by the next one.
By keeping a nice transition from dark to bright, you have a nice base from to start detailing using the smudge tool, and at the end a small, sharp brush.
我建议画羽毛的做法是从基础开始,因为我相信纯手绘的羽毛看起来好于重复的羽毛状刷子,或在重叠的层上复制一排羽毛。
我首先用一个简单的线条画出近似羽毛的形状,然后大致勾划出每根羽毛。
要获得一层层的感觉,一定要添加一些沿着一根羽毛重叠另一根羽毛得到的阴影。
通过保持从黑暗到光明很好的过渡,你有一个很好的基础,开始使用smudge tool,并使用尾部收小的尖锐刷子。

Starting out blocking in rough colours and contrasts lay down a good base for the detailing process later.
Don’t fiddle at this stage, just be bold and do the grunt work.
开始给一个大致的色彩和对比为后面的制作打好基础。
在这个阶段不要乱画,只是大胆和完成这繁重的工作。
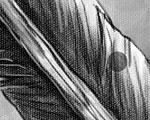
Step 1 – Get the basic shape up, and start painting in contrast.
第1步 – 制作基本外形,并开始画对比。
 \\
\\
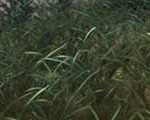
Make a rough outline of the basic shapes of the plumage you plan to paint, and roughly sketch up each of the feathers.
Remember to place the feathers in overlapping layers on top of each other. It’s always helpful to look at pictures of birds and wings to understand how the feathers are overlapping.
画出你计划画的羽毛的大致基本外形的轮廓,在把每根羽毛大致画出来。
请记住,把羽毛放在其他的顶部。这样总是有利于去观察鸟和翅膀,并了解羽毛是怎样重叠的。
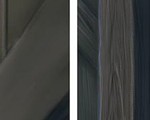
Step 2 – Get the layers of plumage sorted out, and shape up the feathers.
第2步 – 分类整理羽毛图层,形成了羽毛。

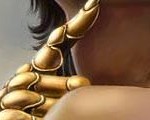
Now, add some shape to each feather, keeping the outer edge bright, and add some shadow where one feather overlaps the other.
The quill is the strong stem of the feather, and it’s usually white at the base and gradually ends up into the main colour of the feather.
现在,添加每根羽毛的形状,外缘保持明亮,并且增加一些叠在下一根羽毛上的阴影。
羽毛管是硬的羽毛柄,而且通常以白色为底色,并逐步最终进入羽毛的主色。
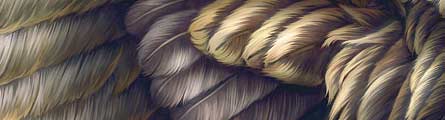
Step 3 – Add final details with smudge, and a thin paintbrush.
步骤3 – 添加最后细节,细画笔。

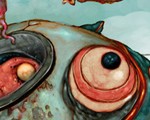
The fine fibres of the feathers are too small to draw every single one, but simply add a few here and there to suggest the texture.
Make some gaps to break up the edges, especially at the base of the feathers. Brush up with a small painting brush at the end.
使用一个小刷子的smudge tool,并形成了羽毛。
细的羽毛的纤维太小以至于很难画出每根来,而只是在这里和那里添加一些,提出纹理。
在边缘留出一些空隙,特别是在基础羽毛的边缘。最后用小笔刷再细化下。


推荐相关中文教程

构图绘画完全教学
本套课程的内容重点是学习绘画艺术的构图规律和方法。在绘画学习过程中,构图是一个重要的组成部分,学习它对于提高绘画练习和创作水平有显著的促进作用。特指纯艺和插画,海报。

推荐课程


推荐教程

已经修正了!
看不到图啊