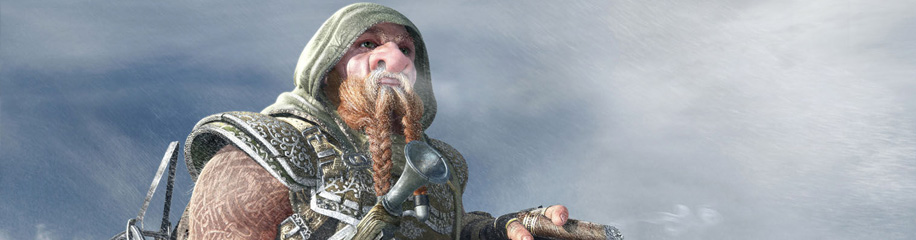
“Rifleman” by Robin Benes
枪手制作
原文来自:http://www.3dtutorials.com/
作者: Robin Benes
翻译: KanyaYan
有问题可以参与答疑
Hi, my name is Robin Benes and my internet nickname is Tes. In this article, I would like to present to you the process of making my picture “Rifleman”.
嗨!我的名字叫Robin Benes,我们网名叫Tes。在这篇文章里我会呈现给大家我的“枪手”的制作过程。
(admin’s note: Robin’s “Rifleman” was awarded with CG Choice Gallery on cgtalk.com)
I will show you how I proceeded with the modelling, texturing,postproduction.
我会给大家展示下我是如何模型、贴图和后期制作的。
The most inspiring thing for me is art by Blizzard entertainment and becouse I’m a big fan of Warcraft i have started work on “my” Rifleman.
最吸引我的是暴雪的技术,而且我是魔兽的超级粉丝,现在就开始我们“枪手”制作。
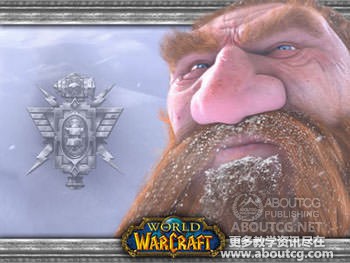
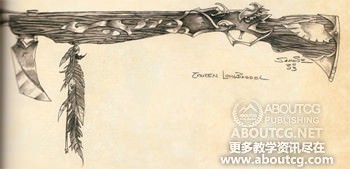
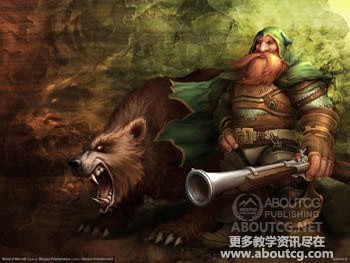
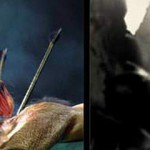
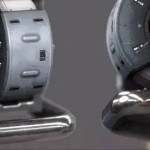
Some reference images:
这些是参考图:

Software used: 3DsMAX,Photoshop,Zbrush,Brazil R/S
使用的软件:3DsMAX,Photoshop,Zbrush,Brazil R/S
This was my plan how to work:
1.)get reference images
2.)character modelling
3.)unwrapping
4.)texturing + shader testing
5.)adding details with Zbrush for displacement maps
6.)rigging and posing
7.)camera placement,lighting and rendering
8.)postproduction
1.)收集参考图
2.)角色模型
3.)UV拆分
4.)贴图 + shader 测试
5.)用Zbrush制作displacement maps增加细节
6.)绑定和姿势
7.)摄象机的摆放、灯光和渲染
8.)后期
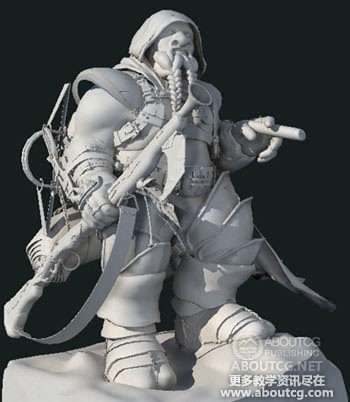
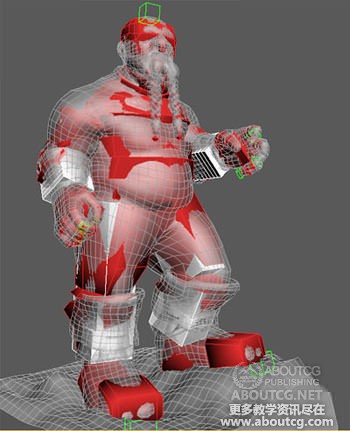
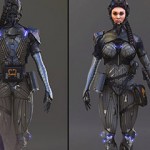
CHARACTER MODELLING
角色模型
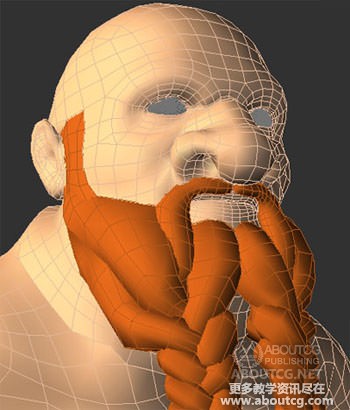
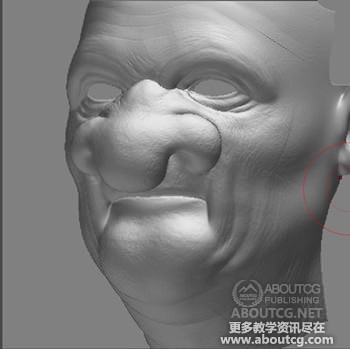
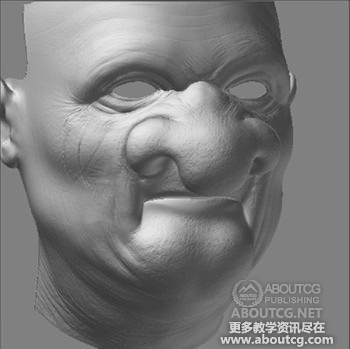
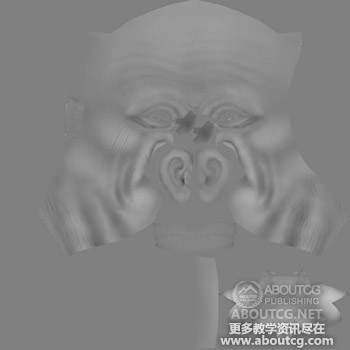
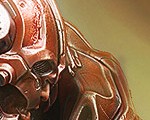
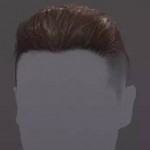
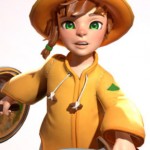
Head modelling:
I’ve started with head – i think that it’s the most important part of every character.Everytime I try to keep my polycage fairly simple and lowpoly, then export it into zbrush as .obj format and do a lot of tweaking and then import it back in Max.
头部模型:
我开始制作头部,我想这是最重要的部分。每次我都尽量保持我的模型简单和低面数,然后就以.obj格式输出到ZBrush里制作一些皱纹后再导入Max里。
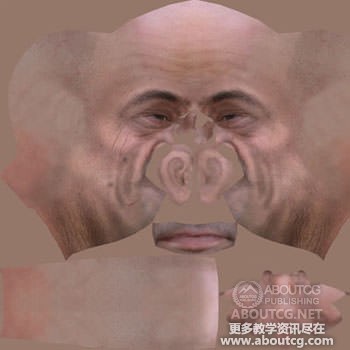
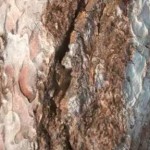
textures:
resource photos for my textures from http://refer.ccbill.com/cgi-bin/clicks.cgi?CA=923154-0000&PA=1485670
贴图:
我的贴图资源照片
http://refer.ccbill.com/cgi-bin/clicks.cgi?CA=923154-0000&PA=1485670

for head i did 4096*4096px textures
头部贴图是4096*4096的分辨率


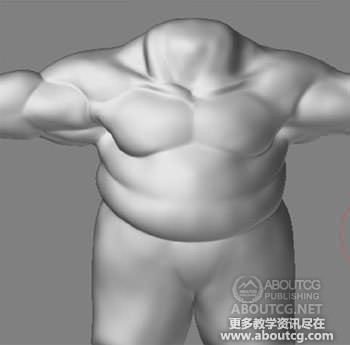
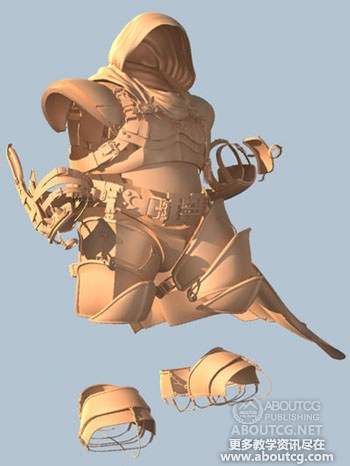
Body modelling :
it is same like with the head – do a low poly model with right mesh topology for good rigging and export it to Zbrush,add details,calculate displacement maps and export it back to max with 1 divide-to keep some basic mesh details done with Zbrush.I didn′t any great details for the body,becouse the armor covers almost everything.
人体模型:
和头部一样,做了右半个容易绑定的低级模型并导出到ZBrush里增加细节,烘焙displacement maps后再将带有基础细节的1级模型导回到Max里。我没在身体上加太多细节,因为盔甲将会覆盖在上面。
textures:
because whole body is on only one 4096*4096px texture i used 5 different mask textures for masking shaders – skin,fabric,metals,leather
On the body were used 14 textures – by 2048*2048 to 4096*4096
贴图:
因为整个人体只有一张4096*4096的贴图,我用了5张不同的mask textures做masking shaders,皮肤、布料、金属和皮革
身体上一共用了14张贴图,有2048*2048 有4096*4096
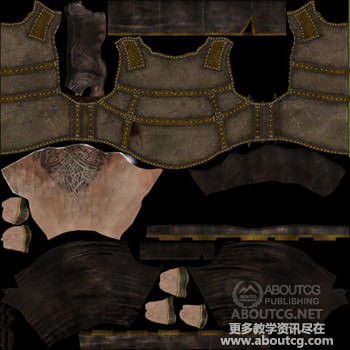
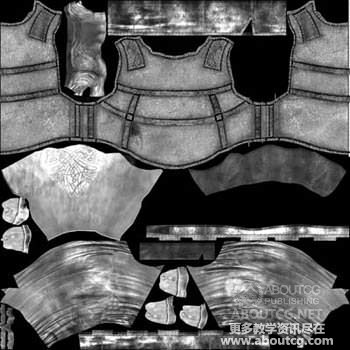


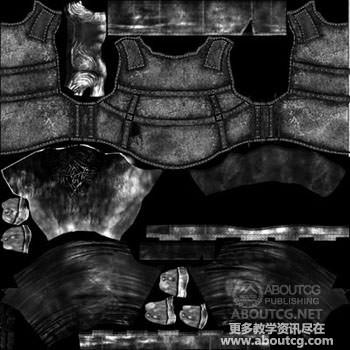
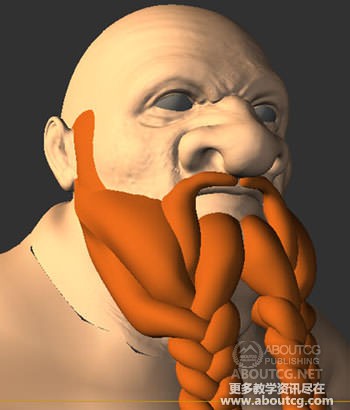
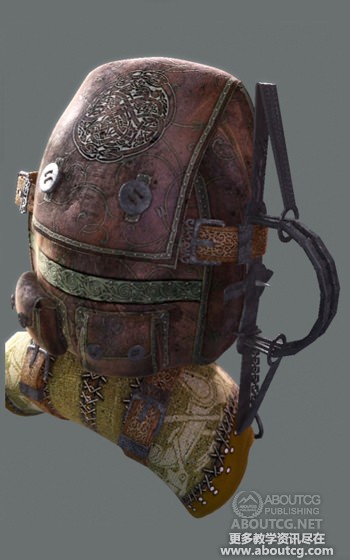
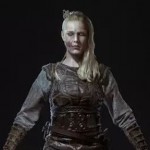
Armor:
armor was the biggest and the most important part of the character.In the original artwork by Blizzard is the armor “simply” and looks cheap.I liked to make it like some rare and extra expensive stuff.
盔甲:
盔甲是最大且最重要的一部分。在暴雪的原始图里看到盔甲比较简单且廉价的。我喜欢让它珍贵华丽点。
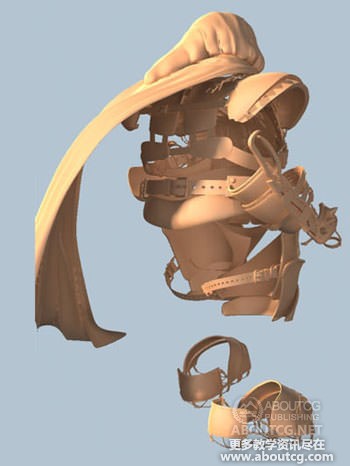
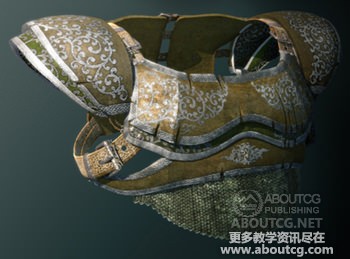

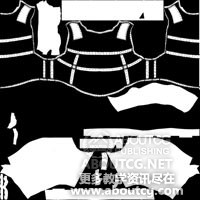
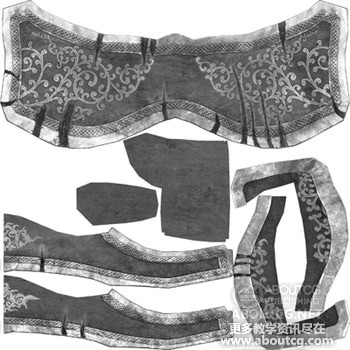
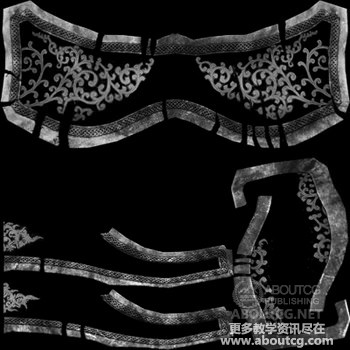
Textures:
because the armor contains wood and steel ornaments i used 2 mask textures for masking shaders.On the armor
were used 41 textures – 1600*1600 px or 2048*2048 px
贴图:
因为盔甲内含有木材和钢铁装饰,我用了2张mask textures做masking shaders。在盔甲上用了41张贴图,1600*1600 px 或者 2048*2048 px


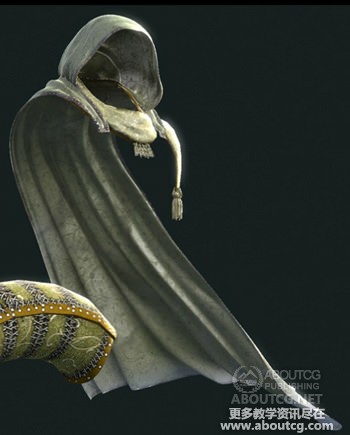
Accesories:
rifle,baggage,cape,bear trap,knifes,bullet belts / not so important things,but gives good look to the character.
附件:
枪,行李,斗篷,熊,陷阱,小刀,弹带等重要东西,但这可以让角色看起来更有感觉。

Textures and Materials :
Texturing tips:
1.)Textures are the most important part of whole model – try to get the best and biggest textures
2.)Bake your model shadows into a lightmap – really usefull in Photoshop
3.)Try to paint as big textures as your computer can handle – you can make them smaller everytime.
4.)If you are doing characters – on http://refer.ccbill.com/cgi-bin/clicks.cgi?CA=923154-0000&PA=1485670 – the biggest and best database of textures for characters – you will get the best
贴图和材质:
贴图信息:
1.)贴图是整个模型最重要的一部分,尽量画的细致和大些
2.)烘焙出模型的阴影做出lightmap,这个在Photoshop里相当有用
3.)尽量在你机器等承受最大的情况下画大贴图,你可以每次缩小他们
4.)如果你做角色,在这里http://refer.ccbill.com/cgi-bin/clicks.cgi?CA=923154-0000&PA=1485670有角色最大最好的贴图,你可以得到最好的
Materials:
I used for everything Brazil advanced shaders -standard,skin and velvet.For steel materials i used Simbiont shaders – they are free and really great
材质:
我用了Brazil的shaders,标准的,皮肤的,和丝绒的。钢铁材质我用了Simbiont shaders,他们免费而且好用
Zbrush tips:
Things that you need to keep in mind before exporting from MAX are :
1. Try to make you model all quads – no triangles and Ngones – they do a really big mess in zbrush
2. No holes in your models.
3. All the uvs must be in in the borders of UV editor window – not out!.
4. There should be no overlapping in the UV’s.
5. Reset Xform
ZBrush信息:
你要在导出MAX前做好心理准备:
1.尽量把你的模型都是四边形的,不要有更多边形和三角形,它们在ZBrush造成杂乱
2.模型不要有洞
3.UV必须在UV框内,不要出去
4.UV不要有重叠
5.重置法线
Export the *.obj right – it’s nothing worse than finished and detailed model with wrong exported mapping.
正确导出.obj,没有错误且细节没有映射
Rigging and posing:
For rigging and posing i used standart Character studio biped with skin modifier.There are much more powerfull plugins for
animation like C.A.T. system.In MAX8 is really good skin modifier with really great tools.
绑定和姿势:
我使用了标准的带蒙皮的角色绑定和姿势。有很多很强的动作plugins如C.A.T系统。在MAX8里很好的蒙皮工具。
I do everytime for skinning short 10 frames long animations of bending legs,arms and other,becouse you can better see what needs to be repaired.
每次蒙皮时我在弯曲的腿,手臂等长的地方加分了10段,因为你可以更好的看到哪里需要修理。
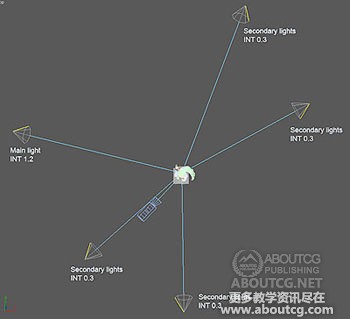
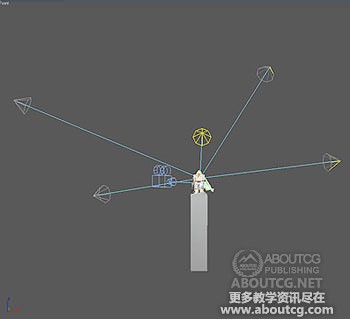
Camera placement,lighting and rendering:
it′s together with lighting the most important thing.If lighting or camera is bad ,the image is automatically bad and all your work goes to hell – So pay few hours in ligthing and camera test – you have nothing to loose.
For my rifleman scene i used 5 brazil spots and a HDRmap.
摄象机摆放,灯光和渲染:
灯光是相当重要的。如果灯光或者摄象机不好,角色形象当然也不好,而且你的所有工作都白费了,所以多花点时间测试灯光和摄象机,你不能放松.
Rendering:
the worst part for me-25 hours of waiting.Now i know that my computer is really old for scenes like my Rifleman.
渲染:
对我最坏的部分是25小时的等待。现在我知道我的机器像我的“枪手”很老了。
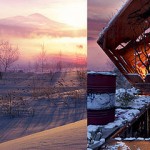
Postproduction:
After those 25 hours i reached to the rendered image.Finally.
后期:
最后,在25小时后我得到了张渲染图。

spent some time searching on the Internet for nice skies and mountains.
花了一些时间在网上找了一些不错的天空和山的图。
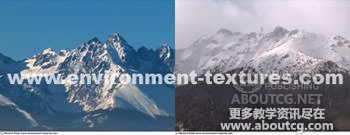
Bigger part contains textures from http://refer.ccbill.com/cgi-bin/clicks.cgi?CA=923154-0000&PA=1485670&HTML=http://www.environment-textures.com.The final background is a composition of about 20 different pictures.
After about 20 hours of work in Photoshop i reached to final image composition with mountains,sky,flying snow,color correction.
在http://refer.ccbill.com/cgi-bin/clicks.cgi?CA=923154-0000&PA=1485670&HTML=http://www.environment-textures.com有大的图。最终的背景是一个有20个不同图组合起来的。
Photoshop工作了20小时后我得到了最终的合成群山、天空和飞雪图,并加以颜色校正。
Hope I’ve explained the way for creating this image. Thank you for the care and patience. Hope that it’s usefull and helpfull for all.
希望我把这张图的制作都说清楚了。谢谢你认真和耐心地看完。希望有用。


推荐课程


推荐教程

0回复枪手制作流程教学"