
本教学为翻译教学,转载请注明来自aboutcg.net,以及注明翻译者
原教学出自CGArena网站,原始链接如下:
http://www.cgarena.com/freestuff/tut…/lostcity.html
作者: Jean-Francois Liesenborghs
邮件: jfliesenborghs@hotmail.com
翻译: CWWS (aboutcg.net)
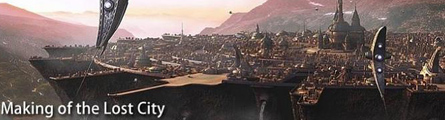
Making of the Lost City
失落的城市的制作流程
Introduction – For this making of, I will try to show you the different steps used to create the final image. My goal with this creation was to put together all the accumulated experience and tricks that I gather to create a landscape city.
简介-在这个流程教学里,我会试着向你展示制作最终这幅图像的不同的步骤,我的目标是把我通过制作这个城市场景的所有的经验和技巧都放在一起展示给你看。

used the free plug-in Greeble to generate the basic polygons of the city. This plug-in is very useful in creating the random polygons.
我使用免费的插件Greeble来生成基本的城市多边形,当需要创建随机的多边形的时候,这个插件是非常有用的。
First of all I have to define the global shape of the city, by just create a cylinder with sufficient cap segments (around 10 or 15) and kept only the top. I have removed some polygons to create a non regular area like this:
首先我需要定义城市的整体外形,通过建立一个有足够分段数(大概是10到15)的圆柱体,然后只保留顶部。我通过去处一些多边形来创建一个不均匀的区域,如下图所示。

Then I selected the polygons where I want to show the buildings. With that selection I have used the Greeble plugin to generate random buildings.
然后我选择想在上面显示建筑物的多边形。然后在这些选择的多边形上面应用Greeble插件来生成随机的建筑外形。


So we have this, it’s look like a magic ;-):
然后我们得到了这样的结果,看起来就像是魔法一样:)


Then I have added some buildings created from the scratch:
然后我从零开始增加一些建筑。

In the center I placed the structure of my choice (later replaced with the another one):
在城市中心,我放了一个我个人选择的结构物,(晚些时候又换成另外一个了)

Then I have to create the cover streets, by simply selecting the edges from the cylinder at the beginning and create shapes (spline) from it. By just selecting the render option of the spline, the splines are render as polygons. I made the copy of these spline and on that I applied the lattice modifier to create the structure around the tunnels.
然后我必须创建覆盖的街道,通过简单地选择一开始创建的基本多边形的边缘,然后以其为基础创建线条物体,并且在渲染选项中选择将线条像多边形一样渲染的特性。我复制了这些线条,然后忘我给它们赋予网格变形器(lattice modifier)来创建一些围绕管道的结构。

Now all the elements combined:
现在所有的元素都组合在一起了:


For the basement of the town, I extruded the border of the cylinder from the first step multiple times and add a Taper modifier to make it more rounded, then I defined the mapping for it.
关于塔的底部支撑物,我对一开始第一步的圆柱体边缘做了好几次挤出操作,并增加了一个斜化调整器(Taper modifier)使其更加圆化,然后我给它定义了贴图。


For the rock look of the basement I used the map of Planet Mars. I retouched in Photoshop, just put in Gray and play with brightness & contrast to create the displacement and bump map.
对于地基岩石状的外观,我使用了火星的贴图,我在Photoshop里面修改它,然后只是通过把它变成黑白的并且调节亮度和对比度来创建相关的置换贴图和凹凸贴图。

For the displacement I used the VrayDisplace modifier, which is interesting cause it is a modifier not a material. So it is always present when you change the material from normal to occlusion.
对于置换效果,我使用了Vray置换调整器(VrayDisplace modifier),有意思的地方是它是一个调整器,而不是一个材质,因此当你把材质从普通的转换为遮挡材质时,置换效果是始终存在的。


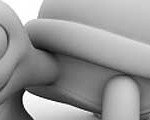
So the different steps are:
因此不同的步骤是:(下图:普通材质,材质+置换,遮挡,材质+置换+遮挡)

So the global image until now:
因此整体的图像现在看起来这样:

I have added landing area:
我开始增加停机坪


I have modeled other buildings too (but not used all of them in the final image)
我还制作了其他的建筑(不过在最终的图像里面,一个也没有用到他们)
A Simple House
一个简单的屋子


I textured the Greeble generation by simply using an UVW Map defined on face, so each face receive my texture. One very important point is that you can define multiple id separated by comma in Greeble material by comma
我仅仅是使用最简单的UVW Map表面定义方式来给Greeble插件的生成物赋予贴图,因此每一个面都能被赋予我的贴图。有一点非常重要就是你可以给Greeble 的材质定义多个材质ID,以便赋予不同的材质
At random the Greeble polygons receive different id’s so you can create a cosmopolite texture town.
Greeble插件生成的多边形根据材质编号随机接受材质,因此你可以创建一个复合材质的小镇。


All Textured…
贴上所有贴图的效果

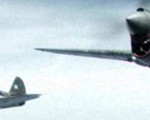
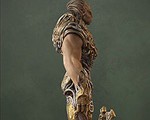
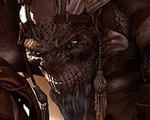
For the foreground I have created a Spaceship, it is really similar to the one done by Andreas Rochas, it was not my goal but these shapes must be somewhere in my head so all the copyrights must go to the Andreas ;-)):
对于前景,我创建了一个飞船,这个飞船和Andreas Rochas创建的那个非常的相似,那本来不是我的初衷,但这些形状一定在我头脑的某些地方,但是版权要归属于Andreas ;-)):

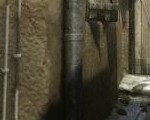
Bigger view on the details that was done only with Normal Bump and not modeled:
更大视图里面的细节只是用发现凹凸贴图来制作的,没有建模。

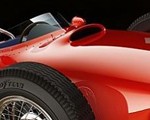
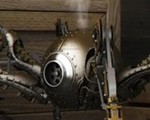
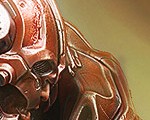
Here are some detailed images:
这里是一些细节的图片


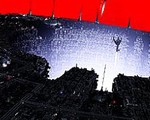
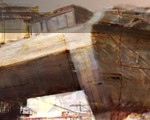
In the final image I rendered the image with Vray_zdepth. I added the background in photoshop by merging different photos and adjust the tones:
最终的图像我是使用Vray_zdepth来渲染的,我在photoshop里面通过合并不同的照片来制作一个背景,并调整了色调。


推荐相关中文教程

UNREAL ENGINE 4虚幻引擎美术设计师室内场景制作生存手册
在本教学中,黄博文老师将带你学习制作UE4虚幻引擎场景所需要的所有知识和完整流程,无论是你三维新手还是老鸟,通过学习都可以快速掌握UE4场景制作技能。3DSMAX动力学特效实战教学
本套教学将通过24章实例教学,来向你详细讲解3DSMAX的动力学特效在电视包装与广告中的应用。VUE自然景观实战案例教程
本套教学是由MG录制。讲解分析了vue的海水材质问题,以及全中国首次以案例的形式讲解vue与maya的结合运用,如何将maya的角色动画导入到vue场景文件中做遮罩并且渲染。3DSMAX国外粒子案例效果解析
本教学通过27个实战案例,教您如何用3DSMAX结合ParticleFlow本身以及扩展的ParticleFlow Box 1、Box 2、Box 3、功能包,结合Vray渲染器,来制作流行的广告和电视包装中的粒子特效效果。无论是常见的粒子聚合,分散,动态粒子替换,粒子矩阵,粒子动力学,本套教学都有相应的案例。3DSMAX国外流体案例效果解析
本教学通过20个实战案例,教您如何用3DSMAX结合Realflow,FumeFX, ParticleFlow插件,来制作流行的广告和电视包装中的流体效果。无论是常见的液体,烟雾,流体碰撞,沙粒变化,水墨表现,本套教学都有相应的案例。2.5D商业游戏场景制作教程 进阶篇
在本教程中,Freeyy老师将从零开始,向你讲解如何根据确定的主题进行前期准备,随后建模,绘制贴图,制作材质,最后再进行细节调整,完成一个商业游戏级别的2.5D场景画面。Mentalray for max实战教程
本教程共包含超过42小时以上的视频教学内容,共18章 132课,通过大量实例,详细讲解了3ds Max平台下的Mental Ray1渲染器的使用基础和实战方法。是一部非常完整详细的3dsMax版的Mental Ray渲染器的教学.网游角色制作女精灵实战教学
本教学以一个AAA级网游女精灵角色为案例,向您展示如何完成她的模型,UV,和贴图绘制。教学使用的软件主要是3ds max和 bodypaint, 其中建模和UV使用3ds max完成,贴图绘制在bodypaint和 PS中完成。


推荐课程


推荐教程

0回复如何制作失落的城市"