
本教学为翻译教学,转载请注明来自aboutcg.net,以及注明翻译者
原文链接:
http://www.3dtotal.com/team/Tutorial…allroad_01.php
作者信息:
Neil Maccormack
www.bearfootfilms.com
Email: neil@bearfootfilms.com
翻译:StoneBird(aboutcg.net)转载请注明出处。
关于译者:

Making of ‘All Road’ by Neil Maccormack

Originally I knew that I wanted to design and model a futuristic vehicle of some description without knowing exactly the type..
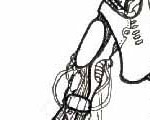
Using Lightwave 3d Modeller I started building basic shapes from primitives and
Began to model a form and shape that I liked..
最初我想做一个有点未来色彩的载具,但是没有什么明确的想法。于是我从最基本的立体图形开始,建造一个我喜欢的载具外形。

I still hadn’t decided at this point if this was to be a hover bike or land cruiser kind of object but had already modeled it like this with a view to where the engine would go and the foot pedals also
做到上图这个程度我还是不确定是应该做一个气垫摩托还是一个陆地巡洋舰。但是,既然做成了这个样子,我就能确定引擎和脚蹬子该放在哪儿了。

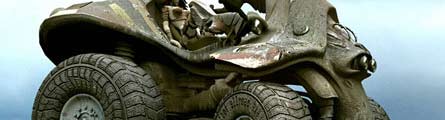
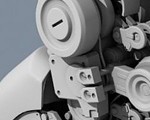
I began adding more details to the engine and suspension trying to keep it at least looking like a real world object.. by now I had decided it would be a 4 x4 type of car with rugged all road wheels and big chunky tires..
我开始为引擎和悬挂增加更多的细节,试着让这东西看起来像是真实存在的物体。就在这期间我决定把它做成一个有着结实轮毂和巨厚轮胎的4X4全地形越野车……

By now I had added the seat and steering column and tires .. I was using basic modeling tools such as extrudes and bevels to achieve the chunky look , I extended the wheel arches to make them more aggressive and trying to keep a 4×4 kind of look..
现在我把座椅、操控杆、轮胎什么的都加上去了。我用了一些基本的建模工具,比如extrude和bevel,打造轮胎的厚实感。我把轮毂扩大了,让它更具有侵略感,同时保持住模型“4X4越野车”的外观。
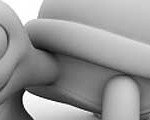
I added the modeled female, which was an older model I decided to reuse for this project..
我又添了个女子的模型。这模型有年头了,而我想在这个项目上重新启用它。
I tried different poses for her with the 4×4 , personally I actually preferred her Slumped over the tire in a kinda cool way but decided against it for the final render.. here are some examples of the different poses I used..
我尝试给她摆不同的造型。我个人比较喜欢她酷酷地一屁股坐在轮胎上的造型,但是在最终渲染的时候放弃了。下面是一些我尝试过的造型


I then started the basic texturing..
I knew that the tires would be hardest part so I designed some UV maps and applied some
Prodecural layers to add to whole effect.
之后我开始材质的工作。
我知道轮胎是最难调整的一部分,所以我制作了一些UV贴图,并为之加上了Procedual贴图来制作轮胎的效果。

The rest of the texturing was image maps of metal textures downloaded from the web and
Some basic procedural layers to break up the UV seams and add some dirt layers..
剩下的步骤就是应用网上找来的钢铁材质贴图。同时我还设置了一些基本的Procedual贴图,来模糊UV贴图的接缝处,还为整个材质增加了一点满是污泥的沧桑感……


For the final render I used a basic scanned image to composite onto..
Again I wanted to use a real world image rather than a fantasy landscape to add believability to the shot so I chose an ambient image without much direct lighting ..
最终渲染的时候我用了一张扫描下来的图片进行合成。我希望用一张真实的影像,而不是什么奇妙的景观,来让最终结果看起来更可信。所以我选用了环绕图片,而且没用多少直接光源。
The lighting was created to generate diffuse soft shadows using arrays of area lights matching the image and to not detract to much from the main subject of the render..
我用了区域光阵列来模拟漫射光产生的柔和阴影,同时这种方法还不会明显破环渲染效果。


Here is also a second version that I made using basically the same techniques and recolored slightly in photoshop
下面是我用同样的方法制作的另一个版本。在PS里面稍微调了一下颜色。


推荐课程


推荐教程

0回复Making of ‘All Road’"