
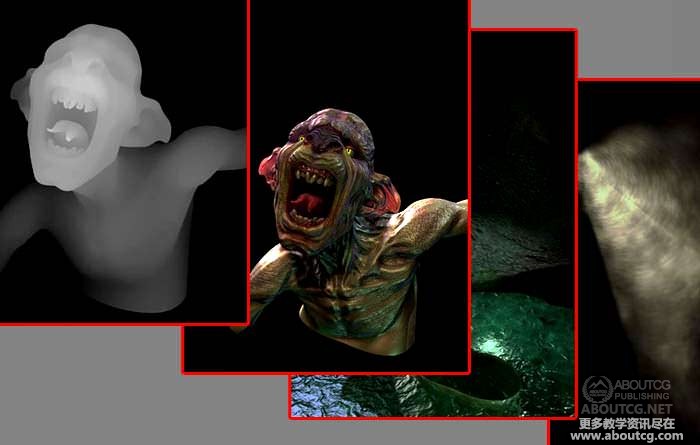
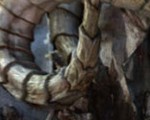
“Wounded ork ” by Dorian Bushi
负伤的ork制作流程教学
原文来自:http://www.3dtutorials.com/
作者: Dorian Bushi
翻译: KanyaYan
有问题可以参与答疑
As this is a making of article, I’m not gona cover every step of the creation process of this image. I assume you have some basic knowledge in 3D in general, and basic to intermediate level for all the 3ds max users.
由于这是一个制作流程的文章,我就不贴每一个步骤的创建过程图了。我假定你有一定的3D基本知识,并且达到3ds Max中级的使用用户。
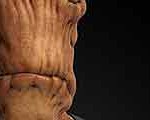
Different from my past creations, where I prepare a concept sketch prior to the cg work, I jumped stright to the computer and start modeling it as fast as I could. I don’t know, the idea came to me as a flashlight and I didn’t want to lost that first impression. I was angry to sculp that fantastic creature. That was my first goal, to frame that wounded monster in mesh. I got started with a simple piece of geometry, and gradually building up volume and form.
不同于过去的创作,我在CG的制作之前准备了一份概念素描,我直接在计算机里尽量快地开始建模。我不知道想法像手电筒一样地来找到了我,我不想丢掉了第一制作印象。我不太喜欢雕塑梦幻般的动物。这是我的第一次尝试,被关住的受伤怪物。我开始时有一个简单的多边形,并逐步增加面量和外型。
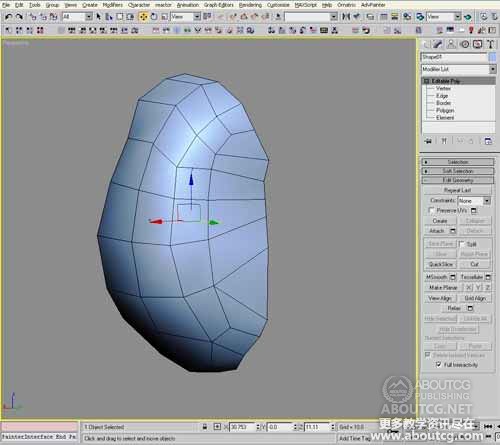
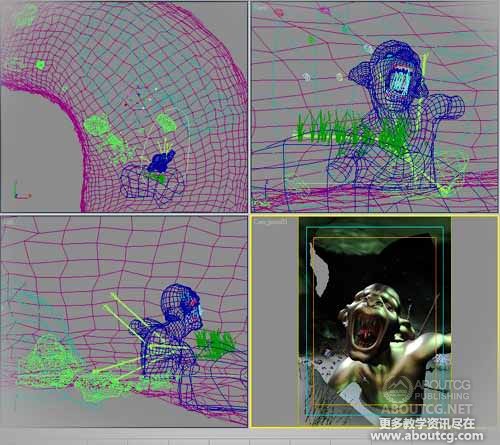
I tend to spend a lot of time focusing on the modeling flow, the way the surface is created, the way the edges tie together forming the necesary grid of mesh to help define the form better.
我倾向于花费大量的时间把重点放在模型上,模型表面的创建,边的形式必要的网格的四边形,以帮助确定的较好的外型 。
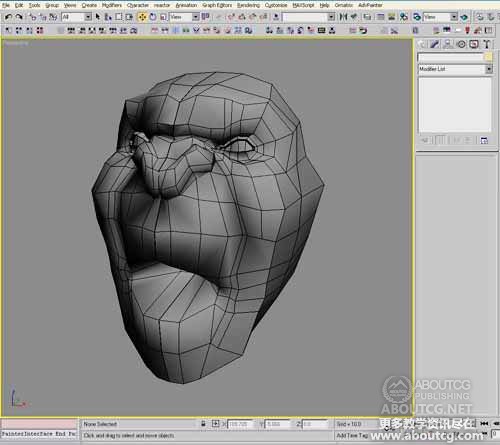
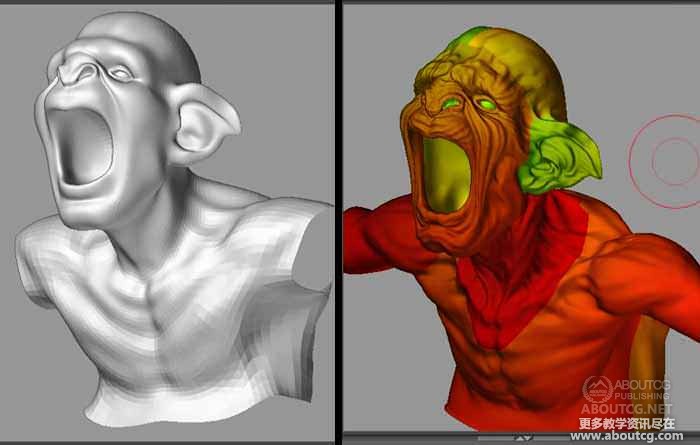
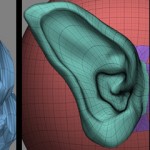
Ok, after modeling quite a rough shape of his head, I exported it to Zbrush. It is a great program and offers infinite ways and techniques for character artists. Because this is an early stage for the modeling, I’m using Zbrush only for shaping the head, playing with proportion and not for adding small details.
好了,头部造型是个相当粗糙形状,我输出到Zbrush 。这是一个伟大的软件,并提供无限的方法和技术给艺术家们。因为这是一个早期阶段的建模,我使用Zbrush只为塑造头,调整比例,而不是为了增加小细节。
Satisfied for the moment from Zbrush, I got back to max extending and building new geometry.
当对Zbrush的制作满意后,我回到max调节并建立新的多边形。

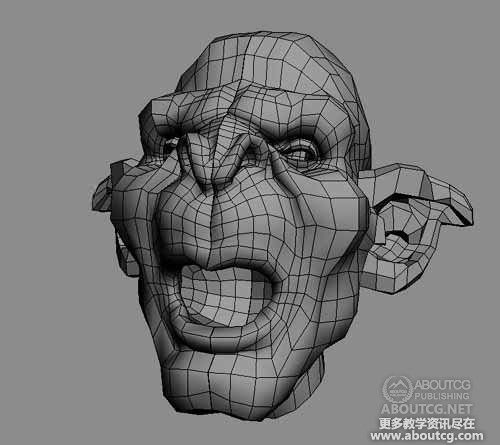
I’m trying to get the most of 3ds max robust polygon toolset. After that point, back to Zbrush.
我使用3ds max强大的多边形工具。之后再回到Zbrush 。
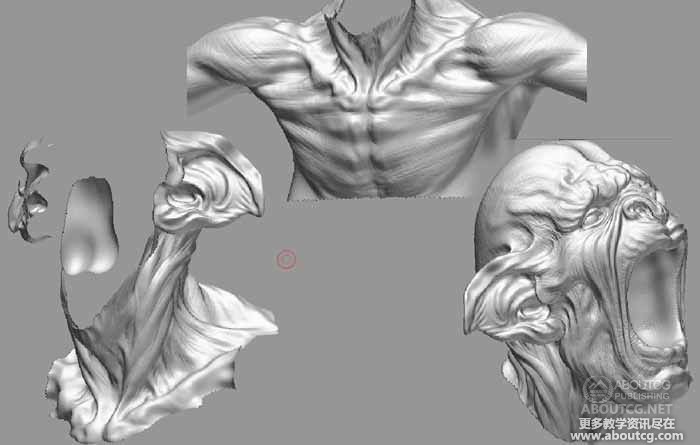
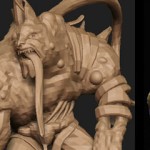
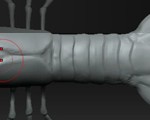
It’s amazing how quickly you can carve a lot of detail, with very few tools like draw and move in Zbrush. Going this way, I’ve modeled the body. Starting from a simple shape turning to poly and adding detail with only these simple tools.
使用ZBrush几个工具,如draw和move笔刷就能很快地可以制作出很多细节。就这样,我建出了身体模型。用这些简单的工具,从一个简单的形状开始添加细节。
Back in max I builded the gums and teeth.
再回到max里制作牙龈和牙齿。

The tounge.
舌头。

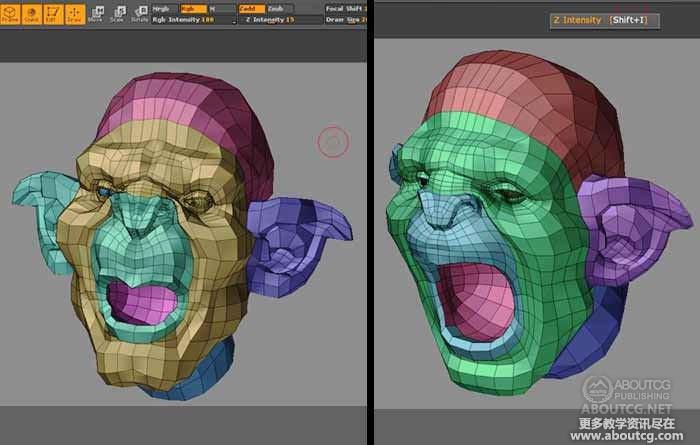
I’m almost done with modeling and it’s time to do some Uv work!… I added Unwrap UVW modifier and started pulling and pushing the UV’s, trying to make them as flat as possible. I also used pelt techniques to flaten and adjust the Uv’s in order to avoid texture stretching .
我总是在做建模的时间同时分好它的UV ! …我还增加Unwrap UVW,并开始拉动和推动UV点,尽量使它们平整 。我还用pelt技术平整和调整UV点,以避免纹理拉伸。

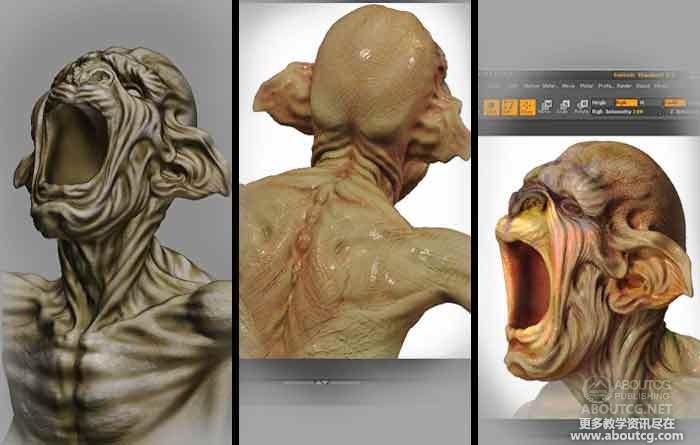
Bringing the model back to Zbrush, I started painting some color for the texture. At the end I exported displacement and normal maps from Zbrush, to use them later on the rendering proces.
再把模型传到Zbrush ,我开始绘制一些颜色纹理。最后,我在ZBrush里输出displacement和normal贴图 ,然后再渲染。
Time for skining.
制作蒙皮。
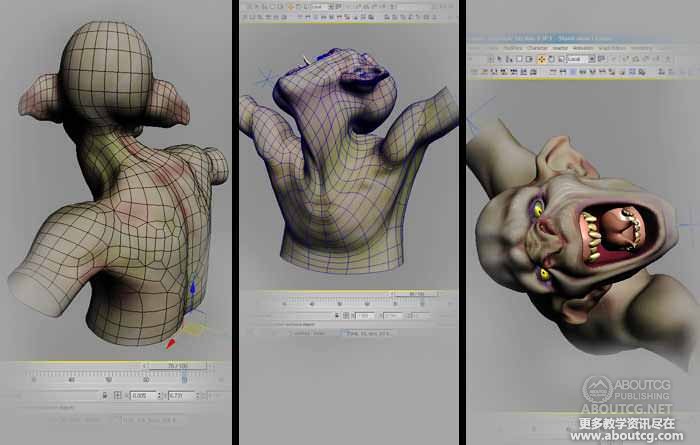
I built a freely simple skeleton rig and added some simple controls for the limbs, head, mouth.
我建立了一个简单的skeleton rig并在四肢、头部和嘴上增加一些简单的控制。

This way I can pose it.
这是我摆的一个姿势。
After that, I worked with the enviroment, building the cave first , and than adding rocks, grass, and other tiny details.
在此之后,我开始背景,先创建了个洞穴,增加岩石、草和其他小的细节。
I’ve created a spot light. Added a Volume light to Atmospheres & Effects rollout.
我创建了一个聚光灯。增加了一个体积光模拟大气效果。
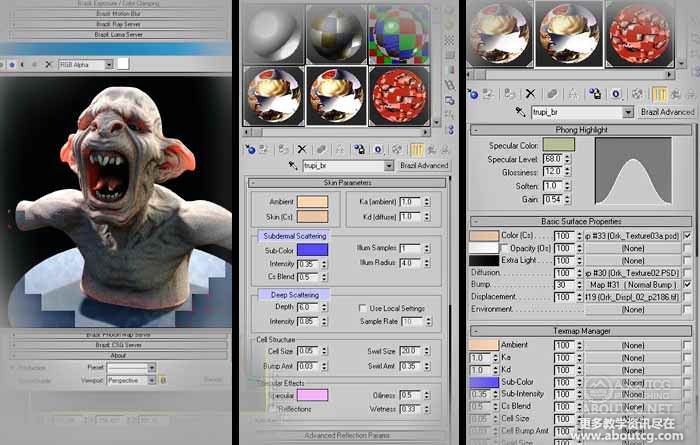
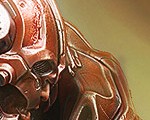
The shaders played very important role in what I was trying to achive for the skin look. Using Brazil rendering system gives me more freedom to play with shaders because it has more channels to fed the texture in. I used brazil skin material for achieving that soft and warm look I was looking for. I turned on Global illuminations and enviroment lightening. Played with Brazil shaders to get the soft and translucent effect I was looking for the skin. Here is a test I’ve done using the elements mentioned before,(volume light & translucent effect).
我尽力让着色发挥非常重要的作用,以实现对真实皮肤的感觉。使用巴西渲染器使我更自如地发挥Shaders,因为它有更多准备好的纹理。我用巴西的皮肤材质来达到我想要的柔软温暖的皮肤。我打开Global illuminations和enviroment lightening。用巴西的Shaders获得我想要的柔软、半透明的效果。这是我之前提到的使用elements做的一个测试(体积光,半透明的效果)。
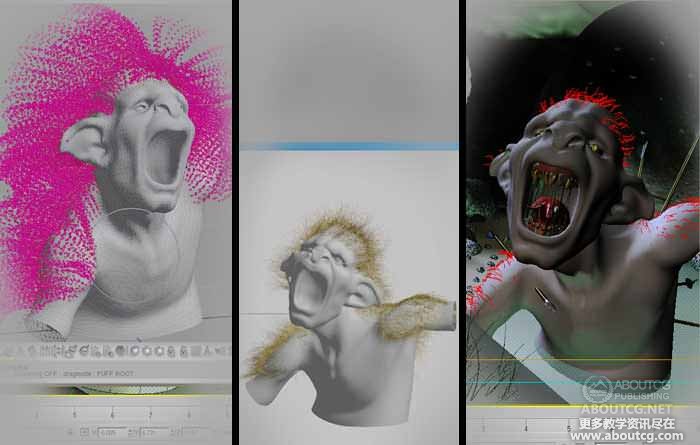
The sss shader combined with normal bumps, enhanced the look of the character even further. It was easy to add hair & fur to my character, using the new intuitive hair system in 3ds max. Combig and styling the hair, bringed to a new level the look of the ork.
在SSS Shader加上normal凹凸,进一步增强了外观的质感。使用3ds Max新的毛发系统能很很容易地给我的角色添加的头发及毛皮。 调整毛发并给ork一个新的视角。
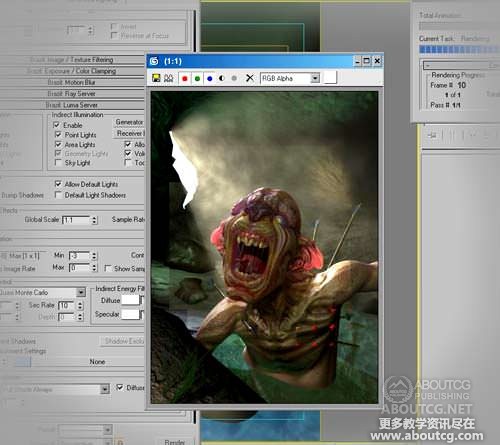
I added some more spots and omni lights in the scene. With all the lights setup in the scene I ensured that Global Illuination was turned on in the rendering panel. Checked once again all the shaders, the textures and the geometry, to verify that everything is all right.
我还有些聚光灯和全局灯在场景里。有了这些灯后我确认了Global Illuination是打开的。再次检查所有Shaders、贴图和模型,以确认所有的一切准备就绪。
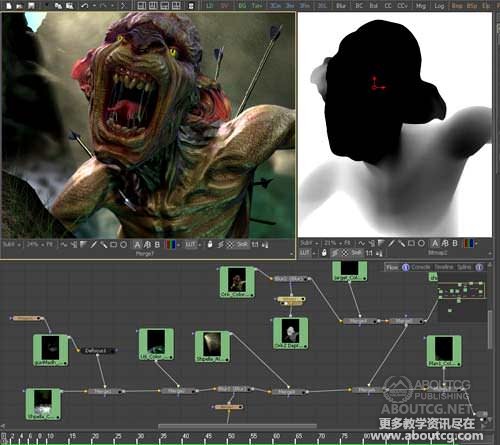
The scene is almost complete now, and it’s time to do planing for rendering it in different passes.
现在制作几乎完成了,现在就可以准备渲染不同的图层了。
Here are some of the main passes.
这是一些主要的图层。
I used Digital Fusion to blend all the passes together into a sigle piece. Also added some lens blur and defocus effect on the main character and the scene itself.
我用Digital Fusion把所有图层融合起来的。 并给角色而后整个场景增加了一些镜片模糊和散焦透镜效应。
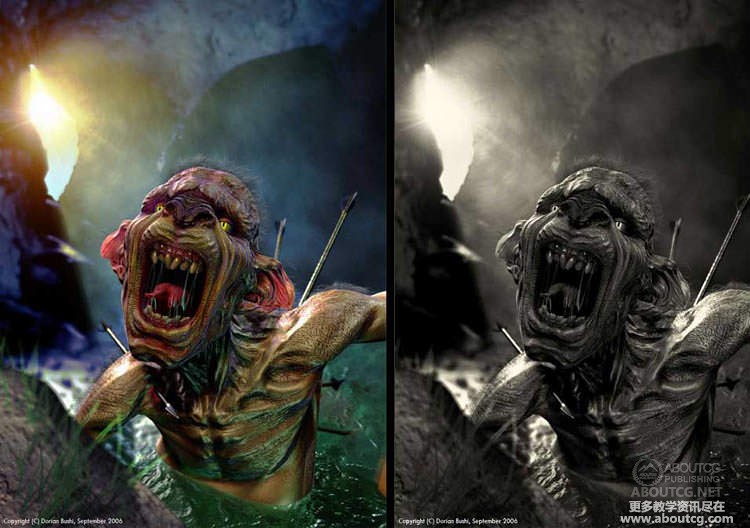
Here is the final image in colors, but i like a lot the black & white version too. I think it is more dramatic in monochrome colors.
这是最终的效果,但我还是更喜欢黑白多点。我认为单色更有声有色。
Thank you for the care and patience. Hope to be useful.
谢谢您的关心和耐心。希望这些是有用的。


推荐相关中文教程

AboutCG Zbrush4R7高级机械建模实战教程
本套教学由我们两位强大的老师,《造型巨匠Zbrush》的作者田涛老师,和《Zbrush完全教学》的作者Purplesun老师一起打造,两位老师分别使用Zbrush4R7制作多个机械模型案例,难度由浅入深,对制作当中用到的功能命令一一讲解。并时时分享提高建模效率的宝贵经验。Zbrush 4R7新功能中文视频教学
zbrush4 r7将会是zbrush4版本的最后一次升级,下一个版本将会是zbrush5。本次更新进一步完善了zbrush的功能,首次提供了几乎全套的多边形建模命令,大部分硬表面对象的建模将不需要借助第三方软件。ZBRUSH全案例实战中文视频教学
本套视频教学以案例为主,通过11个完整的zbrush雕刻案例,由浅入深的带领大家掌握zbrush常用的雕刻流程和雕刻技巧,全套教学在25小时以上。ZBRUSH完全中文视频教学
ABOUTCG现在荣幸的向您推荐这款Zbrush4的完全商业教学:本套教学包含150个片段,共计30小时的内容,全面细致的介绍Zbrush的所有功能,无论你是初学者,进阶者。还是行业人士,本套教学都能为您提供一个思路,一个方案和一份竞争力。
推荐课程


推荐教程

不错正需要呢 谢谢