
三维现实主义:实用简单的工作流程
3D Realism: Practical & Easy Workflows
翻译:层层(本站翻译小组成员)
原文:http://jamiecardoso-mentalray.bl … easy-workflows.html

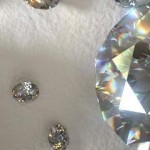
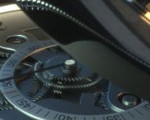
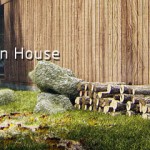
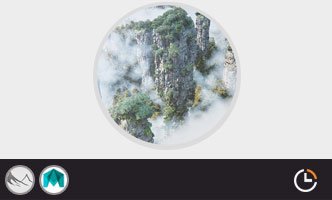
The above image is part of a project I have finished for a client recently.
The final files were produced in two versions: for mental ray and VRay.
However, the techniques described here can easily be implemented across a variety of 3d applications and rendering engines.
上面这张图是我最近为一个客户完成的一个项目的一部分。最后的文件有两个版本:mental ray和VRay渲染。
但是,这里所说到的技术适用于很多三维创作和渲染引擎。
The main brief was to create an image that could sell the space to potential clients.
These types of marketing images are quite popular within the professional visualisation industry.
As such, I took the usual path of following meticulously three main steps:
创作这些作品的首要任务就是让潜在客户能来购买空间。
这种商业用图(marketing images )在视觉产业中是很常见的。
我通常通过以下精细的三步来完成:
1-Pre-production: This vital preliminary step consisted in taking the brief from the client. In this brief,
they came up with their drawings and sketchy ideas.
I then took all the information on board; did some heavy R & D based on their original brief and presented them with a mood board
depicting my vision of the art direction.
This mood board led to another brainstorming session between me and the client,
which culminated into a final mood board that we both
liked (i.e. final collage).
1-前期制作:这重要的一步主要由客户来提供概要。概要主要包括图样和思路框架。
之后我将所有的信息贴到情绪板(mood board)上;在原有基础上进行扩展,并把经过我艺术化加工的作品展示在情绪板上。
通过情绪板我们进行又一轮的头脑风暴,形成我们都满意的最终版本。
It was vital for me to signoff this crucial stage of the project to prevent changing the course of the art direction at later stage,
and to ensure that we both had a clear idea of the final result.
这一步对我来说非常重要,可以避免接下来的工作方向产生大的变动,并且保证我和客户对最终的成品都有一个清晰的认知。
Production: Having gone through the pre-production process and considered some of the artistic and technical approaches available,
I began applying the shaders and textures. All shaders and textures were based on real photo references supplied by the
client and sourced by me during the R&D process. I have carefully ensured that the scene had interesting
reflections (i.e. plain and diffused); highlights from the sunlight and from artificial lights; direct and diffused shadows;
glossy highlights from materials (plain and diffused) and the correct bump values on materials.
2-中期制作:通过前期的准备以及艺术设计和技术测试,我开始制作阴影和材质。所有的阴影和材质都以客户提供的实际照片以及我在前期准备时搜集的材料为基础。我认真确认过场景里有明显的反射(例如平面反射和漫反射);来自于太阳光和人造光的高光,间接反射和漫反射的阴影,来自于材质的高光(平面反射和漫反射)以及材质表面适当的凹凸。

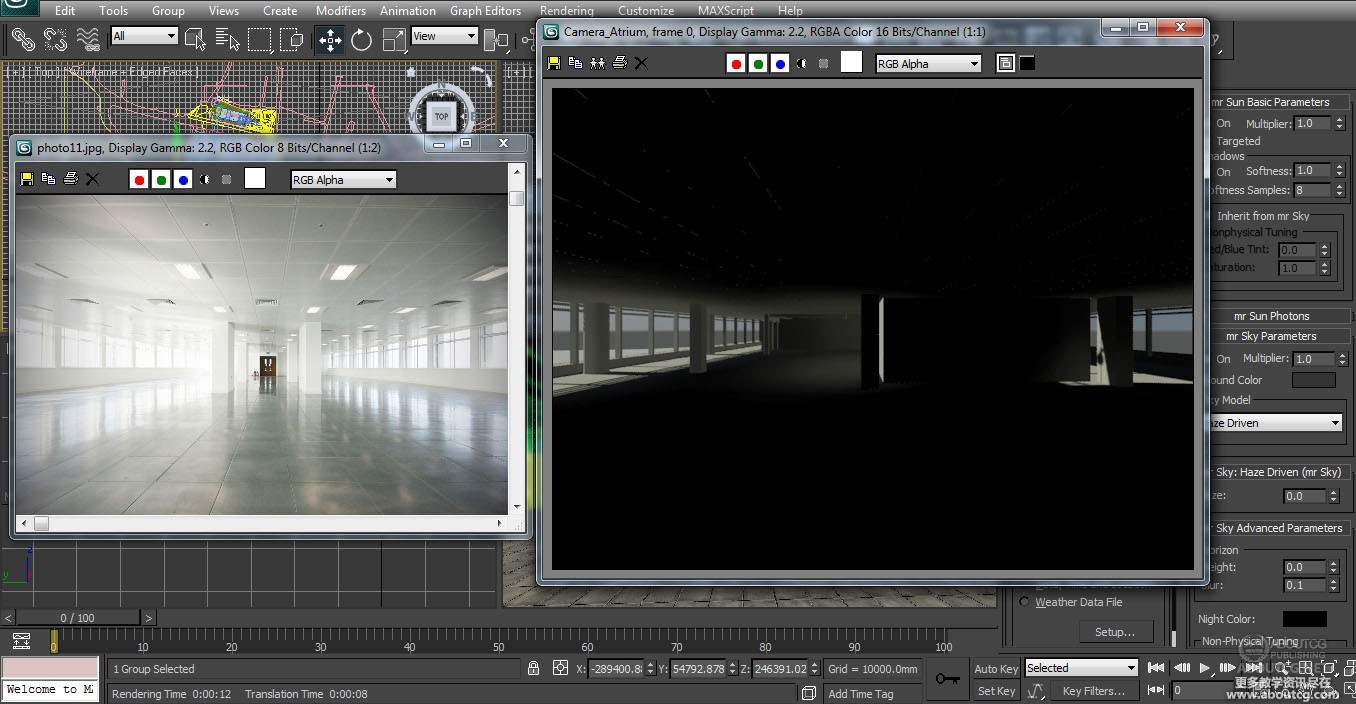
The following process was to begin lighting the scene carefully.
By that, I first introduced the daylight system to set the sunlight direction and its shadows in the scene. As guide
,I have used references from photos of the agreed mood board.
接下来是细致地为场景打光。
我首先在场景中设置天光的方向和阴影,用之前达成一致的情绪板上的照片作为参考。
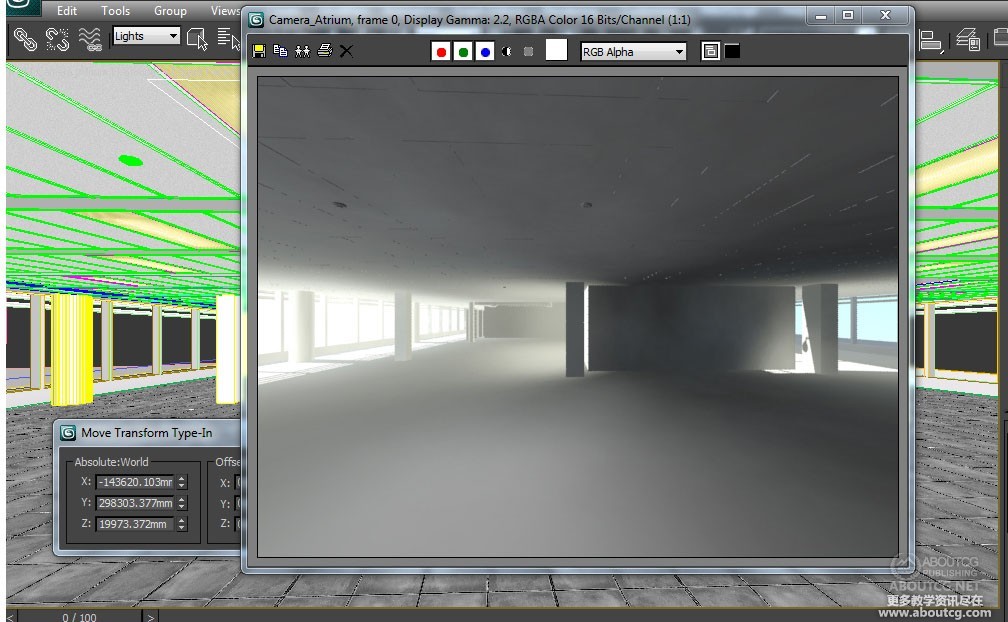
Next, I began adding the artificial ceiling lights. There was a quick test render of each artificial light created
(i.e. with a plain non reflective white OVERRIDE material).This was to prevent the scene from quickly becoming
“bleached out” with too many lights.
Each artificial light had soft shadows.
接下来,我开始添加天花板的灯光。每个灯光都会做简单的测试(例如用一个白色的无反射的OVERRIDE材质)。这可以避免场景因为灯光过多而曝光。
每个灯光都有柔和的阴影。
I had also ensured that, there was a clear definition between lit and dark areas in the scene,in order to create depth.
我还要确保场景中明暗分明,从而得到景深效果。
Once I was fairly satisfied with the overall lighting, I had disabled the material override for the final big size region renders.
当灯光令我满意的之后,我会去掉override材质渲染大图。
The final image Size was rendered at 4000×3000 pixels.
最后的大图是4000*3000像素。
I had produced the renders for mental ray & V-Ray.
下面是mental ray和V-Ray渲染出来的图像。

3-Post production: This process is arguably the most important stage towards signing off a project.
All previous stages and the technical decisions will culminate into this final process.
Effects such as vignetting, depth of field, glow/glare, grain, colour correction, etc, are often applied and tweaked in post.
Mostly due to these effects being under more scrutiny by clients.
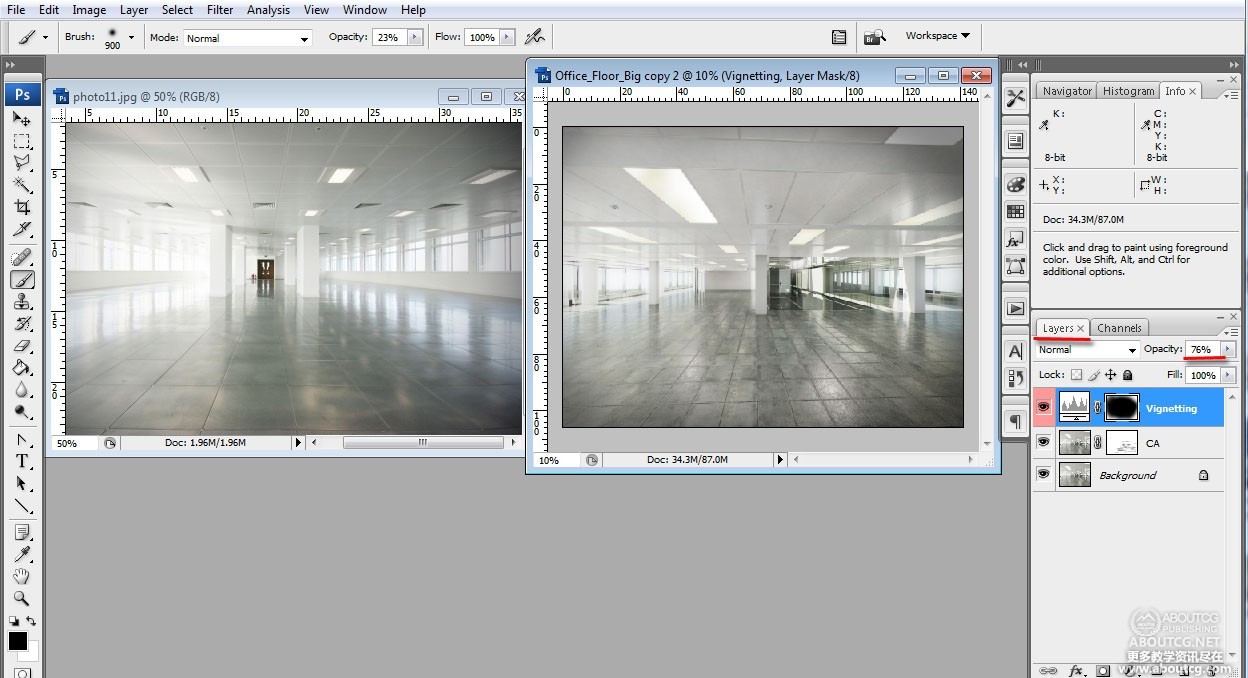
3-后期制作:这一步骤可以说是项目结束之前最关键的一步。之前所有的步骤和技术决策都将在最后一步中发挥作用。像渐晕、景深、辉光/闪耀、噪点、色彩校正等效果通常在后期调整。因为大多数情况下这些效果要在客户监督下完成。
While it’s possible to implement all these effects directly from 3Ds Max, applying these affects in post
increases the work efficiency when matching the photo reference closely. It will also provide more flexibility
to add or omit such effects if or when necessary.
虽然这些效果可以直接在3D Max里完成,但是后期处理的方法将使工作更高效,因为后期处理可以更灵活的增加或去除这些效果。
The above mentioned workflow allowed me to produce the final renders within the allocated time and budget,
while using different platforms and rendering engines to achieve one result.
以上提到的工作流程可以使我在预算时间内完成最终渲染,同时运用不同的平台和渲染引擎来得到同一结果。
For the next few weeks, I will continue posting only key sections of aBook entitled: 3D Realism: Practical & easy Workflows.
This new and unique Book is aimed at intermediate and advanced users who may or
may not be familiar with rendering engines and wish to consistently/repeatedly produce high end marketing
renders while implementing 3 simple steps: Pre-Production, Production andPost-Production.
在接下来的几周里,我将持续更新《三维现实主义:使用简单的工作流程》这本书里的一些重要章节。
这本新书主要针对一些中高级用户,他们可能熟悉也可能不熟悉这些渲染引擎,但是希望运用前期、中期、后期三步制作法持续服务于高端市场。
*This Book is lavishly illustrated with step-by-step tutorials and it is filled with useful tips & tricks throughout as
well as theories and analyses of each technique implemented.
本书有丰富而详细的讲解,实用的技巧说明以及各个技术点的理论分析。
*The Project files are for VRay and mental ray.
工程文件分为VRay和mental ray两个版本。
*There is detailed process of preparing and importing external files; followed by modelling from 2D drawings.
有详细的准备和导入外部文件的流程;提供模型。
*Robust Post-Production techniques to polish your renders.
大量的后期处理技术完善渲染。
*…and much, much more.
等等
来自于阅读指南:
Section 1
第一部分
Pre-Production:
前期制作:
1.1 Introduction
1.1简介
It’s common practice to establish from the start: the type of project involved; the target audience and the media
platform/s in which the final product is to be showcased on.
这些通常是最初要了解的:项目类型;客户目标;最终产品的展示平台。
Projects can range from a simple design exercise for a PDF/PowerPoint presentation; to high end marketing images
for magazines, newspaper, billboards, TV, etc.
项目可能是为PDF/PowerPoint展示做的一个简单设计,也可能应用于杂志、报纸、广告牌、电视等高端营销平台。
Design exercises or renders for PDF/PowerPoint documents,
do not require the same level of expertise and precision as marketing images.
PDF/PowerPoint展示用图不像marketing images(营销用图,即上面提到的用于杂志、报纸、广告牌、电视等媒体)要求的那么专业和精准。
Marketing image gurus have in fact concluded that, it’s far more difficult to produce compelling images without a clear art direction
(i.e. photo references; etc.)than otherwise.
与其他的图像相比,如果没有清晰的艺术方向(例如照片的参考),Marketing image很难做到引人入胜。
The pre-production phase is designed to help the Studio/Artist and the client to establish the art direction prior to entering the production stage.
When failing to sign off this crucial stage (i.e. pre-production), the final product will be more likely to be exposed to criticism and
constant reviews by the client.
前期制作是为了在正式制作之前帮助工作室/艺术家和客户就艺术方向达成一致。
如果前期不能做好,最终成品肯能会被客户否定并且反复修改。
Furthermore, it may subsequently result in “stretched” budgets and unfulfilled expectations by both: the client and the Artist/Studio.
更有可能导致超出预算或者双方都不能达到预期。
The following tutorial will take you through the entire process of consistently producing captivating marketing images.
接下来的课程将带你了解制作出色的marketing images的全过程。
1.2 Research & Development
1.2探索和发展
Creating prestigious marketing images often starts with the initial brief from the client describing their ideas, concepts,
textures/finishes, design drafts, vision, photo reference, etc.
制作marketing images首先要了解客户的想法、理念、材质、设计草图、设想、图片参考等。

With all the information supplied, one should begin making preliminary decisions with regards to finding the
best photo references to use for art direction, design possibilities, lighting, finishes, etc.
This process is considered be one of the most important stages of the pre-production, as the artist/s/studio
will liaise directly with the client about the following:
资料收集完成之后,你应该找到最合适的图片参考来初步拟定艺术指向、设计概况、灯光、材质等。
这一过程是前期制作最关键的一环,因为艺术家/工作室将就以下内容与客户直接沟通:
1. The most relevant features of the project/design.
This will later prove crucial when setting up the cameras and the composition.
1.项目/设计的突出特点。
之后在布置摄像机和构图时,这一点显得尤为重要。
2. Find out the story behind the design/project. This may also play an important role in deciding:
The composition, the overall lighting rig/mood, the types of people to be added in post, and how people should
interact with the space/shot, and with each other.
2.找出设计/项目的关注点。这在之后的决策中起到重要作用:例如构图、整体的灯光氛围、后期要加入的人物类型以及人物与空间、场景和互相之间的联系。
3. The media platform that the marketing image will be displayed on (i.e. Magazines, Billboards, TV, Newspaper, etc).
This process is fundamental when selecting the types photo references, as it will have a direct impact on the choice of
the 3d contents, colour, camera position, render output size, etc.
3.Marketing image的展示平台(例如杂志、宣传单、电视、报纸等)。
这一过程是选择照片参考的基础,因为它将直接影响到三维物体、颜色、相机位置、渲染尺寸等方面的选择。
4. Other alternative art directions. This process involves having numerous photo references representing other
dynamic camera positions, composition, lighting, colours, colour scheme, materials/finishes, etc, that may benefit the final image.
As mentioned earlier, this is the stage where the artist/studio should source for numerous striking photo
references relevant to the criteria (i.e. similar spaces, structures, design, media platform and ideas)
to help the client decide the art direction- Mood Boards.
Most of these striking photos can easily be sourced from websites such as Flickr; Books; etc.
4.其他。这一过程要为摄像机位置、构图、灯光、色彩策略、材质等收集更多照片参考,用以完善最终的图像。
正如前面提到的,这是艺术家/工作室根据客户标准搜集大量参考图片的阶段(例如近似的空间、结构、设计、媒体平台和构思),从而帮助客户确定mood board。

Mood Boards
1.3 Camera & Composition
1.3摄像机和构图
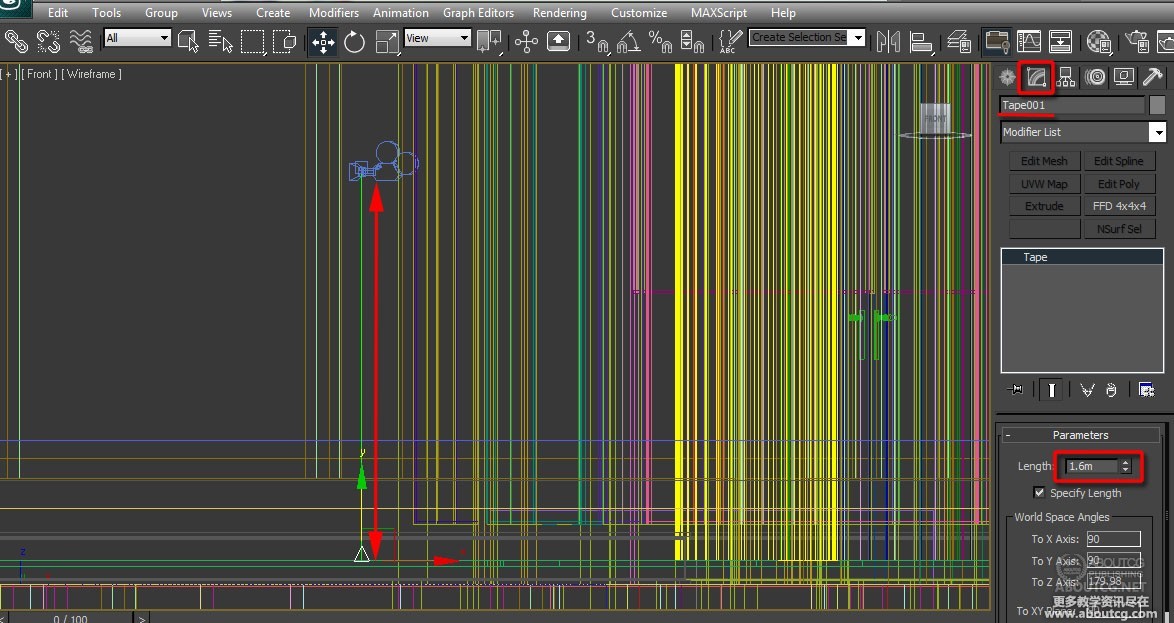
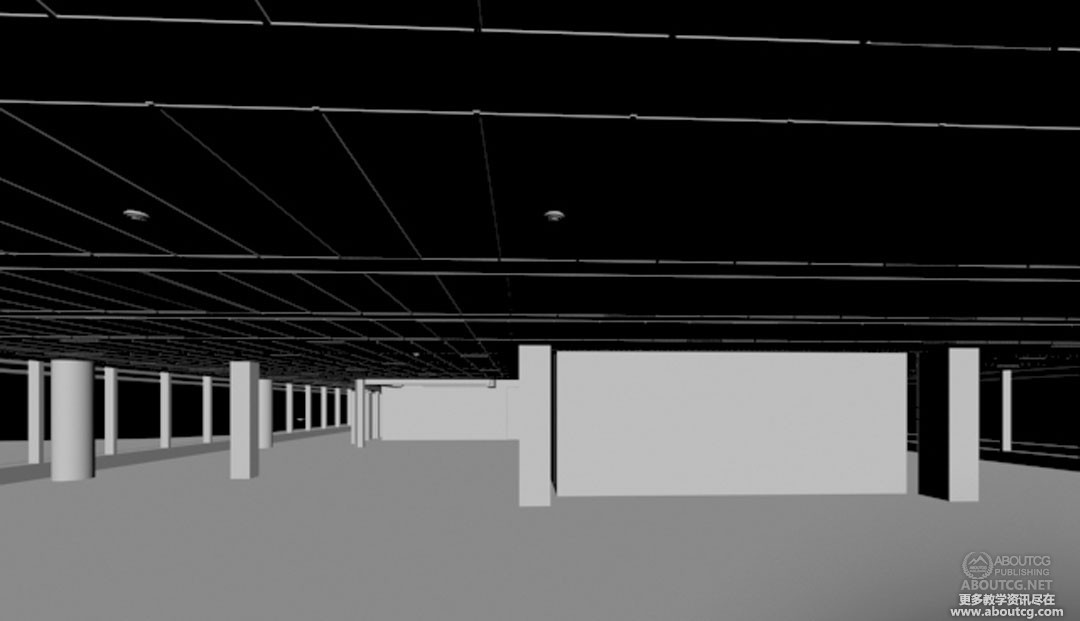
The following step is for the artist/studio to create draft/low poly 3d versions of the most relevant items of the 3d composition.
These should be based on sketches/drawings and photos supplied by the client. Alternatively,
one can use the 3d model supplied, if available.
接下来的阶段,艺术家/工作室需要根据三维构图创建低精度的三维模型。
这将以客户提供的草图和照片为参考。有时候客户也会提供模型。

3D Model from Client
客户提供的三维模型
Next, one can start setting up the camera positions that encompass the relevant areas of the design,
based on the previous information supplied, and the photo references sourced by the artist.
接下来,你需要设置摄像机的位置,使之包含所设计的区域,这些都是以之前提供的信息和搜索的照片为基础的。
With help from the artist/studio, the client should sketch out the camera position/s, and the field of view (FOV);
preferably on a 2d drawing print.
在艺术家/工作室的协助下,客户应当草拟出摄像机的位置和视口(FOV)范围;最好打印出二维图。

Printed Drawing with Camera Positions
摄像机位置打印图
This is a good technique to quickly assess where the camera/s should be placed.
这是尽快确定摄相机位置的好方法。
The camera position and its settings play a crucial role in producing the final render.
It is very important at this early stage to decide how one wants the final image to be interpreted
through the camera lens (i.e. in an artistic, cinematic or standard photography manner).
Even untrained eyes can quickly assess whether or not an image is realistic, based on how the camera is positioned or setup.
摄像机的位置和设置对最终渲染至关重要。
在初级阶段确认最终的图像如何通过摄像机镜头展示非常重要(例如艺术化、电影化或者普通方式)。
摄像机的位置和设置关系到图像是否真实,这一点外行也可以一眼看出来。
The camera’s FOV (i.e. field of view) should reflect the values commonly used in real cameras,
coupled with appropriate render output size to help capture the scene’s essence (portrait/landscape).
The final result should be based on how well the camera, the scene and its contents complement each other in
a dramatic and effective way.
摄像机的视口要像真实摄像机一样很好的反映出图像,为场景(人物/风景)设置合适的输出大小。作品的质量取决于摄像机、场景和内容是否可以完美结合。
Having the camera at eye level (i.e. 1.60m) or another realistic position is important for two main reasons:
将摄像机放到人眼高度(例如1.6米)或者其他真实的高度很重要,原因有二:
1. Our eyes can easily spot odd camera positions (i.e. unusual height/position).
人眼很容易注意到奇怪的摄像机位置(例如特殊的高度/位置)。
2. Having the camera at eye level will facilitate integrating people, and other objects in post.
At times, even accurate scenes may look disproportionate, as result of not having the camera at eye level.
设置摄像机在人眼高度有利于后期合成人物和其他物体。
反之,即使场景精确,也会看起来不成比例。

Creating a Target Camera
创建目标摄像机
Professionals often create the original camera type as “Target” to set its direction.
Once that is done, the camera is then immediately changed to “Free Camera” type,
for more flexibility in moving/rotating the camera in the viewport.
专业人员通常先将摄像机设为目标摄像机(Target)来确定方向。完成之后再改为自由摄像机(Free Camera),因为Free Camera在场景中更容易移动/旋转。
Camera at Eye Level
摄像机在人眼位置

Setting up the Camera Output Size
设定摄像机输出尺寸
“Signing off” the shot/ composition also involves going backwards and forwards with the client,
while deciding on the geometry that should be in the foreground and background.
结束镜头/构图设计之前还要及时和客户反馈,确定前景和背景的几何体。
1.4 Previewing the Art Direction
1.4预览效果
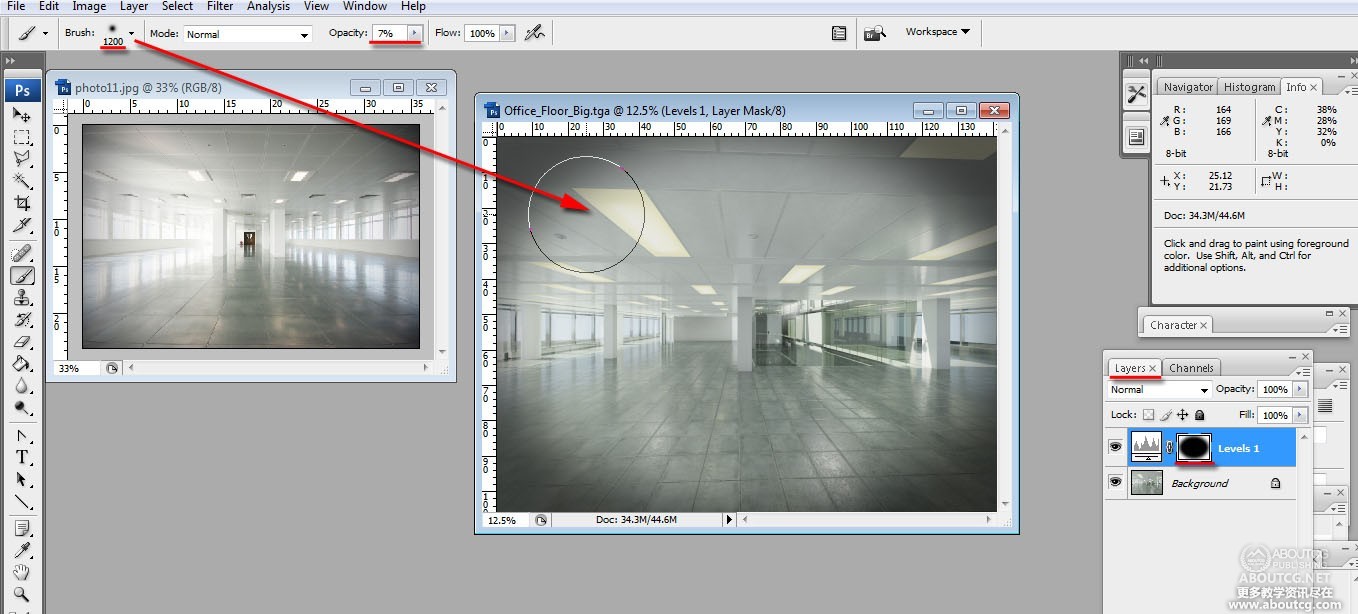
During the process of establishing the final art direction, you will be required to “Photoshop”
elements such as photos, notes, sketches and other effects on top of the previously taken screen grab,
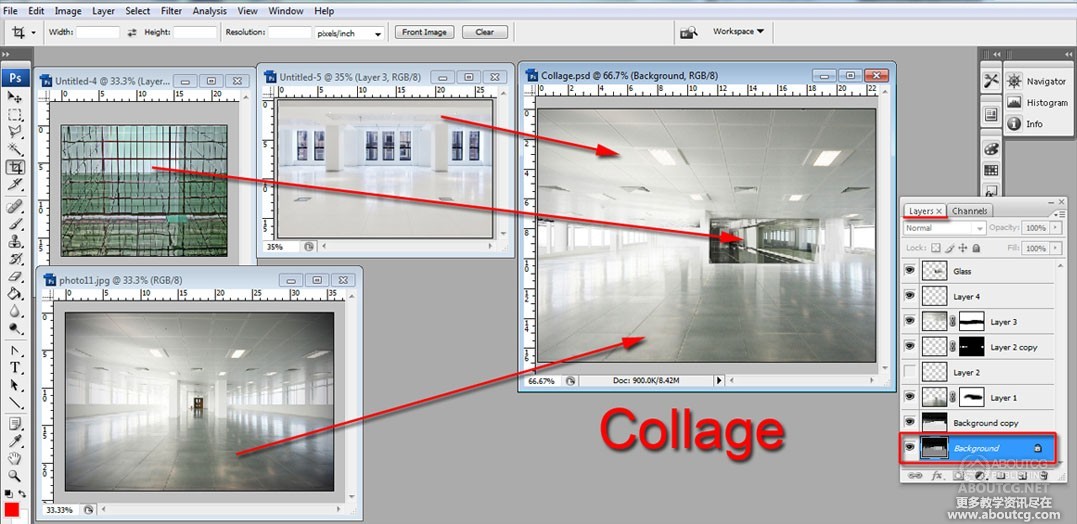
or a draft render. The final result should be an artist’s impression, or a collage depicting the overall art direction of the final shot.
在渲染成图之前,你需要将照片、画稿等一些效果元素ps到抓屏或者低精度渲染图上。这将是最后成品的一个全面的表述或拼接。
The entire exercise is designed to help the client quickly understand and preview the impact of their
choices based on the design and the artistic decisions previously made.
它可以让客户快速了解和预览经过艺术化处理的效果。
Draft Render of the Camera Shot for Collage
为拼接渲染的摄像机草图


Creating a Collage preview of the Final Result
为最终效果做的拼接预览
It’s also worth mentioning that, while liaising with the client, one should be adventurous by
trying to break the mould, and suggest new ideas and effects such as:
值得一提的是,在于客户沟通时,你应该大胆的打破思维定势,提出新的观点,例如:
*Vignetting
渐晕
*Subtle surface discrepancies
细微的表面差异
*Chromatic aberration (…this is the one effect that you should not mention to the client,
but simply add it in a very subtle manner).
色差(这一点不要跟客户提及,只需细微调节)
*Depth of field (it is mostly relevant when there are objects in the foreground).
景深(一般用在背景有物体的场景)
*Glow
辉光
*Lens Flare
光斑
*Dynamic camera positions
动态摄像机位
*ETC
等等
All the above mentioned steps will aid the client when reviewing the overall budget and the final art direction.
It will also help avoid the usual project constraints related to lighting, composition,
textures/finishes; final quality, etc.
以上各步将为客户预算和确定方案提供便利。
也能避免灯光、构图、材质、最终质量等的约束。
As mentioned earlier this article is just a small section of my latestBook manual.
正如之前提到的,这些内容只是我新书的一小部分。
For this Book manual, while a 3d software and a rendering engine had to be chosen as a platform;
the majority of its content focuses mainly on workflows and general methodologies used by most reputable studios.
These techniques can easily be implemented across a variety of 3d applications and rendering engines.
当一种三维软件和渲染引擎被选为操作平台,这本书的大部分内容都在关注被大多数知名公司所采用的工作流程和方法。这些技术可以方便的运用于多种三维软件和渲染引擎。
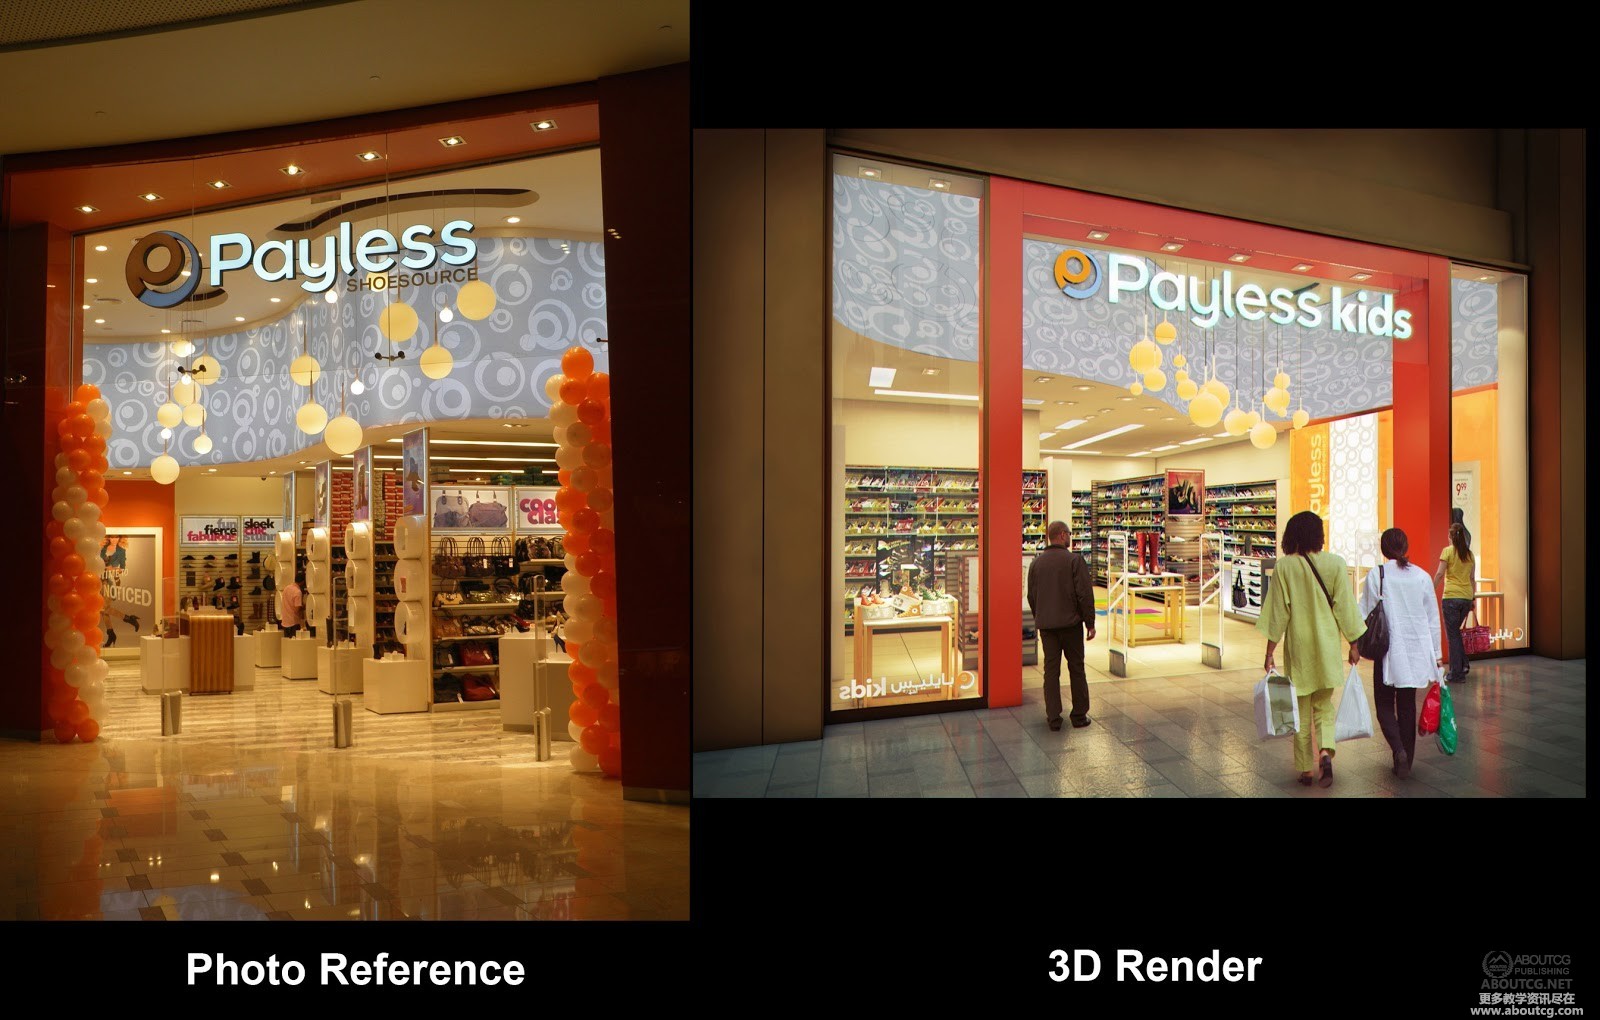
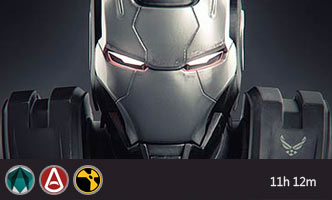
The image depicted below is one of many which proved to be remarkable.
I have produced them while using 3Ds Max and VRay, for a client.
These results were only possible by implementing the techniques and workflows described in this Book manual.
下面这张图是众多出色作品中的一幅。我曾经用3Ds Max和VRay为一位客户完成它。
只有运用本书提到的技术和流程才能如此出色的完成它。
I hope you have found this post interesting.
希望你喜欢这幅作品。
POSTED BY JAMIE CARDOSO
作者 JAMIE CARDOSO


推荐相关中文教程

3DSMAX动力学特效实战教学
本套教学将通过24章实例教学,来向你详细讲解3DSMAX的动力学特效在电视包装与广告中的应用。VUE自然景观实战案例教程
本套教学是由MG录制。讲解分析了vue的海水材质问题,以及全中国首次以案例的形式讲解vue与maya的结合运用,如何将maya的角色动画导入到vue场景文件中做遮罩并且渲染。3DSMAX国外粒子案例效果解析
本教学通过27个实战案例,教您如何用3DSMAX结合ParticleFlow本身以及扩展的ParticleFlow Box 1、Box 2、Box 3、功能包,结合Vray渲染器,来制作流行的广告和电视包装中的粒子特效效果。无论是常见的粒子聚合,分散,动态粒子替换,粒子矩阵,粒子动力学,本套教学都有相应的案例。3DSMAX国外流体案例效果解析
本教学通过20个实战案例,教您如何用3DSMAX结合Realflow,FumeFX, ParticleFlow插件,来制作流行的广告和电视包装中的流体效果。无论是常见的液体,烟雾,流体碰撞,沙粒变化,水墨表现,本套教学都有相应的案例。2.5D商业游戏场景制作教程 进阶篇
在本教程中,Freeyy老师将从零开始,向你讲解如何根据确定的主题进行前期准备,随后建模,绘制贴图,制作材质,最后再进行细节调整,完成一个商业游戏级别的2.5D场景画面。Substance Designer贴图材质系统完全教学
本套Substance Designer教材是由AboutCG陶仁贤历经三个月的潜心研究,录制完成。从Substance Designer在游戏行业的流程入手,逐一介绍产品特点,界面,以及内置的200多个节点的原理和结构。并通过多个实例教材为您展示从零开始制作贴图,Substance Designer与Maya Anrold渲染引擎的互动,Substance Designer与Max互动、Substance Designer与Unity 3D引擎互动、Substance Designer与UnrealEngine3/UDK互动。Mentalray for max实战教程
本教程共包含超过42小时以上的视频教学内容,共18章 132课,通过大量实例,详细讲解了3ds Max平台下的Mental Ray1渲染器的使用基础和实战方法。是一部非常完整详细的3dsMax版的Mental Ray渲染器的教学.arnold for maya渲染器完全教学
Arnold渲染器是基于物理算法的电影级别渲染器,正在被越来越多的好莱坞电影公司以及工作是作为首席渲染器使用。与传统用于CG动画的Scanline(线扫描)渲染器(Renderman)不同,Aronld是照片真实,基于物理的光线追踪渲染器。


推荐课程


推荐教程

0回复三维现实主义渲染:实用简单的工作流程"