

本教学为翻译教学,转载请注明来自aboutcg.net,以及注明翻译者
原始链接:http://ae.tutsplus.com/tutorials/vfx…-battle-scene/
原作者:James Whiffin
翻译:asbeer
Create a Historic Naval Battle Scene
创建一个历史感的海军战争场景
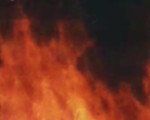
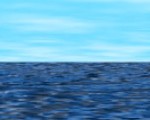
This tutorial will teach you how to create a VFX naval battle scene similar to those seen in period war movies. You’ll learn how to take ordinary footage shot with a DV camera and transform it into a realistic looking old film war battle scene
在这个教程中,我会展示如何使用VFX创建一个和过去的海战纪录片效果类似的海战场景,你会学到如何用DV拍摄的素材创建出令人惊异的旧电影海战效果
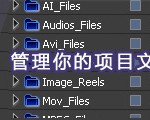
Import your footage into after effects. Click and drag it into the new composition button.
Step 1
导入素材,并拖拽入一个新的Comp

Step 2
We need to track our footage. Select window (top menu) and make sure tracker controls are selected.
Step2
我们需要跟踪我们的素材,选择Windows菜单下,确认Tracker Control已经被勾选
![]()
In the tracker controls make sure your footage is selected in the motion source. Then press track motion and check the rotation box. (If your scene contains any zooms then also select the scale button)
在Tracker Control中确认你的素材被选为跟踪源,然后点击Track Motion并勾选Rotation Box


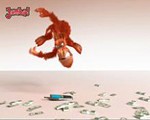
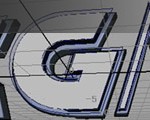
The track points should come on your screen. Enlarge them by clicking and dragging the edges. The larger the track points, the longer the tracking will take but it will be more accurate.
The middle of the track points should be placed on distinct parts of the scenery like roof tops.
跟踪点应该已经在你的屏幕上显示出来了,点击并拖拽使它们能放大到我们希望的大小。跟重点越大,花的时间就会越长,不过也会更加准确
跟踪点的中部应该被放置到图像中有距离的两部分上,像房屋的尖顶似乎不错

Step 3
In the tracker controls press analyze forwards. The camera will start tracking the points. If the track points displace from the rooftops then i know my track is incorrect.
A bad track can be solved by dramatically increasing the size of the track points. Big track points take a very long time to analyze but will fix a bad track.
Step 3
在Tracker Control中点击Analyze Forward,摄影机会开始跟踪点,如果跟踪点从房顶上错开了,那么就说明我们的跟踪不正确
错误的跟踪可以通过增大跟踪点的范围来解决,大的跟踪点会耗费很多的时间,但可以起到实实在在的修正效果

If your track looks good go layer – new null object and rename it “track”
Then on the tracker controls press Edit Target (select the null object) press apply then select X and Y
如果跟踪看起来没问题了,到主合成层,创建一个新的Null Object然后命名为Track
然后在Tracker Control中点击Edit Target选择Null Object然后应用在X和Y象极


Scroll through your footage and the null object should move with the scene.
Step 4
I have taken this image of a battleship from Flickr.com (this image has a Creative Commons License for Commercial Use) and erased the background in photoshop.
浏览你的素材,你会发现Null Object随着镜头在运动
Step 4
我从Flickr.com下载了这幅军舰的照片(这幅照片有应用于创意产业的商业授权)然后将它拖拽入PS

Once you have done this save it as a .psd then import it into after effects with editable layers.
Then place the image into the composition, as you can see it is too big. Scale it down by selecting the layer and pressing “S” then drag the percentage down to 23%.
完成这些之后,将工程文件存储为.psd,然后以允许修改单独层的方式导入AE。
然后将图片放入合成层,正如你所见的,它太大了,点击S调出大小菜单,然后将它缩小到23%


Now that the ship is the correct size place it in an appropriate place, then color correct it using effects – hue and saturation.
然后将图片放置在适当的位置,使用Effects->Hue&Saturation进行调色

Duplicate the ship layer (Control+D on windows), and turn the copied layer into a 3d layer by clicking the 3D layer icon
将船只层复制一次(Ctrl+D),然后打开复制层的3D开关。

Now press F4 and change the Ship Copy layer’s transfer mode to Multiply. This will darken it slightly.
点击F4,然后将复制层的船的叠加模式改为Multiply,这将把船稍许降暗一些

With the Ship Copy Layer selected press “T” and change the opacity to 20%. Now press “W” for the rotation tool and swing the x axis forward.
点中船的复制层,然后点击T,将透明度降为20%,现在点击W键,切换到旋转工具,然后让它沿X象极移动。

Now drag the parent tool for the Ship layer onto the track layer. Do the same for Ship Copy layer. Now that they are parented the ship and it’s shadow will move in sync with the cameras movements.
然后将Ship原始层和复制层的父图层改为Track层,现在这两艘船已经被绑定了,他们的阴影将随着摄影机的运动而移动

Repeat Step 4 until you have a few ships.
重复Step 4直到船的数目足够
Step 5

Add a new Adjustment Layer by selecting Layer – New Adjustment Layer and add the old war film look animation preset by selecting Animation – Apply Animation Preset and selecting the preset in the dialog window.
添加一个新的Adjustment层,然后添加一个旧战争电影效果的预设。

The footage should now look like this:
现在素材层看起来应该是这样的

Go effects – color correction – brightness and contrast and increase the contrast on each ship by 20.
Step 6
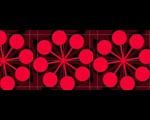
Now we want to make the ship on the right look like it’s been hit by a bomb and its billowing smoke.
Go layer – new solid. Add trapcode particular. Rename it to “Smoke” and change it to these settings:
给每艘船施加Effects->Color Correction->Brightness&Contrast,然后将Contrast值提升到20
Step 6
现在我们希望让船看起来被炸弹命中然后开始冒烟。
添加一个新的Solid层,施加Trapcode Particular插件,将它命名为Smoke,然后将设定值改为一下:

Change the layer Opacity to 30%
Then press Layer – Pre Compose – Move all Attributes.
将层的透明度改为30%
然后点击Layer->Pre Compose-Move All Attributes

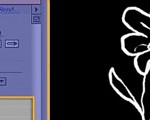
Right click on the Smoke layer and click Time – Enable time remapping.
Now go Composition – Composition Settings and change the length of the composition from 7 seconds to 7 minutes.
Now click on this button down the bottom until you can see the whole composition
右键点击Smoke层,选择Time-Enable Time Remapping
然后在Composition设定中将Composition长度改为7min
现在点击在屏幕底部的按钮直到你可以看见整个Composition。

Now drag the second Time Remap keyframe from point A to point B
现在将第二个Time Remap关键帧从A点拖拽到B点
![]()
This stops the smoke from coming out way too fast. Now change the composition length back to 7 seconds.
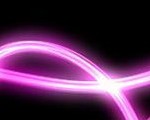
Now we will create the rocket. We will be using LineRocket Away01. Be sure to check out more at Detonation Films!
Once imported, change the transfer mode to screen.
Line the rocket up with the ships, and add a glow with these settings.
这就可以组织烟雾太快的冲出,现在将Composition产读改回7s
现在我们需要创建火箭,我慢将使用Line Rocket Away 01.你可以在Detonation Films找到更多。
导入素材,然后将叠加模式改为Screen。
将Rocket和船对齐,然后添加一个Glow再将属性改为以下的样子。


Now the line rocket shoots towards the center ship, then disappears. So 1 second later the ship is going to blow up.
Download the explosion here: TPipe01 Download free zip file
Download the fire here: ArcRipper__ Download free zip file
Position the thunderpipe ontop of the ship as well as the arc ripper. Make sure both layers are set to transfer mode of screen.
Draw a mask around the arc ripper so the flames don’t spill out of the ships deck. Now press “MM” to reveal the mask properties and change them to this:
现在Rocket的射线正对着中间的船,然后消失,所以1s之后船应该开始起火爆炸。
从这里下载爆炸素材
从这里下载火焰素材
沿着船舷部分话一个Mask ,这样火焰就不会溢出到船舷下面,点击MM调出Mask菜单然后将它们的设定改为如下:


Now add a Brightness & Contrast filter on the arc ripper and reduce it’s brightness by -56.
Step 7
Download this super high-res image of clouds Here (this image has a Creative Commons License for Commercial Use) and rub out the base with a feathered brush in photoshop.
现在添加一个Brightness&Contrast,然后将亮度值降为-56。
Step 7
从这里下载高分辨率版的云层素材(这幅照片有应用于创意产业的商业授权),然后在PS中用一个羽化橡皮擦去底部。

Now place it into your composition in After Effects, making sure it’s underneath our Adjustment layer.
On the cloud layer turn the Brightness down to -13 and bring the Contrast up to 33
Create a new Adjustment Layer and add a Curves adjustment and create a contrast curve in the RGB channel.
现在将你的Comp放入AE中,确定它在我们的Adjustment Layer的下面。
在云层层上施加一个Brightness&Contrast,然后将Brightness降为-13,再将Contrast上升到33
创建一个新的Adjustment Layer,施加一个Curves插件,再在RGB Channel将曲线改为以下:

Create another Adjustment Layer and add a Lens Flare with these settings.
创建另一个调节图层,添加一个Lens Flane滤镜,按图中提示设置。

Step 8
When the explosion goes off we want it to be more dramatic. First, save your project. Second, select every layer and go to layer – precompose, select move all attributes. Now you have one layer.
Press P to bring up the position keyframes, and create keyframes before and after the missile fires, as well as the explosion.
Step 8
当爆炸发生的时候我们希望能出现更多的细节,首先,保存你的工程文件,然后选择所有的层然后预合成,选择Move All Attributes。
点击P调出Position菜单,在导弹发射前后创建关键帧,就像爆炸一样

Select the first two and go to window – the wiggler. Use these settings and press ok.
选择前两个,然后调出Wiggler菜单,使用如下的设置,然后点击OK

For the second two keyframes use these settings.
后面两个使用如下的设定:

Now apply a motion tile to the layer using these settings.
现在施加一个Motion Title在层上,使用如下属性:

Now turn on the motion blur in the layer as well as the composition by pressing these two buttons.
现在打开Motion Title的Motion Blur开关和层的Motion Blur开关。

Now the camera shakes when the explosions occur. You’re finished! (Just add audio) Hope you enjoyed this tutorial.
现在摄影机运动已经创建完了,完成了!(添加点音效)我希望你喜欢这个教程。


推荐课程


推荐教程

0回复创建一个历史感的海军战争场景"