
本教学为翻译教学,转载请注明来自aboutcg.net,以及注明翻译者
原教学出自PSD Tut Plus网站,原始链接如下:
http://psd.tutsplus.com/tutorials/designing-tutorials/how-to-create-a-glittery-christmas-card/
作者: Fabio
(I am a Brazilian designer living in Porto Alegre (south of Brazil).In 2003, I founded a web design studio called ZEE, with Fabiano Meneghetti, an architect and friend of mine. It’s a small studio now, with 4 people working basically with web.)
关于作者:
我是一名生活在巴西南部Porto Alegre的巴西设计师,在2003年,我与好友建筑师Fabiano Meneghetti一起创立了一个叫做ZEE的网络设计工作室,它现在只是一个小工作室,由四个人,主要从事网络方面的设计工作。
网站:http://www.zee.com.br/
翻译:雏田
关于译者:

查看作者更多教学
请尊重互联网道德,转载请注明转载出处和翻译者,谢谢!
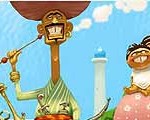
How to Create That Last-Minute Holiday e-Card in Photoshop
如何用Photoshop创建最后一刻的电子节日贺卡
Christmas is just a few days away, so here is a tutorial showing how to create a Christmas design using Photoshop.
再过几天是圣诞节,所以这里是一个教程演示如何创建一个圣诞节设计使用的Photoshop。
What we are going to do is really easy and can be very useful. For this tutorial, we will use some very cool icons as well. You can download them here. I hope you enjoy this little tutorial and that it inspires you to create your own last-minute postcard!
我们将要做的非常简单,但会超级有用,在这个教学中,我们也将会用到许多很酷的图标。你可以在这里下载它们,我希望你们喜欢这个小教学,并激发你的灵感来创建你自己的圣诞贺卡。
Step 1
Create a new document. Using a Layer Style, apply a Gradient Overlay, using a dark red to a black.
第1步
创建一个新文件。使用图层样式,应用渐变叠加,使用暗红色到黑色。

Step 2
Using the the Line Tool, let’s create two lines as shown. This will be our reference for the Christmas tree.
第2步
使用直线工具,让我们创建如下所示的两行。这将是我们的圣诞树参考。

Step 3
Let’s place our Santa Claus Icon《http://www.iconarchive.com/category/christmas-icons.html》in the center of our tree. Using the Pen Tool, draw some lines like I’ve shown below. In order to do that, we need to change the way we will create our lines. Instead of using the Shape Layer, let’s choose Paths.
第3步
让我们安置我们的圣诞老人图标在我们树的中心。使用钢笔工具,绘制如下一些线。为了做到这一点,我们需要改变,我们将创建我们的路线。而不是使用形状层,让我们的选择路径。

Step 4
Now, still using the Pen Tool, let’s round our lines choosing the Convert Point Tool.
第4步
现在,仍然使用钢笔工具,让我们圆线选择转换点工具。

Step 5
Next, create a new Layer Folder and name it “Star Tree.” Change the Blending Mode to Color Dodge, then create a new layer inside this folder and name it “Stars path.” Next open your Brushes Palette (Window > Brushes) and select the Brush shown below. Then set it at the values shown below in the screenshots.
第5步
下一步,创建一个新层文件夹并将其命名为“star tree”。更改混合模式为颜色减淡,然后再创建一个文件夹内的这个新层,命名为“star path。”下一步打开你的刷子调色板(窗口>笔刷),并选择如下的画笔。然后设置截图中显示的值。

Step 6
With our brush created, let’s choose the Brush Tool and make sure that the brush we created is selected.
To create the star tree, make sure that you have selected the “Star path” layer. Using the Path Selection Tool (A), Ctrl-click Stroke Path. A dialog box will appear, and in there choose Brush. Make sure that the brush you created is selected.
第6步
用我们的画笔创造,让我们选择画笔工具,并确保我们创建的画笔被选择。要创建星星树,请确保您选择了“star path”层。使用路径选择工具(甲),按Ctrl-单击描边路径。一个对话框将出现,并在那里选择刷。请确保您创建的画笔被选择。

Step 7
As you can see, the stars follow the path we created and they change size, rotation, and opacity. Now let’s choose another brush, and in a new layer still inside the “Star Tree” folder, let’s add some lighting effects. Select the brush shown below and paint a star over Santa’s glass.
Next, in a new layer, paint a big star at the top of the tree.
第7步
正如你所看到的,这些星星走的道路,我们创建并他们改变大小,旋转和透明度。现在,让我们选择另一种画笔,仍然内的“star tree”文件夹在一个新的层,让我们添加一些灯光效果。选择如下图所示,画了圣诞老人的玻璃明星。
下一步在一个新的层,画在树的顶端一大星星。

Step 8
Select the “Star path” layer and double-click the layer to open the Layer Style dialog box. Select Outer Glow as shown below, and add some glow to the stars.
第8步
选择“star path”层,双击该层,打开图层样式对话框。选择外发光如下所示,并添加一些发光的星星。

Step 9
Next we’ll add our text. Choose the Horizontal Type Tool (F) and type XMAS (or whatever word you would like). Double-click the layer to open the Layer Style dialog box. Now let’s add some effects. I learned this technique from a very nice tutorial I found online, and I have just changed it a little bit.
第9步
接下来,我们将增加我们的文本。选择卧式工具(F)和类型圣诞装饰品(或任何你喜欢的字)。双击该层打开图层样式对话框。现在,让我们添加一些效果。我学会了这种技术的一个很好的教程中,我在网上找到,我刚才已改了一点点《连接:http://luxa.org/tutorial_smooth_glass_type.php》。


Step 10
To create the water floor-effect, just duplicate the text layer and flip it vertically (Edit>Transform>Flip Vertical). Move it right bellow the XMAS text and apply Layer>Layer Mask>Reveal All. After that, choose the Gradient Tool (G), set the colors to black and white, and fill the mask with it.
第10步
要创建水面倒映效果,只需要复制文字层,并选择(Edit>Transform>Flip Vertical)垂直翻转它,把它移动到XMAX文字下面,并添加Layer>Layer Mask>Reveal All建立一个遮罩,之后,选择渐变工具,将颜色设置为黑白色,然后给它加上渐变的Mask遮罩。

Step 11
Add the Merry text and some more icons and repeat the previous step to create reflections for all of them.
第11步
添加快乐文本和一些图标和重复上一步,创造所有这些反射。

Step 12
Let’s add a bit of snow.
Set the colors to dark gray and black.
Create a new layer and go to Filter>Render>Clouds.
Apply some Gaussian Blur.
Go to Filter>Pixelate>Mezzotint
Add some Motion Blur
Change the layera€?s blending mode to Overlay at 30%.
第12步
让我们增添了一点雪。设置的颜色暗灰色和黑色。
创建一个新层,进入滤镜>渲染>云彩。
应用一些高斯模糊。
转到滤镜>像素化>铜板雕刻添加一些运动模糊,
更改层混合模式,30%的覆盖透明度。

Conclusion
This is a very easy way to create a beautiful Christmas wallpaper or even an e-card to send to your friends or clients. However, the best thing is that it shows a bit of what we can do with the Brush Engine, in my opinion one of the best features in Photoshop.
Happy holidays everyone!
结论
这是一个非常简单的方法来创造一个美好的圣诞墙纸,甚至电子贺卡发送给您的朋友或客户。然而,最好的事情是,它显示了我们用的笔刷引擎位的一点,在我看来在Photoshop的最佳功能之一。大家节日快乐!

欢迎到论坛的相关帖子讨论本教学:
http://www.aboutcg.net/showthread.php?t=593
Step 6
With our brush created, let’s choose the Brush Tool and make sure that the brush we created is selected.
To create the star tree, make sure that you have selected the “Star path” layer. Using the Path Selection Tool (A), Ctrl-click Stroke Path. A dialog box will appear, and in there choose Brush. Make sure that the brush you created is selected.
第6步
用我们的画笔创造,让我们选择画笔工具,并确保我们创建的画笔被选择。要创建星星树,请确保您选择了“star path”层。使用路径选择工具(甲),按Ctrl-单击描边路径。一个对话框将出现,并在那里选择刷。请确保您创建的画笔被选择。


推荐相关中文教程

电影MATTER PAINTING基础实战案例教学
马良老师将通过一个精美的实例,来教你如何使用Photoshop结合After Effects软件完成动态Matter Painting场景的制作,从而带你踏入专业MP行业的大门。构图绘画完全教学
本套课程的内容重点是学习绘画艺术的构图规律和方法。在绘画学习过程中,构图是一个重要的组成部分,学习它对于提高绘画练习和创作水平有显著的促进作用。特指纯艺和插画,海报。艺用人体解剖实用教学 下集 四肢篇
本套“四肢篇”教学是王九斤老师的《艺用人体解剖使用教学》系列教程中的下集部分,主要讲解了四肢的结构绘画要点,以及部分人体动态的基础讲解。艺用人体解剖实用教学 上集 躯干篇
本套“躯干篇”教学是王九斤老师的《艺用人体解剖使用教学》系列教程中的上集部分,主要讲解了躯干的结构绘画要点,以及部分人体动态的基础讲解。


推荐课程


推荐教程

0回复用Photoshop创建电子贺卡"