The Chair – Interior Design
椅子—室内设计作品制作流程
翻译:层层(本站翻译小组成员)
作者:Eduardo Souza
原文:http://www.3dtotal.com/

Introduction
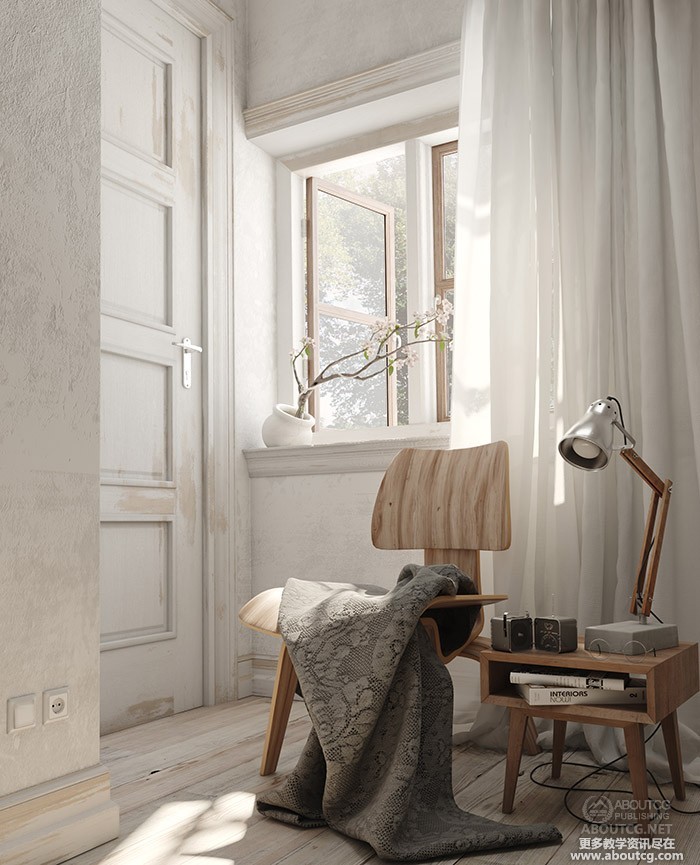
Hello everybody, my name is Eduardo Souza and I am a professional 3D artist from Salvador, Bahia, Brazil. I graduated in Multimedia Digital and am passionate about cars, and it was for this reason that I plunged into the sensational world of 3 dimensions. I come here to share the process of creating a personal work I call ‘The Chair’. The main objective was to create a portfolio scene for my website and also to use it as a study of lighting and texturing. I had in mind to create a scene that was both simple and beautiful so I decided to make an Eames Wooden Chair. After searching the internet for lamps, I found the DIY Industrial Wooden Desk Lamp very charming and decided to put that in the scene. Hope you enjoy!
大家好,我叫Eduardo Souza,是一名来自巴西巴伊亚州萨尔瓦多市的三维艺术家。我出身数字媒体专业,热衷于汽车,这成为我投身美妙三维世界的动力。本文中我将与大家分享个人作品“椅子”的制作过程。主要目的是为我的网站创建一个组合场景,同时学习一下灯光和材质。我想创建了一个既简单又漂亮的场景,所以我决定制作一个埃姆斯木椅。在网上搜索了很多灯的图片之后,我找到了非常好看的工业生产的DIY木质台灯,并决定将它放入我的场景中。希望你喜欢!

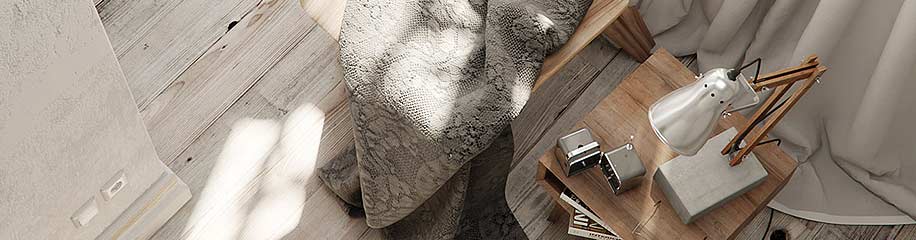
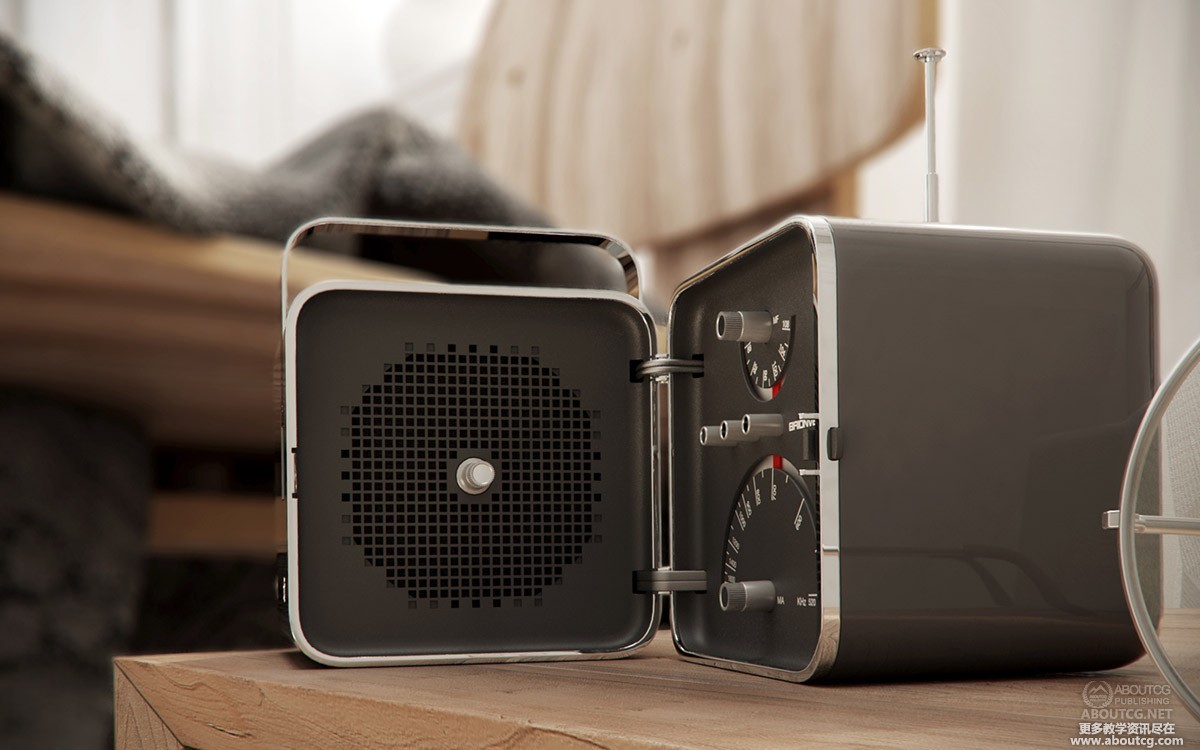
It was that lightbulb moment!
展示一下漂亮的台灯
Configuration
设置
In 3ds Max, space gamma default is 1.0 but the monitors are calibrated to gamma 2.2 space. So we need to adjust our software and rendering engine to work in the same space with our monitor range and this is referred to as LWF (Linear Work Flow) so I enabled Gamma correction settings / LUT.
在max中,gamma的默认值是1.0,但是显示器的标准gamma值是2.2。所以我们需要调整软件和渲染引擎去适应显示器的范围,这被称作LWF(线性工作流)所以我勾选了Enable Gamma/LUT Correction(译者注:Rendering—Gamma/LUT setup)。

Early configuring of the scene
事先设置场景
Modeling
建模
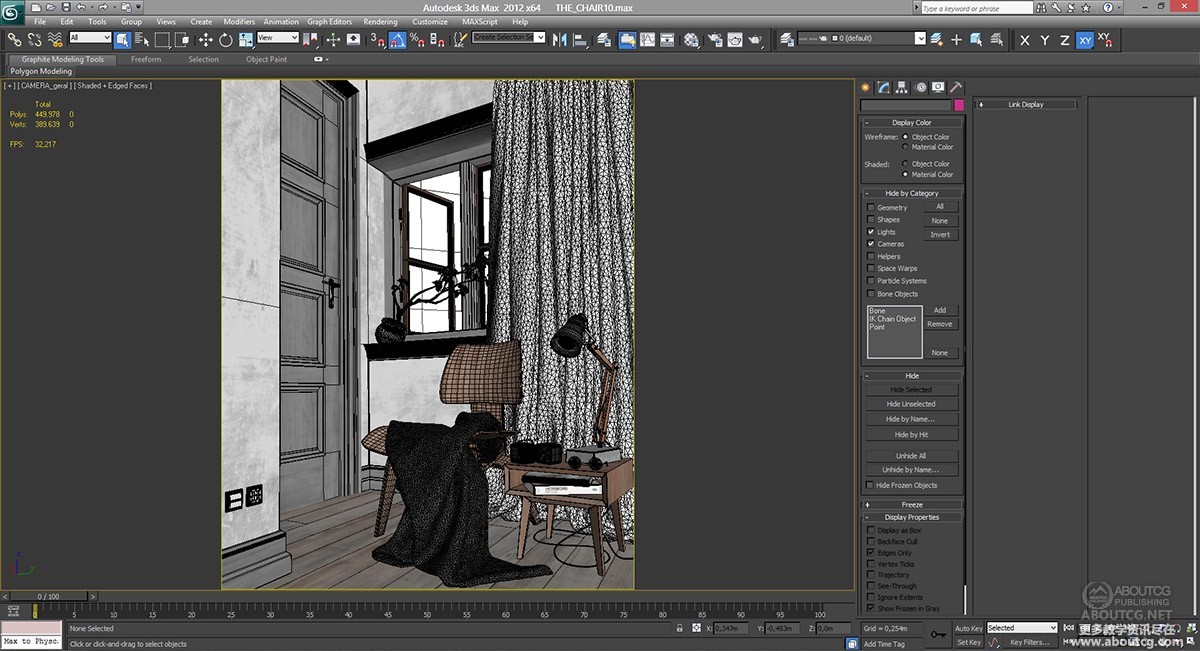
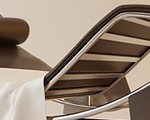
The modeling process was simple, highlighting the beautiful DIY Industrial Wooden Desk Lamp I found particularly beautiful and decided to put it in the scene. It became the object I gave more attention, sought by several references to be the closest possible representation. The tissue placed on the chair and curtain were made in Marvelous Designer and exported into 3ds Max to make adjustments. Doors, walls, windows, floor and plinth were also modeled with special attention since it was a small scene. I paid special attention to give extra quality while modeling.
建模过程很简单,我把我之前发现的很漂亮的工业生产的DIY木质台灯放到了场景中,并重点突出它。我在台灯上花了最多的功夫,找了尽可能多的最接近的参考。椅子上的纱巾和窗帘是在Marvelous Designer里做好再导入max中进行调整的。由于场景很小,门、墙、窗户、天花板和柱基也做的很细致。在建模的过程中,我尽量让模型多一些细节。


he key is in the details
关键在于细节
Texturing
材质
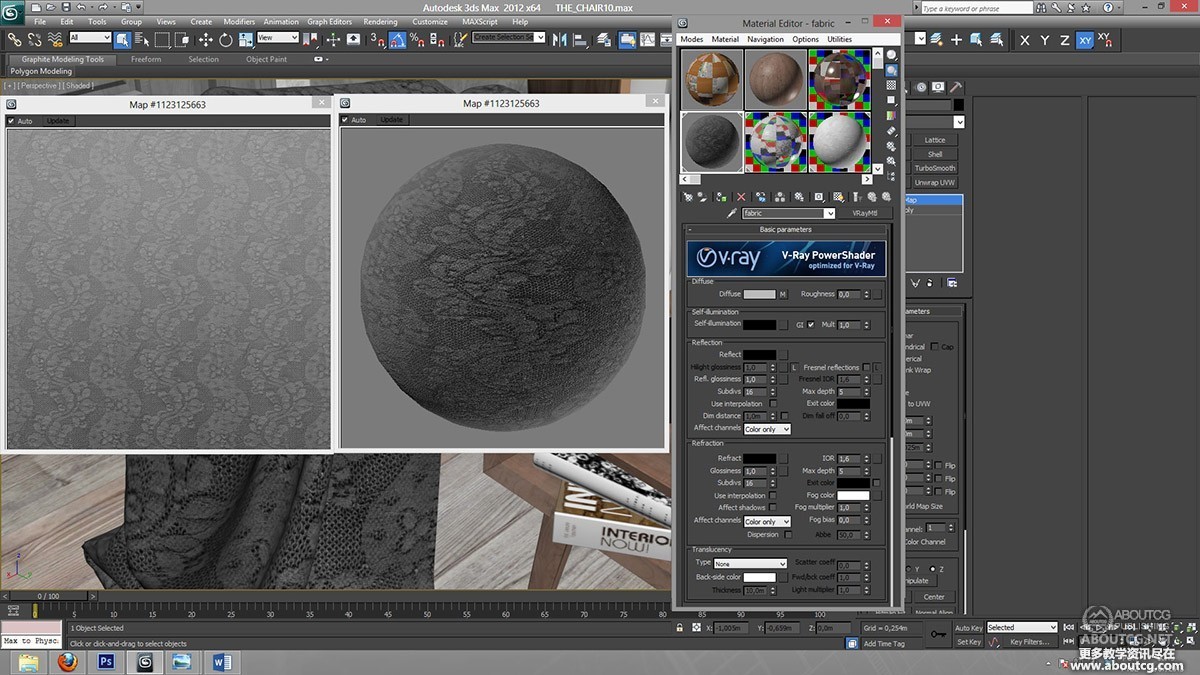
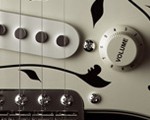
The scene was simple to model, so I had more time to work on the textures. A diffuse texture was used in the Falloff, and I reduced the blur of the Bump texture to 0.5 to sharpen it without using Displacement – all because I wanted to keep the render times fast.
场景建模很容易,所以我花了更多时间制作材质。给漫反射贴图(Diffuse)加入衰减贴图(Falloff),将凹凸贴图(Bump)的模糊(Blur)减至0.5,这样可以不用置换贴图(Displacement)就得到锐化(Sharpen)的效果——所有这些工作的目的都是为了缩短渲染时间。
On the wood texture, I used the same diffuse texture, with color correction in the texture and Reflection and Refl. glossiness activated in the Fresnel reflections. The same applies for all types of wood material in this scene.
制作木质材质时我使用相同的漫反射贴图,并给漫反射、反射和反射高光加入色彩校正(color correction),激活菲尼尔反射(Fresnel reflection)。这个场景中所有的木质材质都可以这么做。

Adding textures
贴材质
Lighting
灯光
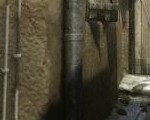
For the lighting of the scene I had initially imagined night light – I even did some tests – but I decided that it would be more in harmony if I made it daylight: clean and clear. Then, to illuminate it I used VRaySun to mark the sunlight on the scene and VRay Dome light for global illumination – one VRay light in the window to generate the influence of external light, and another light in VRay for artificial lighting…
我一开始设想的场景布光是模拟晚上的环境——我甚至做了一些测试——但是后来觉得做成白天会更协调:干净、清晰。我使用VRaySun来模拟场景中的日光,VRay Dome模拟全局光——一个VRay灯光在窗户的位置,产生外部环境对室内的影响,另一个是人造光源…
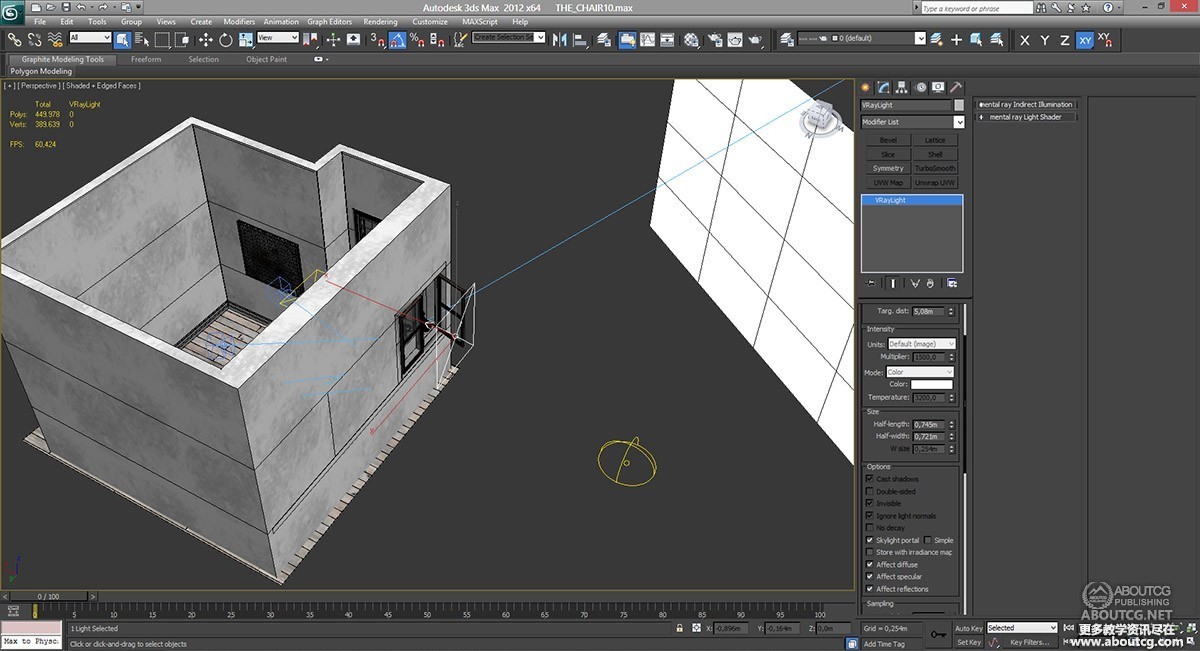
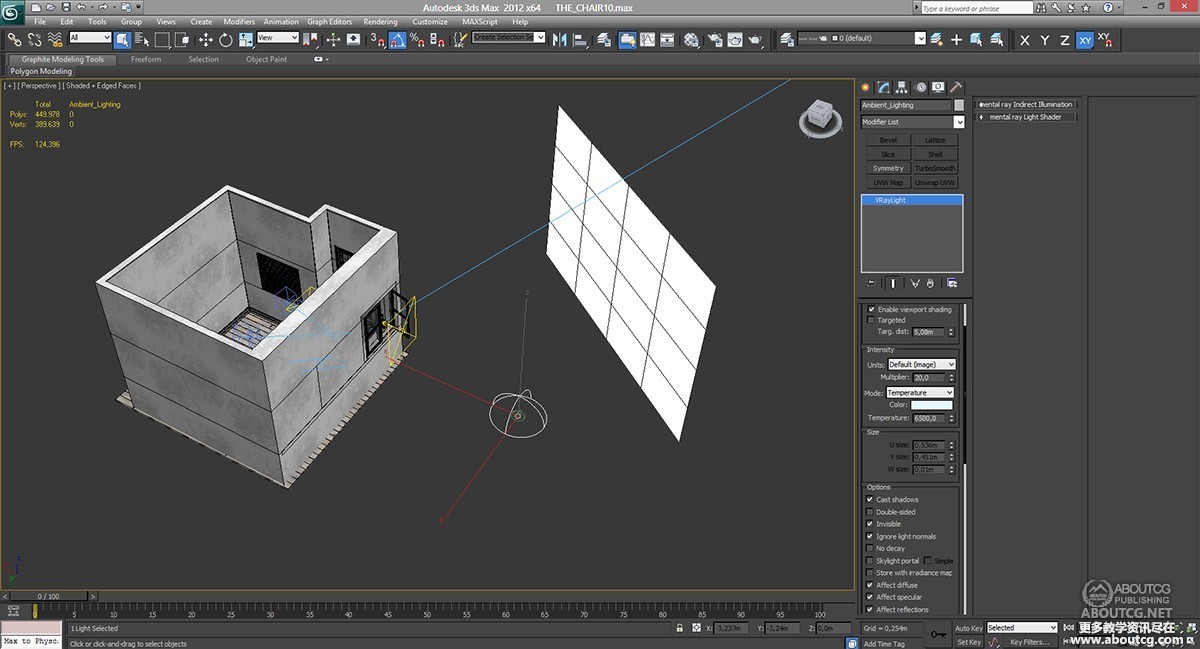
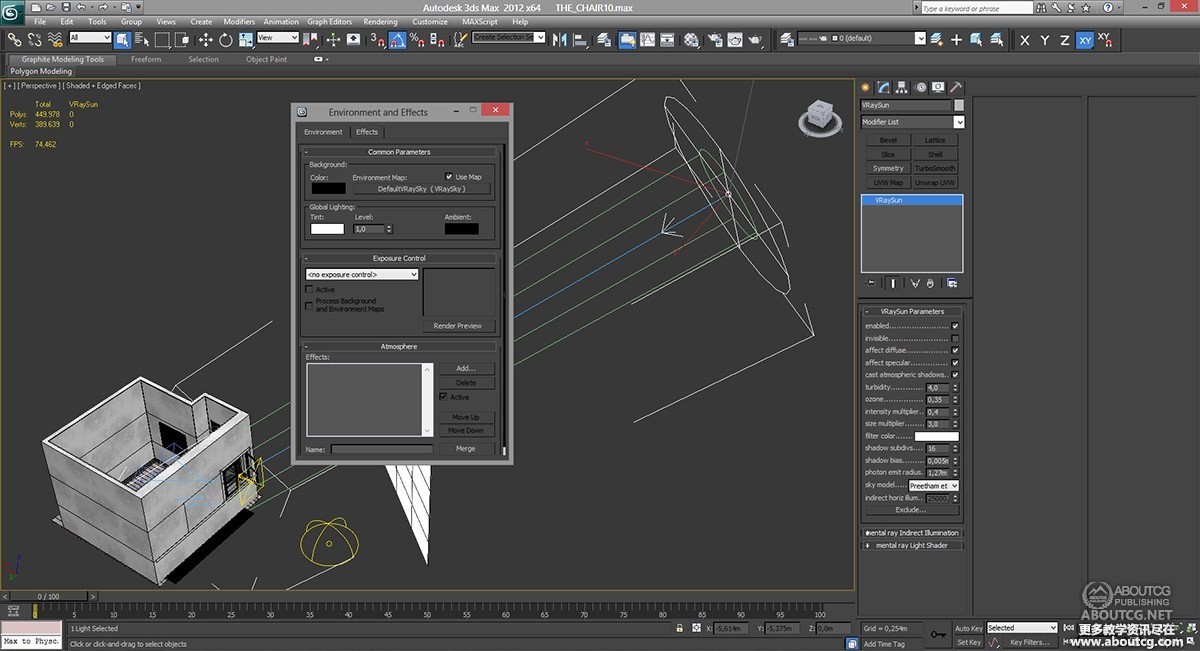
The sun is in the East
太阳光在东方
Camera
摄像机
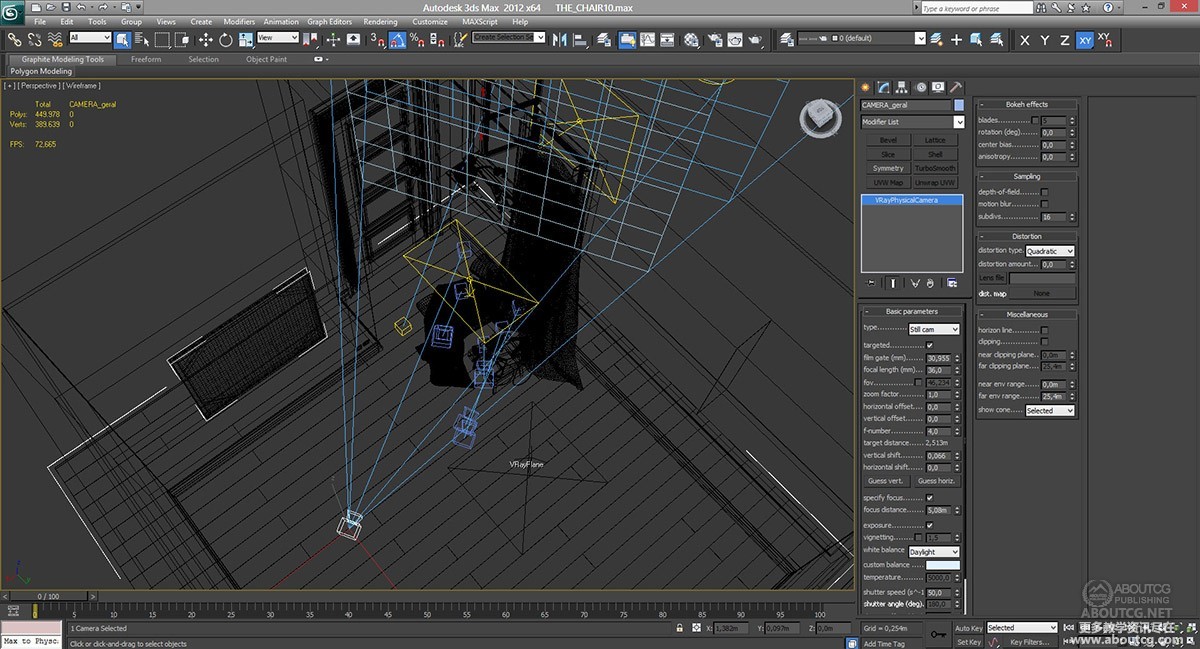
I used a VRay physical camera and the general settings can be seen in the images. I configured the value of F-number to 4.0 and the value of the shutter speedpara to 50, leaving the scene clearer and sharper. I also set up the white balance to daylight, leaving the scene with more natural light, so the scene was not too yellow or blue.
我使用了一个VRay物理摄像机,基本设置从图中可以看到。焦距比数(F-number)给到4.0,快门速度(取倒数)(shutter speedpara)给到50,使场景干净利落。我还会将白平衡(white balance)给到白天(daylight),使场景有更多自然光,而不会偏黄或者偏蓝。
Render
渲染
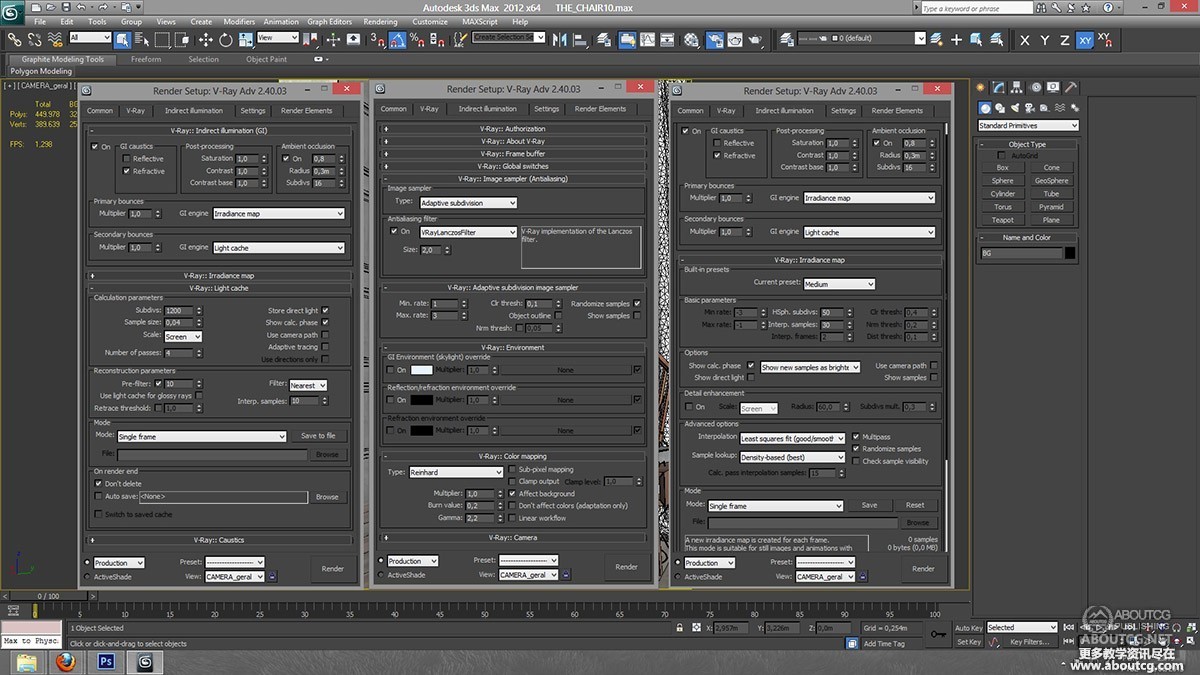
My render settings were very simple as shown in the picture. As explained above, I rendered to VRayFrameBuffer and enabled Gamma Correction, which is known as Linear Workflow. I used the Color Mapping Reinhard burn value to 0.2 to compensate for the F-number of the camera. I would like to remind people that render settings are specific to scenes and copying exact settings can cause either excessively high rendering times or poor quality, so I would advise everyone to test some parameters in your own scenes and set your settings individually, for each scene may be able to have greater quality or faster render times.
如图所示,我的渲染设置很简单。正如之前所说,我使用VRayFrameBuffer 渲染,并依据线性工作流进行gamma校正。Color Mapping的类型(type)选择Reinhard,Burn value改为0.2来补偿相机的焦距比数。需要提醒大家的是,渲染设置是依据场景而定的,单纯复制参数只会使渲染时间过长或渲染质量很差,所以大家最好在自己的场景中进行测试、设置参数,这样可能会得到更好的渲染质量,或更短的渲染时间。
When the magic happens
不可思议的效果
Post production
后期
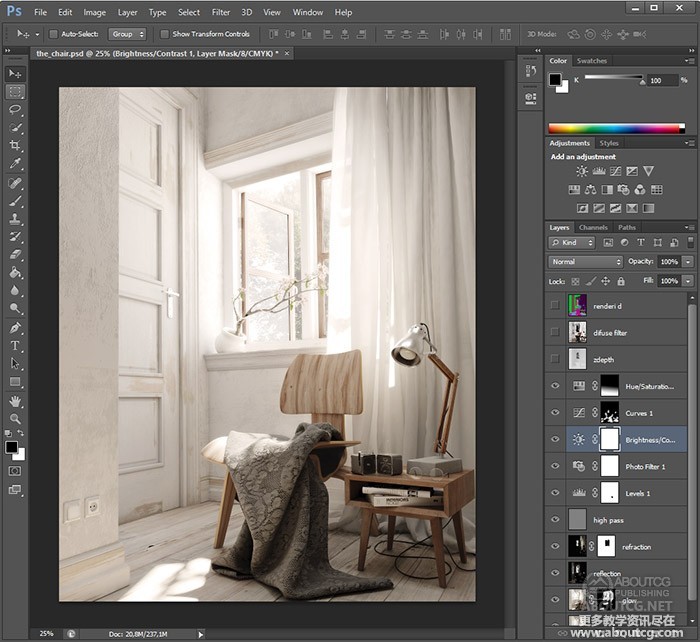
I did the post production in Photoshop CS6 and basically made some corrections to Contrast and Brightness. I also reduced by 20% the Saturation for the image to look more realistic. Additionally, I made some corrections to the Curves and Levels in part of the scene and a light touch of Glow. To finish, I applied a chromatic aberration to look like a photograph.
后期我只是在ps的cs6中调整一下亮度和对比度。同时减少20%的饱和度使图片更加真实。除此之外,场景的某些部分我还会调整曲线和色阶以及加入少量辉光。最后,应用一些色差使图像更接近照片。
Making it more photorealistic
使图像更接近照片
Conclusion
总结
I will appreciate any comments and criticism, so do not hesitate to send me your opinion on my scene or simply rate it.
欢迎任何评论和批评,所以不要犹豫,评论一下我的场景吧。
I would like to thank the 3DTotal team for asking me to write this tutorial for the 3DTotal website – your website brings me so much and it has become one of my favorite references!
我很感谢3DTotal工作组邀请我在3DTotal的网站发布我这篇教程——你们的网站给了我很多,它已经成为我最喜欢的参考网站之一了!
That’s all folks! I would like to thank my family, friends and all of you who support my work. It is with great pleasure that I share this ‘Making Of’ with you! Thank you very much 3DTotal team!
同时感谢所有人!我要感谢我的家人、朋友和所有支持我工作的人。非常高兴能与大家分享这个制作流程!再次感谢3DTotal工作组!


推荐相关中文教程

Vray for maya高级案例商业渲染流程教学
本套教程是vray的全案例流程教学,教程使用三个具有代表性的案例演示了vray的渲染参数设置经验和技巧,同时讲解了如何在实际的工作中使用这些参数来进行渲染的优化和质量的平衡。教程的内容从实际工作经验出发,详细的演示了:合理光源的布置原理,多光源合并调节,多通道渲染与合成,多象限UV的设置与渲染等高级技巧。Vray for Maya完全教学
本套教学选择最重要和最常用的核心功能作为讲解对象,所有内容占到了vray for maya全部功能的80%—90%以上。教学的目的是让学员能够加深对vray的理解,熟悉常用的vray渲染技巧,而不仅仅是记几个常用的参数。教学中很多软件原理和技巧应该是首次在vray for maya中文版教学中披露,而这些东西在帮助文档上是没有的,各位学完之后应该会打下较为扎实的软件使用基础。3DSMAX动力学特效实战教学
本套教学将通过24章实例教学,来向你详细讲解3DSMAX的动力学特效在电视包装与广告中的应用。3DSMAX国外粒子案例效果解析
本教学通过27个实战案例,教您如何用3DSMAX结合ParticleFlow本身以及扩展的ParticleFlow Box 1、Box 2、Box 3、功能包,结合Vray渲染器,来制作流行的广告和电视包装中的粒子特效效果。无论是常见的粒子聚合,分散,动态粒子替换,粒子矩阵,粒子动力学,本套教学都有相应的案例。3DSMAX国外流体案例效果解析
本教学通过20个实战案例,教您如何用3DSMAX结合Realflow,FumeFX, ParticleFlow插件,来制作流行的广告和电视包装中的流体效果。无论是常见的液体,烟雾,流体碰撞,沙粒变化,水墨表现,本套教学都有相应的案例。2.5D商业游戏场景制作教程 进阶篇
在本教程中,Freeyy老师将从零开始,向你讲解如何根据确定的主题进行前期准备,随后建模,绘制贴图,制作材质,最后再进行细节调整,完成一个商业游戏级别的2.5D场景画面。Mentalray for max实战教程
本教程共包含超过42小时以上的视频教学内容,共18章 132课,通过大量实例,详细讲解了3ds Max平台下的Mental Ray1渲染器的使用基础和实战方法。是一部非常完整详细的3dsMax版的Mental Ray渲染器的教学.网游角色制作女精灵实战教学
本教学以一个AAA级网游女精灵角色为案例,向您展示如何完成她的模型,UV,和贴图绘制。教学使用的软件主要是3ds max和 bodypaint, 其中建模和UV使用3ds max完成,贴图绘制在bodypaint和 PS中完成。


推荐课程


推荐教程

国内没这种静帧CGI的市场,产品本来就在模仿,高端的产品表现直接照搬人家老外的效果图了
自学三维真的好累,而且好无力
加油!
同样自学,看到人家很棒的作品自己却没法做出来的心情完全可以理解!国内全部都是室内设计的教程,按部就班的打光方式扼杀了创造力,不过现实确实很难让人真正投身艺术,很少有人研究做一些比较漂亮的静帧作品,毕竟这样的投入毫无回报。希望能有一套比较详备的解释灯光和材质的教程,而不是室内设计的固定位置打灯光,毕竟,我们要先知道灯为什么要打在这或是其他地方也行,而且得明白打在这个地方能产生什么效果,烘托了一个什么样的气氛。