
本教学为翻译教学,
转载请注明来自aboutcg.net,以及注明翻译者
原始链接如下:http://www.eyeonline.com/Web/EyeonWeb/Techniques/tips_tricks/newtips/tip_120.aspx
在翻译时采用中英文对照的方式,如有歧义,请以英文原文为准。
翻译:CWWS (aboutcg.net)
请尊重互联网道德,转载请注明转载出处和翻译者,谢谢!
Glinting Edges
星光闪耀的边缘
Using filters, bitmap masks, and the highlight tool to glint the edges of text.
Requirements: Digital Fusion 3.0 and DFX+ 3.0
Flow: N/A
Images: N/A
Archive: N/A
使用Filter节点效果,位图Mask,和Highlight工具使文字的边缘闪耀星光
需要软件版本:Digital Fusion 3.0 and DFX+ 3.0
效果文件:无
图片:无
素材:无
This week we’ll look at how to use a number of tools in Digital Fusion/DFX+ to create a stylized glint along the edges of an object such as a product or text. This technique can help add a little something extra to your next shot.
We will add the glint to some text. Let’s start by adding a text+ tool, and setting up the font etc.
本周我们来看看如何使用Digital Fusion/DFX+的一些工具来使例如文字或者其他物体的边缘闪耀星光。这个技巧或许会在你的下一个镜头里帮上忙,我们会在一些文字上面加上星光闪耀的效果,让我们从添加一个text+节点工具,并且设置文字开始。
1.Start a new flow.
2.Add a text+ tool, and enter some text. Adjust the font size setting to fill the screen nicely.
1,新建一个 Flow。
2,添加一个text+节点工具,然后填入一些文字,调整文字尺寸设置使它在屏幕上看起来很好。

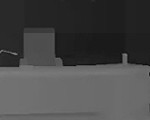
3.Now add a filter tool to the flow, and set the filter to "Laplacian". This is one of the edge detect filters available in the filter tool. If the edges are not defined well, try the ;filter.
3,现在增加一个Filter节点工具,然后把Filter设置为这是Filter工具集里面一个边缘探测工具,如果文字边缘被定义得不是很好,那就试试Filter。

4.Next add a brightness/contrast tool. We will use this to make the edges monochrome (if not already) as well as punch up the levels.
a.Set the gain to 5
b.Set the saturation to 0
c.Adjust the clip low and clip high if necessary to remove any extra lines that may be visible (other than the edges of the text.), or enhance weaker lines.
4,下面增加一个brightness/contrast节点工具,我们将使用这个工具使边缘变成单色的(如果边缘还不是单色的话)
a.设置gain参数为 5
b.设置saturation参数为0
c.如果必要的话,设置clip low 和 clip high去掉边缘之外的多余线条,或者把看上去比较弱的线条增强。

This has set up a matte of our text to limit the effect of the highlight tool that we will be adding next.
5.Add a highlight tool to the flow next. Set your angle slider to about 45 degrees. Now adjust your clip low setting until it has added a number of highlights.
这为我们即将添加在文字上面的效果制作了一个遮罩。
5,加下来往Flow里面添加一个highlight节点工具,把你的angle滑动条设置为45左右,现在设置你的clip low参数直至它增加了一定数量的星状高光

As you can see the highlight tool has added the highlights, but it’s hardly subtle now is it? In order to fix this we’ll add an effects mask, and then a highlight mask to illustrate the differences of these two options. In this case we’ll work with a bitmap mask.
正如你所看见的,Highlight工具添加了高光,不过现在似乎太密集了对不对?为了修正这个问题,我们添加一个效果Mask,然后一个highlight mask来分辨出两个选项的区别,在这个场合我们使用一个bitmap mask。
6.To add a bitmap mask, we first need a bitmap that we plan to use. In this case a modified plasma tool will do the trick. Add a plasma tool to your flow separate from the main branch.
a.Open the color tab, and adjust all the sliders to 1. This will make the plasma monochromatic.
首先,我们需要一张位图来作为位图Mask的资源文件,在这个教程里我们使用plasma 节点工具来创造一个,加入一个plasma 节点工具到你的Flow中去,并且和原来的节点分开。
a.打开Color tab,然后调整所有的滑动条都为一,这会创建单色的plasma效果。

7.Add a brightness/contrast tool after the plasma, and set the clip low setting to a large value. The idea here is to clip the plasma to just a thin line to act as a mask.
7,在plasma节点后面添加一个brightness/contrast节点工具,并设置clip low参数为一个比较大的数值,这是为了得到比较细的线条来作为Mask。

8.Next ensure that you have the highlight tool active. Then right click in the large view, and choose the effects mask/bitmapoption. You should see a blue dot appear next to the mask tab (under the small view). Open the controls for the mask, and then the bitmap controls. Drag and drop the brightness/contrast after the plasma to the area marked drop tools here;
8,下面确认你选中highlight节点工具,然后在大的屏幕视图上面单击鼠标右键,然后选择 “effects mask/bitmap”参数,你会看到一个蓝色的点出现在邻近Mask标签的地方(在小的屏幕视图之下)。打开这个Mask的控制面板,然后进入到 bitmap控制参数,然后把plasma节点后面的brightness/contrast节点拖拽到菜单上标记有drop tools here;的区域。

As you can see this has limited the effect of the highlight tool to just where the plasma crosses the outline of the text. But this isn’t really the effect we’re looking for, as the highlights are just nondescript waves at this point, and not truly a highlight. To fix this;
正如你所看见的,这一步操作使得星光被限制并只出现在Mask和文字边缘交汇的地方,不过这还不是我们想要的最终效果,现在的星状高光无法很清晰地被辨认出来,我们来修正它。
9.Right click on the header for the bitmap mask, and choose delete.
10.In the large view, (again ensuring that the highlight tool is selected) right click, and choose highlight mask/bitmap
11.Again, drag and drop the brightness/contrast from the plasma to the ;drop tools here; area of the mask.
9,在bitmap mask顶部单击鼠标右键,并选择delete。
10,在大的屏幕视图里,(同样请确认你的highlight节点工具处于选择状态)单击鼠标右键,并选择highlight mask/bitmap
11,和上次一样,把plasma节点后面的brightness/contrast节点拖拽到Mask菜单上标记有drop tools here的区域。

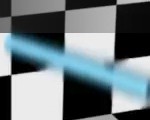
This time you should see now that the highlights are only being created where the plasma and edge detect cross, but is not limited to that region, and therefore bloom nicely. (You may need to adjust the clip settings under your highlight tool to increase the intensity.) The final stage of this little project will be to merge the highlights over the original text. We need to add a branch from our original text+ tool, and merge our highlights over.
这一次你能看到星状高光很清晰地出现在文字边缘和Mask交汇的地方,但并不是十分严格地被限定,在边上还有很多小的星光细节。(或许你需要调整clip settings的数值来增加高光的强度)这个教程的最后一部会把这个高光合并到原始的文字上去,我们需要从我们的text+节点工具上再增加一个分枝,然后把高光合并在一起。
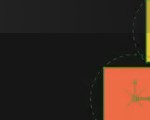
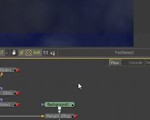
12.Add a merge to your flow, not connected to anything.
13.Drag a connection from the text+ output to the background of the merge. (Brown)
14.Drag a connection from the highlight output to the foreground of the merge. (Green)
12.添加一个merge节点到你的Flow视图,不要连接任何节点。
13.把text+节点连接到merge节点,作为background(背景)。
14,把highlight节点连接到merge节点,作为foreground(前景)。


推荐课程


推荐教程

0回复用DF做星光闪耀边缘效果"